
|
Swamp Rats Workers and Peasants #2 |
||
|---|---|---|
| (Attacker) Germany | vs | Soviet Union (Defender) |
| Formations Involved | ||
|---|---|---|
| Germany |  |
12th SS “Hitler Jugend” Panzer Division |
| Germany |  |
20th Motorized Infantry Division |
| Soviet Union |  |
1st Separate Mountain Brigade |

| Total | |
|---|---|
| Side 1 | 2 |
| Draw | 1 |
| Side 2 | 0 |


| Overall Rating, 3 votes |
|---|
|
4.33
|
| Scenario Rank: --- of 913 |
| Parent Game | Workers and Peasants |
|---|---|
| Historicity | Historical |
| Date | 1941-09-07 |
| Start Time | 09:00 |
| Turn Count | 28 |
| Visibility | Day |
| Counters | 276 |
| Net Morale | 0 |
| Net Initiative | 3 |
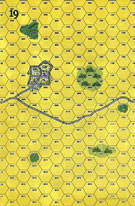
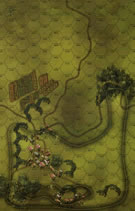
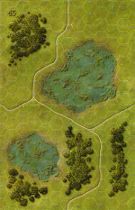
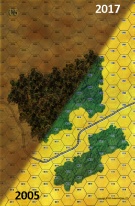
| Maps | 4: 19, 27, 45, 6 |
| Layout Dimensions | 86 x 56 cm 34 x 22 in |
| Play Bounty | 222 |
| AAR Bounty | 159 |
| Total Plays | 3 |
| Total AARs | 3 |
| Battle Types |
|---|
| Exit the Battle Area |
| Inflict Enemy Casualties |
| Urban Assault |
| Scenario Requirements & Playability | |
|---|---|
| Eastern Front | Maps + Counters |
| Fall of France 1 | Maps + Counters |
| Road to Berlin | Maps + Counters |
| Sinister Forces | Counters |
| Workers and Peasants | Base Game |
| Introduction |
|---|
|
After the 1st Separate Mountain Brigade was forced to retreat from Mga Station and into the surrounding swamps, part of an NKVD Rifle Division was sent to their aid. It was to no avail, as the Germans slowly pushed them back towards Sinyavino. The loss of that village would render the defenses in the sector untenable, so the Soviets launched an all-out effort to hold the position. |
| Conclusion |
|---|
|
Parts of two mobile divisions easily drove through the Soviet defenders. The NKVD men limped away to the west while 1st Separate Mountain Brigade fell back to the east to make a stand at Sinyavino. It was no use and they soon lost the village, but that would be overshadowed by the failure of inform Stavka of the loss of Fortress Shlissel'burg. When Stalin found out about it from a German communique, the front commander was ordered to Moscow and Marshal Zhukov was sent there to salvage the situation. |
| Additional Notes |
|---|
|
Maps 45 comes from the non-series game Infantry Attacks: August 1914. |

|
|
|---|
| AFV Rules Pertaining to this Scenario's Order of Battle |
|---|
|
| Heer |
|---|
|


| Army (RKKA) |
|---|
|


| NKVD |
|---|
|


| 8 Errata Items | |
|---|---|
| Scen 2 |
In the Soviet (NKVD) Order of Battle, 1 x 81mm should read 1 x 82mm. (rerathbun
on 2012 Jan 26)
|

|
The reduced direct fire value of the Heer HMG became 5-5 starting with Fall of France. (plloyd1010
on 2015 Jul 31)
|

|
The Pz IVe appearing in the original Panzer Grenadier game had an Anti tank value of 4-7. As of Afrika Korps (2002), continuing onward through the 3rd and 4th edition games, the anti tank value has been 4-4. (plloyd1010
on 2016 Jul 25)
|

|
Two German PzJr. 1 counters have their full strengths printed on the back, and reduced strengths on the front. (Shad
on 2010 Dec 15)
|

|
The morale and combat modifiers of German Sergeant #1614 should be "0", not "8". (Shad
on 2010 Dec 15)
|

|
All SPW 251s have an armor value of 0. (Shad
on 2010 Dec 15)
|

|
The reduced direct fire value in Kursk: Burning Tigers is 4-4. (plloyd1010
on 2015 Jul 31)
|

|
Kommissars never get morale or combat modifiers. Ignore misprints. (Shad
on 2010 Dec 15)
|
| Demoralized in the Swamps | ||||||||||||
|---|---|---|---|---|---|---|---|---|---|---|---|---|
What a monster scenario, not only for the number of counters, but with the action in the game. This early war Soviet scenario is very good in showing the issues of the Soviet troops as the tough attack that the Germans had trying to cross the open, swampy land. The Germans will not only deal with a lot of Soviet defenders, but only one good road to move two divisions of troops. The Soviets have a typical mix of army units and NKVD troops helping to support the fight. The Germans however have the better quality troops and more support weapons, but it is a logistic challenge. For forces the Soviets have lots of INF and HMG's, some onboard mortars and 76.mm guns, but no tanks. They do receive NKVD reinforcements but it is just two companies of troops. The Germans have two divisions of INF and HMG, plus PzIIIF and PzII's, good OBA support and the occasional aircraft. Morale favors the Germans and the leader selection goes to the Germans with many bonus leaders and several +2 leaders. The setup has the Soviets setting up in two levels of defense. The first is close to the setup limit. This will give good cover from a small town and woods to give the defenders a chance to slow the leading elements of the German attack. The second line is centering in the woods and swamps on board 45 as well as the town on board 19 and the swamps to the east. There are quite a few troops dugin on the roads to try to rush forward once the German attack is identified. The Germans will have the major groups for the attack. On the west side moving onto board 27 a group of foot INF/HMG/ENG with support of PzIVe and some of the mortars and guns. This will move against the town and swamps to the west and try to force their way down the road. In the center, another foot INF/HMG/ENG to move against the western edge if the large woods that dominates the southern have of the battlefield. The last group with be the INF/HMG/ENGs mounted on the SPW251's. They will circle around the woods to the east and either drive for the town or dash for the north board edge depending on the time of game they achieve a breakthrough. The first few turns have the Germans advancing onto the boards and the logistical challenges for that. Meanwhile the Soviets rain OBA and on board fire on the advancing troops, scoring disruptions and demoralization on some of the Germans. Soon the Germans are closing on the town on board 27 and look to assault the Soviets to clear the roads. Heavy fire from the Soviets slows the advance for assault. The Germans are forced to push more troops around the town and eventually they get into the town. Several assaults happen before one of the town hexes fall, the other doesn't fall until late in the game. Meanwhile in the western woods, the center force hits the defending Soviets. An AT gun is discovered and becomes the focal point of the attack. Soviet fire keeps the Germans from advancing on the woods for several turns. When the Germans do get into the woods and assault, the Soviets prove to be tough to weed out. Several turns of assaults are fruitless for the Germans, but soon the weight of the German attack destroys the Soviet defenders. To the east, Soviet cavalry and armored cars prove to be a big pain in the neck. A Ba6 and a company of cavalry were stationed in the woods. They provided a nice screen in the woods to hit and run on the Germans. Spotting for OBA and artillery, they slowed the SPW251 mounted units and force them to deploy to attack them. The Ba6 was lost to the German PzIIIF but not before it lead them into the deep woods and slowing them down. Meanwhile a German company was dispatched and chased the cavalry for the rest of the game. The rest of the German flanking force moved to attack the Soviet line to the east. Motorcycle units hit the dugin Soviets first before the other mounted units deployed and attacked the dug in Soviets. OBA and key assaults broke the Soviet line, but there was still a 45mm AT to get by. Aircraft struck and demoralized the gun so the tanks could approach and attack the infantry. This left a big hole in the Soviet line. Although the Germans were making progress, time was sneaking up on them. Several early FoW rolls kept most of the Germans from not activating for several turns. By the half way mark the Germans had only covered 1/3 of the boards and the command structure was stretched out and need to reorganize. This would prove a challenge for the German command. But the eastern group jumped back on their SPW251 and the Colonel grouped them together for the move up the board. To the center and west, several small groups formed up and moved forward, while others recovered and reorganized. So enough troops we up to the second set of woods to provide fire on the woods, but the Soviets were taking there toll on the Germans, by disrupting and demoralize some of the German INF's. German armor moved up to support but soon 45mm AT were discovered and the PzII's needed to halt. Infantry tried to move up but demoralizing fire slowed them down. A small gamble was needed to go after the AT guns. A set of PzIIIF's advanced with the INFs to close on the defending Soviet infantry. The Soviet 45mm opened up and took out one step of PzIIIF. Another took its place and the assault tied up the Soviet INF's. German MTC's advanced around the Soviet INF and attacked the gun, eventually destroying it. But the Germans were strung out again and it was looking tough to get up to attack the town. At this point the step loses were high on the Soviet side over 50 steps lost, but they were still more to defend. The Germans had to run to the north and get the VP's for exiting the board. The SPW251 force to the east was in position to do this, but there was two groups of Soviets blocking the way. Advancing up to the first group, the Germans call in an airstrike. With a Ju87 screaming in they destroy a step of Soviet INF. The reduce step, the HMG and the leader all demoralized, one group out of action. The leader deserted his post on the next turn due to the terror of the Stuka attack. The SPW251 move around the demoralized Soviets and go for the second group. This time OBA demoralizes the defenders and the Germans move around and head for the north. There is no more Soviets left and the Germans race for the end. This tips the VP balance to a major victory for the Germans and the Soviets cannot do anything about it. Game ends after turn 25. A very good scenario to show on a grand scale the problems of the German advance and inability of the Soviets to stop them in the early days. |
||||||||||||
| 2 Comments |
| A Hole in the Line |
|---|
|
Played solo in 13 hours. You can see my Soviet setup in Post 3. The idea was to slow down the German advance early and to fall back in good order. It did not work at all. The Germans saw a gaping hole between the town and the wood and moved tons of troops through that gap. The Soviets tried to close the gap but found out quickly that troops that are not dug in do not stay alive very long. The Soviets commit their reinforcements to slow down the Germans but to avail; they eventually don't have enough troops to cover a wide front. The Germans set up a corridor between the defenders and start exiting troops off the north edge. They exit their 40th step by turn 22 to ensure victory. German major victory. I rated this one a weak "4". I like large scenarios and it was fun to see the consequences of a terrible setup. Very bloody scenario with the Germans suffered 51 step losses and the Soviets, 94. |
| 0 Comments |
| Score draw? | ||||||||||||
|---|---|---|---|---|---|---|---|---|---|---|---|---|
This large scenario, has elements of two German divisions attacks elements from a Soviet mountain brigade and a NKVD regiment. VC are gained for steps eliminated, tow hexes held (on board 19 only) and for the German units exited, the Soviets get 40 VP if the Germans do not get 40 steps of the north edge of the board. The Germans pushed down the the western edge of the game map brushing aside the first Soviet line of defence with some losses. The main German effort would be on that side of the board with a pinning attack on the eastern side with a MCY company pushing up the centre to try and exit the board quickly. However this did not work as the Soviet using MTR and ART fire blunted this move, German aircraft though made the MTR and ART crew suffer with some very accurate Stuka attacks. As the German force hit the second line of resistance the German leadership which up to then had been very well coordinated began to slightly unravel. Soviet resistance further stiffened when the NKVD arrived and formed a third line behind the already crumbling second line. The middle game of this scenario became an assault slugfest with the German slowly chewing threw the Russian dugouts with losses mounting for both sides. A few PZIII's managed to slip through the line to exit the board but it was soon obvious that to exit 40 steps would be a very hard task. The German commander then changed track and began to look at causing the maximum casualties to the Red Army while minimizing German losses. This was more successful and on one turn caused 12 Soviet step losses for zero German losses. However by the last turn the Germans still needed to inflict 14 step loses to grab a minor victory but by now there were few fewer DEM units on the board which could be target by German art or fired/assaulted by nearby German units. The attack petered out when the VPs were counted the Germans had 84 VP compared to the Soviets 83 VP. Cracking scenario this though be warned its a biggie and uses a board from August 1914 however I substituted an Elsenborn Ridge board and changed the light woods to woods/swamps which worked out well enough |
||||||||||||
| 2 Comments |
A 5 from Alan! Two questions: