
|
One Last Attempt Winter Soldiers #8 |
||
|---|---|---|
| (Attacker) Germany | vs | United States (Defender) |
| Formations Involved | ||
|---|---|---|
| Germany |  |
1st SS "Leibstandarte Adolf Hitler" Division |
| Germany |  |
Kampfgruppe Hansen |
| Germany |  |
Schnellgruppe Knittel |
| United States |  |
30th "Old Hickory" Infantry Division |
| United States |  |
3rd "Spearhead" Armored Division |
| United States |  |
743rd Tank Battalion |

| Total | |
|---|---|
| Side 1 | 2 |
| Draw | 0 |
| Side 2 | 0 |


| Overall Rating, 3 votes |
|---|
|
2.67
|
| Scenario Rank: --- of 913 |
| Parent Game | Winter Soldiers |
|---|---|
| Historicity | Historical |
| Date | 1944-12-22 |
| Start Time | 10:00 |
| Turn Count | 16 |
| Visibility | Day |
| Counters | 80 |
| Net Morale | 0 |
| Net Initiative | 1 |
| Maps | 6: 10, 11, 22, 24, 25, 9 |
| Layout Dimensions | 129 x 56 cm 51 x 22 in |
| Play Bounty | 176 |
| AAR Bounty | 159 |
| Total Plays | 2 |
| Total AARs | 3 |
| Battle Types |
|---|
| Inflict Enemy Casualties |
| Rescue |
| Road Control |
| Conditions |
|---|
| Off-board Artillery |
| Scenario Requirements & Playability | |
|---|---|
| Battle of the Bulge | Maps |
| Elsenborn Ridge | Maps + Counters |
| Winter Soldiers | Base Game |
| Introduction |
|---|
|
The previous evening remnants of Kampfgruppe Peiper had withdrawn to La Gleize, critically short of fuel and other supplies. The effort to air-drop supplies to them during the night went awry, so the SS dug themselves in deeper and prepared to defend their ground until Kampfgruppe Hansen reached them. Meanwhile, Obersturmbannführer Hansen pushed two more companies over the Ambleve River to strengthen his desperate counterpart's anvil, but his hammer, his dozens of panzers, were still stranded south of the river. |
| Conclusion |
|---|
|
Things started off badly for the Germans when the 1st Battalion's Commander was killed while scouting the battlefield before sending his men forward. Nevertheless, these veterans of the vicious Eastern Front fighting needed little encouragement to reach their trapped comrades at Stavelot. But German intentions did not matter today. The 117th Infantry Regiment was in no mood to give ground and stopped the grenadiers' attack cold. The two companies of the 3rd Battalion attacking Petit Coo fared much better, driving Task Force Lovelady from the village and capturing their recon platoon almost intact. But misfortune struck the German leadership again when upon leaving Petit Coo, the battalion commander caught a bullet, throwing the attack into confusion and eventually stalling it completely. This would be another day with no relief for Peiper's men. |
| Additional Notes |
|---|
|
SS transport counters are available as a free download from Avalanche Press. If not using these or other SS transport from other games, players should use regular German army transport as substitutes. |

|

|
|---|
| AFV Rules Pertaining to this Scenario's Order of Battle |
|---|
|
| Schutzstaffel |
|---|
|


")
")
")
")


| Army |
|---|
|


| 1 Errata Item | |
|---|---|

|
The reduced direct fire value of the SS HMG is 5-5 in Beyond Normandy and Road to Berlin. (plloyd1010
on 2015 Jul 31)
|
| Plenty Of Room For Movement On Large Wide Board | ||||||||||||||
|---|---|---|---|---|---|---|---|---|---|---|---|---|---|---|
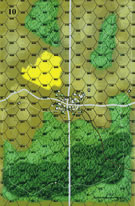
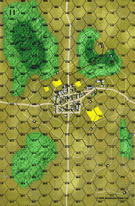
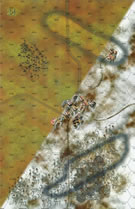
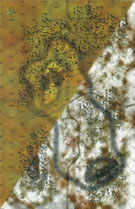
This battle was played ftf against Wayne Baumber and was chosen via a random selection. It is meant to portray the SS attempts at relieving Peiper and requires the Germans to open up a road across the board. I hate that as a task as I find it very difficult to contain an enemy that try to get round your flanks and harass the rear. That said, lets be positive and attempt to open those roads up. 1000 hours: American deployment was forced to cover quite a large frontage thus thinning their lines, whilst the German entry was likewise thinned as they were forced to enter in two groups (along a three board long side frontage) . Their mission was to open up a roadway from the south going north towards Stavelot in an effort to relieve Peiper’s men. Despite their split status, they did their best to enter from the south as close to each other as possible. Both groups passed by the empty town of Ster and pushed northwards towards the American dispositions in other villages further along. At this point, the main town of Petit Coo in the the north-west was not given priority by the German advance. For them, their only desire at this stage was to open a road up anywhere from south to north. The American commander saw this fact and sent out two platoons of M5’s eastwards from Petit Coo, leaving just a recon infantry platoon and one further M5 platoon in the town. In the centre, at 1100 hours, the grenadiers of the Leibstandarte Adolf Hitler in Schnellgruppe Knittel began to make first contact with the American 117th infantry. Fire was exchanged and it was the Americans that suffered the first losses, losing 1 step to HMG fire backed up with rifle fire. Then, at 1115 hours, the 2 x platoons of M5’s sent from Petit Coo were ambushed on the main road to Ster. German grenadiers attacked the tanks as they passed by on the road, eliminating them all within 20 minutes. This was a wasteful loss by the Americans and achieved nothing. KG Hansen and SG Knittel meanwhile now funneled their attack around either side of the American positions in an attempt to cut off Petit Coo to the west and Renardmont in the east. At the same time, they continued to inflict more losses then the defenders and by 1145 hours (half-way), the US losses were 9 steps, German 2steps. The Americans sent out a platoon of M4 Shermans to probe east and occupy the main road from Renardmont. In response, the Germans sent out a grenadier and machine-gun platoon to dispute the road with the US tanks. The left flank of the German advance now fanned out west and away from the central battle and headed towards Petit Coo. Their mission would now be to remove the M5’s and IR platoon there. They would be assisted in this by a German armoured car recon unit backed by some half-tracks coming up directly south from Petit Coo. Both these actions on the flanking roads led to a game of cat & mouse as the American forces attempted to remain elusive but at the same time, controlling parts of the road. With the Germans concentrating their efforts here, the Americans in the centre became more aggressive in their approach and actually counter-attacked German positions to their front. With good OBA supporting them, they were able to cause a good few casualties (4 steps) over the next hour, whilst losing about half as many themselves. Ultimately, this aggressive action would prove pointless as it was not going to affect the final flank battles. Some more American infantry pushed out east to try and cause disruption on the roads, but these were headed off without too much trouble. They would never reach their objective. On the east flank, the German troopers finally made their ground on the tankers and in a 30 minute battle, destroyed the enemy platoon, thus putting to an end any US prescence on this road. To the west, the German armoured cars surprised the American M5’s in Petit Coo and in a short sharp volley, destroyed the US tanks in a blink of an eye. The IR unit remained elusive for some time, but were finally caught up with after running out of escape routes, and they too were rendered hors de combat by 1315 hours. Both flanking roads were now open, including the important main road through Petit Coo. The troops the Americans did have would not be able to get through to them within the next 30 minutes and therefore, the battle had been lost for them. Final losses – USA 17 steps, German 9 steps. Two roads forced open including Petit Coo means a German major victory. Well, the roads were opened successfully, but such battles are always nip and tuck. As for rating, its one of those 3.5 type of scores that can't be given. As it was not one of the greats, but was fun, I'll have to rate it as a strong 3. There will be plenty of replay value in this as their are just so many options. |
||||||||||||||
| 0 Comments |
| Stuart's Sleeping? | ||||||||||||
|---|---|---|---|---|---|---|---|---|---|---|---|---|
This scenario presented several challenges. Firstly, a hidden unit scenario played solo. Secondly, I do not particularly like road-control scenarios. In this particular case, the US must hold three N/S road avenues against a larger, but foot-bound German relieving force. US Set-Up: TF Lovelady in Petit Coo on board 10 as stipulated. 1^INF on 0809-22. 1^INF on 0709-25 (dug-in holding x-roads). 4^INF + 1^HMG + 1^81mm + M4 in Ster/11. 3^INF + 1^HMG + 1^81mm in Renardmont/24. German Entry: Board 24 force splits into three groups: Company to seal the E/W road between 11/24 and pin forces in Ster (includes the SK234/2). Company to move north towards Renardmont (incl. all HMG) Company to flank Renardmont to the E. Board 9 group moves north in a five-hex swath along the road. US initial redistribution: one M5 moves E to loop to Renardmont; two M5's move S with ldr to spot/interdict SS battalion moving north. the INF at 0809-22 moves W to reinforce Petit-Coo. First four turns go all the US way. OBA and on-board mortars DIS/DEM four HMGs in the first two turns. I played the Germans as a bit desperate (=rushed = stupid) so they attacked Renardmont with little attempt to "soften up" (few tries did nothing as the US had a 10-morale LT with a +1 morale bonus along with a 9-morale capt with +1 morale bonus). US OF results in a total of four step losses due to extraordinary rolling on the DF table. There was a face-off between company sized units of the US east out of STER and the Waffen SS holding the inter-board edge. The US sent the M4 and single INF West towards Board 9; this force was blocked by 2xGren+1HMG. The real US disaster (hence the title) was my miscue keeping the M5's+LDR within visual range of the advancing German force (for the purpose of calling down OBA) - perhaps the US player (cough) was a bit too distracted by all the good stuff going on in the defense of Renardmont. On a German impulse, I realized that I could split up my 2xGren stacks and literally surround the 2xM5's ... US OF for once failed and those units thence succumbed to assault and INF-AT fire. This left Petit-Coo with the Recon and Reinforcing INF from board 22, but they were unable to hold the town again the forces the SS were able to bring northwards from board 9 leaving a few units to cover any encroachment by the US M4+INF. |
||||||||||||
| 2 Comments |
The M5's seemed fated to disaster !
Wayne had his ambushed by SS troopers in our play ?
They're cursed I tell you ! Cursed !!
If solo play can contain surprises, this was it. Three stacks of 2xGrens in a line two hexes away ... the Stuarts were carrying an LT as a forward artillery observer.
It was strange suddenly realizing that should I unstack those Grens, I could simply surround the stack of M5's. Sort of a cognitive dissonance moment for me really: one gets so used to keeping stacks together and adjacent for leader activation and fire combination.
I could imagine one of the Stuart commanders spitting a quid: "now where d'ya suppose those fellers be a'run'n off to there?"
But by God, the US OF over on board 24 was a grim thing to behold: roll: 2X!; roll: 2X!. More like running into a AC-47 gunship.
| Not my finest moment | ||||||||||||||
|---|---|---|---|---|---|---|---|---|---|---|---|---|---|---|
This game is played over 6 boards a smallish US force has to stop larger German forces from clearing a north-road. The US player has strong off board artillery and hidden units to help in this task, he also has some armour support. The American forces maim issue is he has a wide frontage to cover, so his set up must be spot on, mine in fact was very poor and trying to hold all three roads just resulted in being spread to thin. The German commander blasted through the initial line very easily and after that in an attempt to reinforce the centre I bungled a tank move and allowed 2 platoons of M5's to get caught in an assault where the German Panzerfaust's put paid to any mid game rally. Towards the end game the US artillery played a more prominent role and a counter attack at least made the last few turns interesting. I initially rated this game as a only a 2 but that would be unfair and purely a reflection of my poor play and of the other two scenario's we played today. I will therefore raise it to a 3 as this scenario though not a classic is solid enough and has some replay value with a number of tactical options for the defender, |
||||||||||||||
| 2 Comments |