
|
Striking Back Winter Soldiers #5 |
||
|---|---|---|
| (Defender) Germany | vs | United States (Attacker) |
| Formations Involved | ||
|---|---|---|
| Germany |  |
1st SS "Leibstandarte Adolf Hitler" Division |
| Germany |  |
Kampfgruppe Peiper |
| United States |  |
3rd "Spearhead" Armored Division |

| Total | |
|---|---|
| Side 1 | 6 |
| Draw | 3 |
| Side 2 | 1 |


| Overall Rating, 12 votes |
|---|
|
3.5
|
| Scenario Rank: 397 of 913 |
| Parent Game | Winter Soldiers |
|---|---|
| Historicity | Historical |
| Date | 1944-12-21 |
| Start Time | 07:00 |
| Turn Count | 14 |
| Visibility | Day |
| Counters | 44 |
| Net Morale | 0 |
| Net Initiative | 1 |
| Maps | 2: 10, 9 |
| Layout Dimensions | 56 x 43 cm 22 x 17 in |
| Play Bounty | 138 |
| AAR Bounty | 141 |
| Total Plays | 10 |
| Total AARs | 6 |
| Battle Types |
|---|
| Inflict Enemy Casualties |
| Urban Assault |
| Conditions |
|---|
| Off-board Artillery |
| Terrain Mods |
| Scenario Requirements & Playability | |
|---|---|
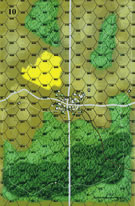
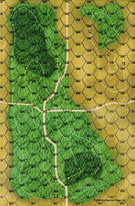
| Battle of the Bulge | Maps |
| Elsenborn Ridge | Counters |
| Winter Soldiers | Base Game |
| Introduction |
|---|
|
While the fighting for Stoumont raged to the west, Task Force McGeorge attempted to drive the Germans from La Gleize. The task was complicated by the narrow Sherman tracks which tended to bog in the mud and snow, thereby restricting them to the roads. Thus, the burden of the attack fell on the "poor bloody infantry." On the German side morale spiked when Rottenführer Bahnes returned to the unit with a Panther tank he had spent two days behind enemy lines repairing. |
| Conclusion |
|---|
|
Confining their Shermans to the road made the Americans sitting ducks for the superior armament of the German tanks and dug-in anti-tank guns. The Germans waited until the Shermans were executing a tight turn before opening fire. Losing two tanks in quick succession amid a flurry of incoming rounds, the American armor withdrew, leaving the infantry to go it alone. The GIs made some progress but eventually were driven back. After some time to regroup and rethink, the task force tired again but was similarly rebuffed in their outflanking attempt. |
| Additional Notes |
|---|
|
SS transport counters are available as a free download from Avalanche Press. If not using these or other SS transport from other games, players should use regular German army transport as substitutes. |

|
|
|---|
| AFV Rules Pertaining to this Scenario's Order of Battle |
|---|
|
| Schutzstaffel |
|---|
|


")
")
")


| Army |
|---|
|


| 3 Errata Items | |
|---|---|

|
All SS 75mm IG guns are direct fire weapons (black), not indirect (white). (Shad
on 2010 Dec 15)
|

|
The reduced direct fire value of the SS HMG is 5-5 in Beyond Normandy and Road to Berlin. (plloyd1010
on 2015 Jul 31)
|

|
The M18 has a special rule in Battle of the Bulge but it applies globally: "A two-step M18 unit can fire one anti-tank shot and move half its movement allowance (retain fractions) in a single impulse. The order in which it does these two actions is the player's choice." (Shad
on 2010 Dec 15)
|
| Panthers and Dough-boys | ||||||||||||
|---|---|---|---|---|---|---|---|---|---|---|---|---|
I found this a great scenario that came down to the wire. German set-up: road block with 75mmIG + 2-Gren + Panther. Gren+SPW cover the eastern and western approach (0403&0718). The 75/41 in town covering the road along with the HMG and 2x81's. US: Stewarts and INF+ENG move up the west edge. 3xINF + HMG attack SW from 9-0608/0509 towards 10-0213/0212. The M18 sets up on the east edge 0717 and the M4's on the cross roads. The US pushes a leader SW from the middle to call in an OBA strike against the dug-in German road block (specifically, the IG). Seeing shells explode in the target area (the roll did force an M1 check), the leader called up his M3-carried company. Suddenly, orange flashes alight from within the settling dust. The SS gunners had not been laid low ... and their aim was true killing a laiden M3 platoon carrying (rolled randomly) the US 50-calibre HMGs! The rest of the US ground pounders saw fit to huff it the rest of the way on foot. The Stewart lead task force makes its way southward along the western edge as the Germans shift their GREN + SPW from the eastern side over to reinforce setting up a major assault at hex 10-0716. US OBA avenges their HMG comrades with a devastating '2' roll on the 21/30 col to kill half a platoon of SS grenadiers and the IG. The panther refuses to expose itself (dug-in on the hill) despite being "offered" an M4 platoon. So eventually, the American "player" decides to try the fortune favors the brave adage, rolls an M4(making its off-road roll), right up adjacent to the PzV's ... this unit, however, it hit by some nice shooting from the 75/41 gun lurking in the town. The US makes its dash with the M18 and other shermans to get within 3 hexes, but the PzV crews calmly wait for eight shots (at -1/-2 admittedly; there was a close call with a modified '9') until the M18 shows its hand ... poof! The US gets another four shots from favorable initiative, but by turn 7, US armor is a smoking ruin. On the other hand, the US assault to the SW goes incredibly: a "softening up" attack from one Stewart causes both Gren platoons to DEM! In comes the US 30-col assault only to roll a 1!!! Still, after three more turns, the SS flank is turned (by turn 8). Turns 9-14 then have the US consolidate for its eastward march whilst the PzV moves south into the town with the MG-42 platoon. The US pays a heavy price in terms of M3's and Stewarts, but the INF holds tough killing another three Gren platoons. By game end, US holds three town hexs; contests 1; and does not control 2. German VP: 17 (US steps, all but two armor/M3s) + 2 town hexes = 19. US VP: 11 (German steps) + 7 (for the town hexes) = 18. So a formal draw. Exciting down to the wire well worth a "5" at least in this time-line. |
||||||||||||
| 0 Comments |
| Striking Back | ||||||||||||
|---|---|---|---|---|---|---|---|---|---|---|---|---|
The Germans set up along the edge of Board 10 to try and slow the Americans down as they head for the town and victory. The Panther sets up in the town with the other AT assets with the intention of covering the only road into the town. The rules for the Sherman's really limit them to on-road movement or risk bogging down and being useless. The Americans set up with the tanks along the road, but the infantry and supporting M3's in the light woods. They send four platoons down the left and two platoons to the right. As the scenario opens, the Americans advance down board 9 towards the Germans, but stay back in the tree line to prevent easy kills from the Panther. The M3's unload at the edge of the woods, and all groups prepare to advance. The two American flanks advance first and head for the weak German flanks. German opportunity fire from the AT guns destroy some M3's, but the Americans suffer little other damage. On the next turn, the Americans close to assault range on the German flanks, and the M5's emerge from the woods. The Germans quickly eliminate a platoon of M5's and disrupt some of the American infantry. The Shermans also advance out of the woods to prepare to attack the Panther next turn. The Americans gain the initiative and start with AT fire against the Panther. They get lucky and reduce the German tank and disrupt it. German AT guns eliminate another M5, and the American infantry begin to fire on the German flanks. The American infantry begin to crumble the German right flank, but the German left flank assaults the American right. Meanwhile, the American armor head towards the town with the off board artillery trying to keep the German AT guns pinned down. The German right falls as well as the American right. The American tanks assault into the AT guns in the town, and the American infantry heads for the town to assist in the assault. The tanks eliminate the 75mm IG, and the infantry assist the tanks in eliminating the 75/41 AT gun. The Germans now only have a couple of GRE platoons and some 81mm mortars while the Americans have most of their armor and Infantry and occupy the town. Result is an American victory! |
||||||||||||
| 0 Comments |
| Winter Soldiers #5 Striking Back or Striking Out |
|---|
|
The Axis set up in the village with positions on either flank and several hundred meters in advance in the woods on the Axis left and the fields on the Axis right. These positions were dug in and mutually supporting. The Allies decided to approach through the fields as opposed to the woods expecting to meet a weaker force. Units then could still use the fields to cover their approach to the village. As the Allies came up to the Axis foxhole line there was a vicious close range exchange of fire that caused the Allies to loose 2 entire M5 platoons, an Infantry platoon and two M3 platoons. OUCH! But in return the Allies eliminated the 75mmIG, 2 Gren platoons and two HTs. On the initiative roll for the next turn, 08:30, a special event caused the Allies OBA to run out of ammo. But on that same turn the Allies got the initiative by 1. They were faced with a dilemma. They could safely get adjacent to the Axis at the moment because the Axis were disrupted and demoralized. But on the turn following if the Allies did not get the first activation they would be sitting ducks right under Axis guns (assuming the Axis had recovered on the previous turn, which was likely). The Allies decided to gamble and made the move. The Axis not only failed to get a shot but failed to recover. Strike 1. On several other turns this sequence was repeated. The Axis getting the worst of it each time even loosing the precious Panther platoon to Allied crossfire bonus. Not to mention another Gren platoon. Strike 2 Then in the end the Axis just did not have enough units left to cover many village hexes allowing the Allies to just roll in and occupy empty hexes on the last turn. Strike 3. Axis OUT! Despite inflicting just about equal losses on the Allies the Axis just whiffed every pitch it was thrown. They failed to break up the initial Allied advance taking as many step losses as they inflicted. They failed to get the first activation on key turns and thus lost their armor. In addition they failed to leave enough units to occupy village hexes in the end game. A large part of the Axis plan was to give the Allies a bloody nose with the forward positions and then fall back into the town. Well it worked except for the falling back part. There wasn't much left to fall back with. I'm giving this scenario a 4 because of the many variable strategys that both sides can use. The way this scenario turned out is a perfect example of why in PZ GREN it is sometimes better to be lucky than skilled. A fact that every student of military history can attest to. |
| 0 Comments |
| Striking Back ... well, not really |
|---|
|
On the 21st of September 1944, Task Force Mc George attempted to drive Kampfgruppe Peiper from La Gleize. The attack proved difficult from the start when the Americans found out that their contingent of Shermans could only move by road. So it all came down on the shoulders of the infantry. The first group, led by the Sergeant were hit by mortar fire as soon as they became spotted. Soon, this little group was more occupied with holding their position than trying to assault. With half of their infantry pinned down, McGeorge ordered the M18 to take out the threatening Panther that was looming on the Hill just outside of La Gleize. The plan was to use the speed of the Hellcat to ride through the woods to the other side of the village and get some enfilading fire on the German tank. Rottenführer Bahnes was no fool though, and after an hour of cat and mouse play, the Americans decided on a new strategy. They surged their tanks forward to create a target rich environment, thinking that most of them would get through. Well, the Panther took the bait: shot after shot smashed through the thin armor of the US vehicles. Soon the battlefield was scattered with burning US hulks. The Kampfgruppe took heart from this magnificent display of German marksmanship and they ousted the Americans straight out of La Gleize. A bloodbath ensued and the only US troops to survive this inferno was the Sergeant and his trusted platoon of engineers. End score proved “close”: 51-9 for the Germans! |
| 0 Comments |
| Through the woods is the only way to go | ||||||||||||||
|---|---|---|---|---|---|---|---|---|---|---|---|---|---|---|
I had the pleasure of inaugurating a new PG player to Skype, Hugmenot. The game was played over two evenings, both being very enjoyable as the battle kept swinging both ways until the end. The scenario is a small one just 14 turns and a handful of counters, but with SS troops defending it is always a tricky game. I was the Americans, Hugmenot was the Germans. Some interesting SSR's and victory conditions make scenario interesting. The small German force sets up in the town on board 10, will an outpost to the north and several until outside the town to the west, including the Panther. The Americans have a small force for the attack, only a reinforced company of mechanized INF's a couple of M4's, several M5's and an M18. All of which start on board 9, placed in the woods out of sight of the Germans. The Americans have some limitations, the M4's cannot leave the roads due to the tough terrain. But the M5's, M18 and M3's can, so they will use the cover of woods to try to get close to the town and dislodge the SS. The game starts with three groups of American troops/tanks moving out through the southern woods. The M18 and M5's pick their way along the woods with a company(-) following along. The second group of M5's with a company(-) move through the woods a little to the north, trying to stay in the cover but spotting the SS pickets to the west of the town. Then the M4's with a LT move down the road to spot the German pickets. The German pickets to the north pack up and head back into town when it is apparent that the American force is to the south. Soon the American M18 and M5's are on the road south of the town on board 10. The German Panther reacts by closing in on the M18 to try for a quick kill. The American move the M4's up the road to counter but run into a 75/41 that quickly takes out a M4/76 step. The others move back to the safety of the woods on board 9. The Panther catches the M18 and kills it but it is exposed to the following American INF's. The Americans close and demoralize the Panther. A German OSFTR takes two GREN's to support the tank, but disaster strikes. Friendly fire from German 81mm mortars hit the the advancing GREN's killing a step and disrupting and demoralizing the remaining troops. American fire continue the killing by double demoralizing the other unit. This leaves the American INF's free to kill the Panther, which occurs shortly thereafter. The remnants for the SS relief force is also destroyed by the Americans. The next phase has the Americans positioning for an attack on the town. M5's maneuver to the east of the town to be able to bring fire on SPW251's positioned in the east of the town, while the infantry continue to move up. But SS OP fire is very good scoring morale checks that the Americans have trouble with. The American command is green and posses not leader with a morale bonus, that hurt the advancing INF's. The American M5's attempt to pick off the SPW251's but two turns of fire yields no results. It is only until later turns will the SPW251's be destroyed. This gives the Germans strong firebases to hit the advancing Americans. The Americans try the OBA with little effect other than some disruptions that the Germans quickly recover. The Americans quickly focus on the southeast corner of the town. Stationed there is a HPSTFR, GREN and 81mm mortars. They are able to concentrate fire on the hex and force the demoralized 81mm out of the hex and disrupting the others. The Americans rush an INF with the SGT to close on the town, but SS OP is right on the mark and kills an American step and the SGT is mortally wounded. The American concentrate fire an are able to take out the 75MM IG keeping the M3's safe for the moment. Getting down to the last turns the Americans move up the M5's and the M3's to close for an assault. Heavy fire by the Germans is ineffective and the American's assault the corner town hex. In the end the assault scores morale checks that leaves the hex contested. Final score Americans 14 Germans 12 |
||||||||||||||
| 0 Comments |
| Striking Out | ||||||||||||
|---|---|---|---|---|---|---|---|---|---|---|---|---|
I decided to get back to some PG after a couple of months of by playing a Bulge game on the day it was fought. I picked this one as it is a straightforward attack/defend scenario with low density counters and turns. The SS set up mostly in the town with two dug-in Grenadier platoons on the high ground just to the west to cover that approach. The ATG was set up in the northwest town hex with a grenadier platoon and a grenadier platoon and HMG on its right flank. The anther was set up in the light woods to the east to set for crossfire when the enemy tanks approached. The US plan was to send the infantry and light tanks around the west flank and come across that high ground, sweeping the delaying force there and then attack the town. Then the Shermans would race down the road and swarm the town and hope for the best. Once the Germans detected the light tanks and halftracks coming with the infantry, the Panther raced across the board to get to the high ground to fight the M5s. The US saw this as an opportunity to swarm the panther and get cross fires with the M4/76 and Hellcat. It didn't work. The Germans got the next turn initiative, and the panther took out the M-18s and m4/76s while the ATG reduced one of the M4 platoons. The US infantry attack pushed back one Grenadier platoon but soon came under mortar and MG fire. Calculating the point deficit and seeing that the panther was going to go a have a M5 Stuart feast, the US commander withdrew and conceded defeat. What is interesting about this one, if the US got the initiative after swarming the panther platoon, the battle might have gone the other way dramatically. Sometimes you have to take the risk and roll the dice. |
||||||||||||
| 0 Comments |