
|
A Dicey Proposition Winter Soldiers #3 |
||
|---|---|---|
| (Attacker) Germany | vs | United States (Attacker) |
| Formations Involved | ||
|---|---|---|
| Germany |  |
1st SS "Leibstandarte Adolf Hitler" Division |
| Germany |  |
Kampfgruppe Peiper |
| United States |  |
30th "Old Hickory" Infantry Division |
| United States |  |
824th Tank Destroyer Battalion |

| Total | |
|---|---|
| Side 1 | 6 |
| Draw | 2 |
| Side 2 | 3 |


| Overall Rating, 12 votes |
|---|
|
3.42
|
| Scenario Rank: 452 of 913 |
| Parent Game | Winter Soldiers |
|---|---|
| Historicity | Historical |
| Date | 1944-12-19 |
| Start Time | 13:00 |
| Turn Count | 15 |
| Visibility | Day |
| Counters | 79 |
| Net Morale | 0 |
| Net Initiative | 1 |
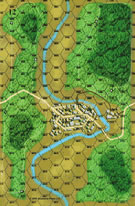
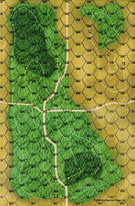
| Maps | 2: 12, 9 |
| Layout Dimensions | 56 x 43 cm 22 x 17 in |
| Play Bounty | 147 |
| AAR Bounty | 135 |
| Total Plays | 11 |
| Total AARs | 7 |
| Battle Types |
|---|
| Bridge Control |
| Inflict Enemy Casualties |
| Urban Assault |
| Conditions |
|---|
| Off-board Artillery |
| Terrain Mods |
| Scenario Requirements & Playability | |
|---|---|
| Battle of the Bulge | Maps |
| Elsenborn Ridge | Counters |
| Winter Soldiers | Base Game |
| Introduction |
|---|
|
Yesterday Peiper's spearhead had passed through Stavelot leaving the problem of securing it for the trailing elements. When a lack of fuel prevented the Panzer IV battalion from advancing this made securing the town a dicey proposition. Complicating the situation was 30th Infantry Division was unwilling to concede the initiative and sent a battalion forward to retake it. |
| Conclusion |
|---|
|
By noon all of Stavelot was in American hands save for a few houses at the western edge. When some of the refueled Panzer IVs launched a counterattack to retake the town, captured American jeeps in the lead element of the attack caused Lt. Colonel Frankland to call in artillery fire instead of directly engaging the enemy. This separated the German armor from their infantry support as the panzers continued on alone. The counterattack faltered when two of the leading tanks were destroyed just short of the bridge. |
| Additional Notes |
|---|
|
SS transport counters are available as a free download from Avalanche Press. If not using these or other SS transport from other games, players should use regular German army transport as substitutes. |

|
|
|---|
| AFV Rules Pertaining to this Scenario's Order of Battle |
|---|
|
| Luftwaffe |
|---|
|


| Schutzstaffel |
|---|
|


")
")
")
")
")


| Army |
|---|
|


| 3 Errata Items | |
|---|---|

|
The reduced direct fire value of the SS HMG is 5-5 in Beyond Normandy and Road to Berlin. (plloyd1010
on 2015 Jul 31)
|

|
The Units in Beyond Normandy were misprinted with a movement factor of 5. The movement factor should be 8. (rerathbun
on 2012 Mar 21)
|
|
|
Liberation 1944's counters are mislabeled 'PzIVF2.' The counter's ratings are correct (Armor 5, Move 8, DF 11-6, AT 6-8). (rerathbun
on 2014 Feb 14)
|
| Not-so-hot Dice | ||||||||||||
|---|---|---|---|---|---|---|---|---|---|---|---|---|
My first chance for a Bulge game so far. The US have to hold out in Stavelot, the big town on board 12, with SS already in the western 3 hexes, a large mix of SS and FJs in the woods and hills to their east, and SS reinforcements waiting to enter from the west. My roll for German reinforcements brought them in immediatly. The US set up with a wall of infantry and HMGs facing the SS in the town, the Major and 2 more infantry in the central town hex with another infantry and an engineer in the north and south central hexes waiting to assist in assaults, and the 3in guns and mortars in the eastern town hexes, with an outpost accross the river holding that single hex of town to prevent a larger force of Germans from the north heading for the bridge. The German Mk IVs made a dash for the bridge and accross into assaul after taking a single step loss to the 3in guns but the US major brought his troops in and in 3 turns, wiped out the German tanks, while SS infantry got stalled on the bridge by US OBA and mortars. In the west, the initial SS troops in town were killed by adjacent hex fire just in time for the SS reinforcements to arrive and move into assaults, the Armored cars faring much better with their infantry support. Assaults bogged down, but overall, Germans took step losses while the US troops took morale losses. At the end of 11 turns, the Germans had lost 26 steps to 9 US, and the Germans just couldnt get a strong force accross the bridge. Even then, the Germans controlled the 3 western town hexes, and 4 more town hexes were contested, the bridge firmly in German hands but not of much value with all the SS troops hunkering down under constant arty fire there. Time to call it a game, 39 points to the US to 20 for the Germans. Great game. |
||||||||||||
| 0 Comments |
| A close run thing |
|---|
|
Americans succeeded in gaining control of all but northwestern edge of Stavelot. Turn two, the German reinforcements showed up and cautiously probed for a weak spot. In the meantime, Peiper chose to rush the town before the Amis took the bridge and Panzers took positions in the east while waiting for most of the infantry to catch up (minus the tank riders who accompanied them for security) American mortars positioned on the hill west of the town took a heavy toll on the Fallschirmjaeger while American artillery also cut huge swaths in the advancing troops. The battle seesawed all the way until the final turn. During the battle, the senior leader was unexpectedly cut down and chaos reigned for a couple turns while the second in command could not gain control of the battle (curse those 11s!). Nevertheless KG Peiper succeeded in whittling down US control of the town until the end. |
| 0 Comments |
| Inexorable | ||||||||||||
|---|---|---|---|---|---|---|---|---|---|---|---|---|
As this battle has been described in detail in others, I shall only note where my play was substantively different. US Set-UP: 2xINF 0711 ENG+INF+M2 0710 INF+M3+3in 0807 (covers the W entry into Stavelot and hex 1111 (approach to bridge)) INF 0809 2xHMG 0911 INF 0910 HMG+INF 1011 INF+M3+3in 1008 INF+ENG 1110 Germans: Luftwaffe units set up N of the E/W road in row 12xx SS lined up on hill S of E/W road. PzIV's set to target 1110 at 600m. Notes: US won initiative every turn through turn 11 (when I ended the game) Germans only attained reinforcements on turn 6. On turn 2, a PzIVH moved into LOS from 0807 somewhat by accident (an "oops" moment). Rolled a 12 at +1 on the AT for a full unit kill (TheDoctor witnessed it). Sort of stunning. US OBA pummels the triple-stack of 81mm's on the 40-m hill. Turns 3 and 5 see good fire from the SS. As no German reinforcements appreared, the US took a few units to reinforce the northern wing and try to protect the 3-in guns which were keeping the PzIV's pinned behind the eastern back hamlet. On turn 7, the Germans get a '2' on a 30-col DF and clear/take the bridge hex. By turn 11: German VPs: 6 town hexes held + 16 step losses inflicted + held bridge hex. US VPs: 5 town hexes held + 14 step losses (countable). German victory at this point was inevitable (save for wild die rolling) so I ended play. Interesting situation in terms of US set-up. |
||||||||||||
| 0 Comments |
| Lucha casa por casa en Stavelot |
|---|
|
En este escenario una fuerza alemana compuesta por un batallón reforzado de granaderos de las SS, dos compañías de Fallschirmjäger y una compañía de tanques Pz IVH, todos ellos integrados en el Kampfgruppe Peiper, atacan la población de Stavelot, defendida por aproximadamente un batallón de infantería de la 30ª división americana. Los alemanes disponen además de dos secciones de coches blindados (SK 234/3 y SK 234/2), tres secciones de morteros, una sección antiaérea de 20mm, vehículos Hanomag y artillería fuera del mapa (2 x 16). Los americanos despliegan además dos secciones de morteros, dos secciones de cañones AT de 3-inch, halftracks M3 y artillería fuera del mapa (3 x 18). Tres secciones de panzergrenadiere y la batería AA ocupan los tres hexes más occidentales de Stavelot. Los americanos ocupan el resto de la población. El resto de los alemanes se sitúan al este de Stavelot o entran a partir del turno 1 por el oeste. Los alemanes tienen claro su plan: defender a toda costa los tres hexes de Stavelot en su poder, esperar refuerzos desde el oeste y contraatacar hacia el interior de la población. Al mismo tiempo el grueso de las fuerzas alemanas, entre las que se incluyen los tanques, avanzarán desde el este y atacarán el borde oriental de la población. Las fuerzas americanas serán así tomadas "en sandwich". Los americanos no tienen muchas opciones: atacar los hexes occidentales de la población mientras tengan superioridad numérica y conservar como sea la máxima parte de ella y sobre todo el vital puente del hex 1011 del mapa 12. Los americanos acosan a la compañía de panzergrenadiere que defiende los tres hexes occidentales de Stavelot. Los alemanes resisten bien y logran mantenerlos bajo control hasta la llegada de refuerzos. A partir de ese momento la situación cambia. Los alemanes atacan simultáneamente por el este y el oeste. El frenético fuego alemán de artillería, morteros y directo destruye las dos secciones de cañones AT americanos, tras lo que los tanques germanos salen de un bosque próximo y hostilizan las defensas occidentales de Stavelot. Los americanos resisten valientemente, pero no pueden impedir que el hex de ciudad 1110 del mapa 12, situado al este del río Ambleve, caiga en poder del enemigo. A partir de ese momento la lucha alcanza su climax. Los americanos no dan un paso atrás. Los alemanes tampoco. Los bajas aumentan en ambos bandos y la tensión se mantiene literalmente hasta la última tirada de dados. Se produce una épica lucha por el control del puente del hex 1011 del mapa 12, en la que ningún bando consigue la victoria. Al final se produce un ajustadísimo empate. Los alemanes sufren 15 steps de bajas, las mismas que los americanos. Y cada bando controla cuatro hexes de Stavelot. En consecuencia, 23 VP cada bando. Éste ha sido uno de los combates más ajustados que recuerdo. Le adjudicaría un 5/5, pero lo reduzco un punto por estimar que los alemanes tienen una ligera ventaja, que en esta partida no han aprovechado a causa de unas pésimas tiradas de dados. |
| 0 Comments |
| What the Hell, we're surrounded! | ||||||||||||
|---|---|---|---|---|---|---|---|---|---|---|---|---|
StavelotThe American player had set up his most power adjacent to the 3 German controlled town hexes, so the German player had to retreat his Gren and 20mm units. But instead of leaving the town hexes unoccupied the German player moved Pz IVH tanks with Gren support to the town hexes, to assault the American defense in the next turn. The American player tried to inflict some step losses to the tanks with his AT-guns, but they lacked firepower, and the German player assaulted the fist hex, which included a INF, a demoralized 3-inch and a demoralized M3. In the first round of the assault the german player inflicted two step losses. But the Americans still had a good grip at the town. This changed when the German reinforcements attacked the back of the town, and the Americans where surrounded! While the Germans in the east of the town won terrain with assaults, the German Para's attacked the north of the town with no effect. But in the south of the town one INF and one HMG unit assaulted the German Pz IVH and two Gren units which where gaining too much terrain. This was a big mistake, because they immediately suffered two step losses, and the Germans south of the town crossed the river and took the town hex where the American INF and HMG assaulted from. Now the German player had a good grip on the town. and started to drive the American remainders out. ConclusionWith the Americans suffered enormous casualties and almost all town hexes German controlled, the German player won a major victory. |
||||||||||||
| 0 Comments |
| Winter Soldiers #3 Dicy Proposition or The Dice were Loaded |
|---|
|
The Allies set up for all round defense of the town with no thought of trying to engage the Axis positions in the west end of town. The Allies had dug in on the bridge hex with a ATG, INF, M3 Halftrack and a 9-1-1 Lt. The Axis naturally got their reenforcements on the first possible roll and instantly reenforced their western town hexs and began an assault on adjecent Allied positions. Meanwhile the Axis manuvered east of town to arrive in suitable assault positions before the bridge hex. The allies were up to the Axis first rush. The Axis assault vs the bridge hex was repulsed because of it's piecemeal nature. The axis para's assault vs the foot bridge was repulsed by Lt. McKrackin and the ATGs and Inf. Finally the Axis assault into the town center was absorbed by the Allied Inf and HMG which counter assaulted causing Axis casulities. But over the long run this could not continue. The Axis finally wore the Allies down. First at the bridge hex when, after knocking out the Allied ATGs with direct fire from stacked HMGs and 81mm morters, the Axis brought up 3 platoon of MkIVs to an adjecent hex to blast away at Allied foxhole positions. That is the 30 col up 1, (down 1 for being dug in, up two for being adjecent.) Then the Assault and counter assault in the town center finally was decided when the Allies just ran out of units to feed into the assault hex. Higher morale when reduced and superior leadership won the battle here. Fortunatly Lt. McKrackin (8-0-1) survived by escaping over the foot bridge into the woods to the north, bypassing the demoralized Axis paras who never did get back into the battle. He finished with a +6 points despite having become demoralized during the scenario. Despite superior 81mm fire and OBA the Allies just could not hold on. Actually they did better than I thought they would at first glance. But as far as Axis firepower goes, they were loaded. And so were the dice. |
| 0 Comments |
| Following Failure | ||||||||||||
|---|---|---|---|---|---|---|---|---|---|---|---|---|
After completing Failing Orders,I was naturally drawn to this scenario. It is an interesting situation. An American battalion inserts itself into Stavelot amidst the followup German forces. It would have been more interesting had it not turned into a complete rout for the Americans as they were crushed handily by the Germans. The Americans have a full battalion that will typically be setup in the town of Stavelot, but part of the town is still held by a company of SS GREN's as well as a German relief force on board 9. This is significant as it mounts four PzIVH's and two companies of GREN's. To top it off the Germans have a 50% chance of reinforcements to help the GREN's in the town on board 1. The Americans have to just hunker down and hold the town with the dual attack. On turn 1 the Germans get there reinforcements and begin to move them in as well as get the troops on board 9 advancing on the town. Direct fire from the town GREN's are able to disrupt American troops in the town. Forced to recover the Americans pass on firing on the advancing reinforcements, giving the Germans the edge to assault the town. To the east the Germans press forward and American OBA does score a hit, but the bulk of the force is able to close on the bridge quickly and prepare for assaults. By turn 5 the game boils down to assaults on the town. Heavy assaults occupy and drive up the casualty count quickly, but the Americans are on the bad end of it and slowly ground down and lose most of the town hexes. By turn 13 the Americans have no chance for retaking the towns with 6 INF, 2 HMG and a ENG lost. The Germans also have high losses in the attack, but they hold the bridge and the majority of the town. A bit disappointed by this one as the Americans were forced to sit in the town and the Germans where easily able to get their tanks into the town. American OBA was not a big factor in the German advance and the American AT guns were quickly locked in assault allowing the German tanks to roam free. Eventually the game was just a slugfest in the town. My thoughts is that this scenario is too quick to surround the Americans and the game would be better to delay the western German reinforcements until turn 3 and make the unit on board 9 reinforcements that enter on turn 1. This would give the Americans a chance to fight it out with remnants in the town before tackling being surrounded. |
||||||||||||
| 0 Comments |