Panzer Grenadier Battles on April 27th:
Arctic Front Deluxe #40 - Children's Crusade Broken Axis #14 - Târgu Frumos: The Second Battle Scenario 3: Sledge Hammer of the Proletariat
Army Group South Ukraine #6 - Consternation Road to Berlin #73 - She-Wolves of the SS
Errors? Omissions? Report them!
Chocos in the Sun
Waltzing Matilda #12
(Defender) Japan vs Australia (Attacker)
Formations Involved
Australia 2nd Infantry Division
Australia 3rd Army Tank Brigade
Japan 1st Maizuru Special Naval Landing Force
Display
Balance:


Overall balance chart for WaMa012
Total
Side 1 0
Draw 0
Side 2 1
Overall Rating, 1 vote
5
4
3
2
1
3
Scenario Rank: --- of 913
Parent Game Waltzing Matilda
Historicity Alt-History
Date 1942-12-01
Start Time 08:00
Turn Count 30
Visibility Day
Counters 138
Net Morale 1
Net Initiative 3
Maps 3: 17, 20, 5
Layout Dimensions 84 x 43 cm
33 x 17 in
Play Bounty 191
AAR Bounty 171
Total Plays 1
Total AARs 1
Battle Types
Inflict Enemy Casualties
Urban Assault
Conditions
Randomly-drawn Aircraft
Terrain Mods
Scenario Requirements & Playability
Afrika Korps Counters
Eastern Front Maps
Guadalcanal Counters
Road to Berlin Maps
Waltzing Matilda Base Game
Introduction

A Japanese conquest of Australia would have to be effected relatively quickly, an extraordinarily difficult task given the forces available and distances to be covered. Failing to knock out the Australian defenders, the Japanese could expect determined counter-attacks from all points in an effort to throw them back into the sea.

Conclusion

Scorned by AIF veterans of the Western Desert as "Chocos" (short for "chocolate tin soldiers," since they'd melt away in the Middle Eastern sun), many Militia soldiers yearned for the chance to show themselves every bit the defender of Australia as the strutting AIF men. With the veteran regulars away in Egypt, it would fall to the Militia to throw invaders out of Australia. Their abilities were never tested in that role, but they certainly did not melt when thrown into combat in New Guinea.

Additional Notes

Players should make extra copies of the both Australian and Japanese pieces from Waltzing Matilda to provide all the units needed for the scenario.


Display Relevant AFV Rules

AFV Rules Pertaining to this Scenario's Order of Battle
  • Vulnerable to results on the Assault Combat Chart (7.25, 7.63, ACC), and may be attacked by Anti-Tank fire (11.2, DFT). Anti-Tank fire only affects the individual unit fired upon (7.62, 11.0).
  • AFV's are activated by tank leaders (3.2, 3.3, 5.42, 6.8). They may also be activated as part of an initial activating stack, but if activated in this way would need a tank leader in order to carry out combat movement.
  • AFV's do not block Direct Fire (10.1).
  • Full-strength AFV's with "armor efficiency" may make two anti-tank (AT) fire attacks per turn (either in their action segment or during opportunity fire) if they have AT fire values of 0 or more (11.2).
  • Each unit with an AT fire value of 2 or more may fire at targets at a distance of between 100% and 150% of its printed AT range. It does so at half its AT fire value. (11.3)
  • Efficient and non-efficient AFV's may conduct two opportunity fires per turn if using direct fire (7.44, 7.64). Units with both Direct and AT Fire values may use either type of fire in the same turn as their opportunity fire, but not both (7.22, 13.0). Units which can take opportunity fire twice per turn do not have to target the same unit both times (13.0).
  • Demoralized AFV's are not required to flee from units that do not have AT fire values (14.3).
  • Place a Wreck marker when an AFV is eliminated in a bridge or town hex (16.3).
  • AFV's do not benefit from Entrenchments (16.42).
  • AFV's may Dig In (16.2).
  • Closed-top AFV's: Immune to M, M1 and M2 results on Direct and Bombardment Fire Tables. Do not take step losses from Direct or Bombardment Fire. If X or #X result on Fire Table, make M morale check instead (7.25, 7.41, 7.61, BT, DFT).
  • Closed-top AFV's: Provide the +1 modifier on the Assault Table when combined with infantry. (Modifier only applies to Germans in all scenarios; Soviet Guards in scenarios taking place after 1942; Polish, US and Commonwealth in scenarios taking place after 1943.) (ACC)
  • Tank: all are closed-top and provide the +1 Assault bonus, when applicable

Display Order of Battle

Australia Order of Battle
Army
  • Mechanized
  • Towed
Japan Order of Battle
Imperial Japanese Navy

Display AARs (1)

These Chocos Don't Melt
Author rerathbun
Method Solo
Victor Australia
Play Date 2013-04-06
Language English
Scenario WaMa012

Chocos in the Sun is a kill-the-enemy and take-the-towns scenario with some unusual features. The Japanese are backed up against the sea and will resist to the last. The Australians have numbers, but their big advantages are the Frog flamethrower tanks and their 25-pounder artillery.

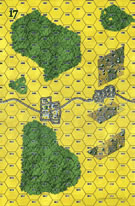
The Japanese set up forward with most of their force, including their best anti-tank guns, in and around the woods and town closest to the Australians. They kept a small force in the smaller town farther back, covered by the smaller anti-tank guns.

The Australians entered on turn one, spread out in line for a coordinated advance. They kept the tanks behind the infantry and in cover until the anti-tank guns could be spotted and dealt with. The 25-pounders immediately unlimbered, since they could cover the entire field from their entry hexes.

The infantry moved up and set up firing lines against the Japanese troops as the Australian artillery and aircraft went after the anti-tank guns. Neither side made much impact at first. The Japanese firepower was just too low to do much, and the Australians couldn't demoralize the fanatical Japanese, only kill them. The Australians came out slightly ahead in the firefights, inflicting some losses but suffering a few in return.

Once the Japanese anti-tank guns were out of action, The Australian tanks moved up and the assaults began. The Japanese never gave up, but they couldn't withstand the assaults by the flamethrowers, engineers and machine guns of the Aussies. The Australians slowly ground them down and wiped out the entire force holding the town.

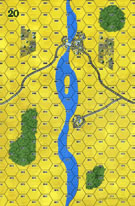
The Australians cleared the first town, but it took until the final turn. The Japanese held the second town, but lost the towns next to the sea to Australian forces that bypassed the second town and made it to the empty villages. They had been held by some artillery and a platoon of infantry, but the Australian 25-pounders managed to clear them out and the diggers just walked in.

The result was a Major Australian Victory. The Australians held seven out of nine town hexes and inflicted almost twice as many casualties as the Japanese.

The Japanese could have improved their chances by setting up all of their anti-tank guns forward and further slowing the approach of the tanks. As it was, the Australian aircraft took out the guns dug-in by the second town before the Australians made it past the first town.

I enjoyed this scenario. In my opinion it plays better solo than shared, since there isn't much for the Japanese to do once they set up. (There is no transport for the Japanese anti-tank guns and artillery.) The outcome wasn't really in doubt for the final one-third of the game, but there was a lot of tension as to whether the Australians would be able to clear the first town. From my experience, it seems to heavily favor the Australians and would probably rate a '2' if balance is important to you.

0 Comments
You must be a registered member and logged-in to post a comment.
Errors? Omissions? Report them!
Page generated in 0.749 seconds.