
|
First Wave Waltzing Matilda #2 |
||
|---|---|---|
| (Attacker) Japan | vs | Australia (Defender) |
| Formations Involved | ||
|---|---|---|
| Australia |  |
11th Infantry Brigade |
| Japan |  |
1st Sasebo Special Naval Landing Force |
| Japan |  |
2nd Sasebo Special Naval Landing Force |

| Total | |
|---|---|
| Side 1 | 3 |
| Draw | 0 |
| Side 2 | 0 |


| Overall Rating, 3 votes |
|---|
|
3
|
| Scenario Rank: --- of 913 |
| Parent Game | Waltzing Matilda |
|---|---|
| Historicity | Alt-History |
| Date | 1942-08-01 |
| Start Time | 13:00 |
| Turn Count | 16 |
| Visibility | Day |
| Counters | 90 |
| Net Morale | 1 |
| Net Initiative | 2 |
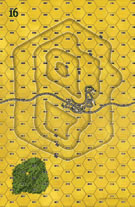
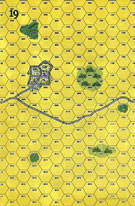
| Maps | 2: 16, 19 |
| Layout Dimensions | 56 x 43 cm 22 x 17 in |
| Play Bounty | 168 |
| AAR Bounty | 159 |
| Total Plays | 3 |
| Total AARs | 3 |
| Battle Types |
|---|
| Hill Control |
| Urban Assault |
| Conditions |
|---|
| Randomly-drawn Aircraft |
| Scenario Requirements & Playability | |
|---|---|
| Afrika Korps | Counters |
| Guadalcanal | Counters |
| Road to Berlin | Maps |
| Waltzing Matilda | Base Game |
| Introduction |
|---|
|
While the AIF practiced mobile warfare in the Western Desert, Australia's Northern Command did not intend to follow suit in case of a Japanese invasion. Australian units would stand and fight where they stood, with Maj. Gen. George Vasey counting on his troops' expected fanaticism to hold out long enough for reinforcements to arrive. That would relieve inexperienced troops of the need to maneuver while in contact with the enemy, but could expose them to intense combat. |
| Conclusion |
|---|
|
Japan's elite naval infantry would have spearheaded any assault on Australia - the invasion was the Navy's idea, and the Navy would have had to throw in all of its land forces to make it work. Australia's citizen soldiers were not nearly the equal of the "Japanese marines" in fighting ability, but standing on Australian soil would have made a huge difference in their performance. |

|
|
|---|
| AFV Rules Pertaining to this Scenario's Order of Battle |
|---|
|
| Army |
|---|
|


| Imperial Japanese Army |
|---|
|

| Imperial Japanese Navy |
|---|
|


| First Wave wipes out the Australians |
|---|
|
This is a fairly basic hill and town defense scenario. The Australians set up on the hills and town of board 19, with the Japanese approaching from the north. The Japanese have higher morale, plus artillery, air and armored support, whereas the Australians have the defensive terrain. The Japanese approached to within two hexes of the dug-in Australians and softened them up with 30 minutes of direct fire, aided by artillery and air support. The Australians were unable to break up the attack, causing only a couple of disruptions. After achieving a few demoralizations, but no losses, the Japanese move forward to assault. The Australians did only minor damage to the assault waves with opportunity fire, and the Japanese assaults did their job. By the halfway point, the left side of the Australian defense had collapsed and the few demoralized survivors were retreating into the town. The Japanese attack bogged down due to a heroic Australian defense in one hex, plus some unkind Assault and Fog-of-War die rolls. The Japanese kept feeding fresh troops into the assaults and the right side of the Australian defense fell apart in the last 45 minutes of the scenario. The town defenders were wiped out in the last 30 minutes by the Japanese who had earlier defeated the Australian left. The two heroic Aussie platoons that had held out in one assault hex for well over an hour were wiped out on the last turn. This is better as a solo scenario; there's not much for the Australians to do but hunker down and hang on. Halfway through I thought it would be a Japanese cake walk, but the die rolls shifted against them (they did very well the first half) and it turned out much closer than I expected. |
| 0 Comments |
| Like trying to hold back a tsunami |
|---|
|
This was a pretty fast game, but without much for the Australian to do but wait for the inevitable. The Japanese have 24 SNLF, about 7 HMG, and 6 tanks as the main strike force, plus assorted air support and weak artillery. The Australians have a battalion of infantry to hold them back. They must survive four hours on a tall hill with a town. This was one of the few times in my experience where an all-out relentless charge worked. The Aussies were spread out in a number of dugouts around the front and sides of the hill, hoping to disrupt the Japanese as they approached. The Japanese concentrated 2/3s of their force on the left with all the tanks, the rest on the right. The plan was an all out charge, bypassing the lower defenses to be mopped up later while driving right up the hill for the town. The short version: it worked. The combination of better morale and the Japanese INF assault bonus was an insurmountable advantage. The Japanese never stopped to prep assault hexes with DF or artillery, they just charged right in. The speed of their HMGs (the Waltzing Matilda counters are incorrectly marked as speed 2, it should be 3) was a great boon to keeping their momentum up. Yes, their tanks suffered heavily from some amazing Aussie AT shots, but they really didn't contribute anyway. This was a high-speed raid on foot that left isolated pockets of Aussies to be cleaned up at leisure. The Aussies did put up stiff resistance in each pocket, and largely stymied the right hand side of the Japanese line, but the Japanese left just blew through them. Japanese victory. |
| 0 Comments |
| Line in the Sand |
|---|
|
When I was a kid we frequently visited my grandmother's apartment east of Cleveland, OH. At the time, I'm sure my parents saw these visits as a chance to come home (we lived in Pittsburgh), visit old friends, and maintain important relationships. I, however, saw it as a beach vacation. In the 70s, Cleveland became famous for the Cuyahoga River which was so polluted that it actually caught fire several times. My beach vacations were, however well before then and the river, then (and thankfully, now again) was clean and the beaches of Lake Erie were pretty much unused. I enjoyed swimming, beach combing (finding "beach glass", discarded bottles, broken and worn smooth by the waves and sand), and, especially on windy days, seeing if I could guess how far the next wave would get up the beach. I would draw a line in the sand with my toe and watch to see if the wave would get there or not. The most fun was when I guessed just right and the wave filled the line but went no further. It occupied me for hours to the delight of my mother who didn't have to worry about me for a bit. This scenario felt a lot like that. Every time my Austrialians thought they had the line in the sand, something would tip off that the wave wasn't quite done. The wave of Japanese Naval troops who are charged with taking the hills and town held by the Austrailians seemed irresistable in this scenario. There are hordes of them and they are supported by tanks and plenty of artillery and they even have air power. The Aussies have some HMGs and mortars but basically present an infantry force to the Japanese. Rather than blunt themselves against the entire Austrailian front, the Japanese advanced em\n masse against the western hill. This was a bit of a risky strategy as there were only 16 turns and the goal was to take both hills and the town between, but I have had too many attacks stall due to lack of reserves, better to keep concentrated and count on mass, morale and the Japanese infantry bonus to provide the force to clear the successive obstacles. With 6 turns to go, two town hexes and one eastern hill hex remained unconquered and all were in active assaults. It was only on the last turn of the game itself that the Austrailians were finally removed from the last town hex. The Japanese took heavy losses (18 steps plus 1 tank step, but the Austrailians were eliminated as a fighting force. The tactical problem for the Austrailians is that once the wave reaches them they will have no maneuverability. The Japanese will assault and tie them down and then wear them down, especially outside of the town. As long as the Japanese have reserves they will maintain the only flexibility on the board and will crush the Austrailians. The Japanese need to remember, however, that their tanks do not provide assault bonsues so they are really just slightly move mobile HMGs in this scenario. I enjoyed the balance of the timeframe and goals in this one but there is just so little to do as the Austrailians that I can't rank it any higher than a "3". I don't see this one as a good shared play game. Play it solo, and draw your own line in the sand. |
| 0 Comments |