
|
The Beast Spearhead Division #22 |
||
|---|---|---|
| (Defender) Germany | vs | United States (Attacker) |
| Formations Involved | ||
|---|---|---|
| United States |  |
3rd "Spearhead" Armored Division |
| United States |  |
414th Infantry Regiment |

| Total | |
|---|---|
| Side 1 | 2 |
| Draw | 1 |
| Side 2 | 0 |


| Overall Rating, 3 votes |
|---|
|
4
|
| Scenario Rank: --- of 913 |
| Parent Game | Spearhead Division |
|---|---|
| Historicity | Historical |
| Date | 1945-04-10 |
| Start Time | 16:00 |
| Turn Count | 20 |
| Visibility | Day & Night |
| Counters | 93 |
| Net Morale | 0 |
| Net Initiative | 1 |
| Maps | 2: 23, 25 |
| Layout Dimensions | 86 x 28 cm 34 x 11 in |
| Play Bounty | 169 |
| AAR Bounty | 165 |
| Total Plays | 3 |
| Total AARs | 2 |
| Battle Types |
|---|
| Inflict Enemy Casualties |
| Urban Assault |
| Conditions |
|---|
| Anti-infantry Wire |
| Off-board Artillery |
| Randomly-drawn Aircraft |
| Reinforcements |
| Smoke |
| Illumination |
| Scenario Requirements & Playability | |
|---|---|
| Elsenborn Ridge | Maps + Counters |
| Spearhead Division | Base Game |
| Introduction |
|---|
|
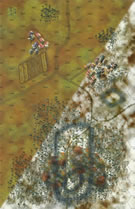
While one task force of Combat Command A attempted to secure Osterode and thereby seal Spearhead’s flank, the other headed for Herzberg. On approaching Herzberg they encountered massive German assault guns that were just shy of 35 feet long and over nine and a half feet wide. Their frontal armor was over nine and three-fourths inches thick and they mounted a high velocity five-inch cannon that could defeat any enemy armor at distance of well over a mile. Unfortunately their weight of almost 69 tons put a huge strain on the 700-horsepower engine and drive train. This meant that breakdowns happened early and often. |
| Conclusion |
|---|
|
The defenders fought for the approaches with vigor and once in the Herzberg itself the fighting intensified. All the defenders’ efforts went for naught as they were sent packing sometime before midnight. On paper the Jagdtiger was an awesome weapon but in the hard light of reality it weaknesses that might have been overcome with enough time and attention. As it was, it was a maintenance hog that put a huge strain on a logistical system which even in the best of times was never more than haphazard. |

|
|
|---|
| AFV Rules Pertaining to this Scenario's Order of Battle |
|---|
|
| Heer |
|---|
|


| Schutzstaffel |
|---|
|


")
")
")


| Army |
|---|
|


| 4 Errata Items | |
|---|---|

|
The reduced direct fire value of the Heer HMG became 5-5 starting with Fall of France. (plloyd1010
on 2015 Jul 31)
|

|
The reduced direct fire value of the SS HMG is 5-5 in Beyond Normandy and Road to Berlin. (plloyd1010
on 2015 Jul 31)
|

|
The Units in Beyond Normandy were misprinted with a movement factor of 5. The movement factor should be 8. (rerathbun
on 2012 Mar 21)
|
|
|
Liberation 1944's counters are mislabeled 'PzIVF2.' The counter's ratings are correct (Armor 5, Move 8, DF 11-6, AT 6-8). (rerathbun
on 2014 Feb 14)
|
| Spearhead Division: scenario #22: The Beast | ||||||||||||
|---|---|---|---|---|---|---|---|---|---|---|---|---|
Spearhead Division: scenario #22: The Beast In this scenario it was my first German victory, as I think I had something like 5 or more American victories in Spearhead this far. The Germans pretty much setup defending the two towns, with units mostly inside or Dug-in close by either town. Both towns could cover and support each other and the Mighty Beast, Jagdtiger setup in a town hex with a great view of the approaching American units and also had Infantry support in it’s hex. The Americans first group from the CCA 3rd Armored Division followed closely by the 414th Infantry got blasted by the Anti-tank guns of the German 75/41 guns, the Panther, the Pz IVH and the Beast Jagdtiger. The Jagdtiger setup so it wouldn’t have to move and risk breaking down it was responsible for at least killing 8 steps of American Tanks, even with one shot per activation, many time rolling high on the dice. That counts as 16 points, most likely more, as I lost count. The Americans air-support was terrible in this scenario unlike the last scenario, where the airmen did great but not this time and I rolled a lot of ones, so in the 9 turns they hardly showed up and they couldn’t kill the Beast even when they tried. As would have it, the American Ammunition Shortage also played a big role and when I needed it the most it wasn’t there, while the Germans off-bard artillery and the on board German rocket NW 41 units roll great, 2s and 12s. The second group of American reinforcement from the CCA, 3rd Armored Division managed to show up on turn ten but by then it was too late. They did manage to take the smaller southern town but didn’t have enough strength or support left to take the northern town. I am sure the Germans pulled out later that night but with a very clear Major Victory, 62 points to only 17 for the Americans. Maybe the Beast broke down later that night but not in this scenario. The biggest mistake the Americans made was trying to rush and overwhelm the German armor, as unlike the last game it didn’t work out and I even used the 4 valued DF Sherman Tanks. Fun to use however but the dice were clearly on the Germans side today. |
||||||||||||
| 0 Comments |
| Beast, Indeed |
|---|
|
Shortly after acquiring Spearhead Division, I knew my first scenario would have to include the Jadgtiger. So I selected "The Beast." The basic American approach was to, naturally, lead with the armor and create a blocking wedge for the vulnerable halftracks to disgorge their infantry without fear of being hit by AT when still loaded. The Germans placed the reduced Panther, the PZ-IV, and the SS 75/41 forward, with the barely-mobile (but highly potent) Jagdtiger further back, but forward of the towns. The SS held the larger town and the Heer the smaller one. The Americans got off to a good start when a P-47 strike took out the Panther and an M36 wiped out the PZ-IV; artillery blasted the SS 75/41 also (and not long after that, the Heer 75/41 went down.) The M3's thus had carte blanche to close on the town and disgorge their powerful foot soldier contingent, which - accompanied by their former mounts - soon began to grind away at the towns (though German off-board artillery and SS firepower caused a good deal of trouble.) But the American attack took a gut punch from the Jagdtiger. Over several turns, the Yanks set up any number of crossfire AT attacks (the only way to hope to dent the "8" armor of The Beast) but none of them worked, and in the meantime the Jagdtiger must have taken out four or five full tank platoons. Only a couple units were left to slink away after the Beast had made its one attack per turn, and when the second wave of CCA showed up, they stayed out of the line of fire until visibility began to drop and they could safely skirt the behemoth. Once night fell, the Jadgtiger needed to move in order to stay in the fight - and promptly broke down in the first hex it moved into. It was done after that, except the once or twice visibility was "2" for the turn. And then, after clearing the 3-hex town, the Amis closed on the Beast with infantry and, on the final turn, wiped it out in an assault. By then, the US (greatly aided by the second-wave armor that skirted the Beast) had cleared all but one town hex, which was still under assault and defended by a lone full-strength SS GREN. The German position was in dire straits, but the armor losses due to the concerted effort to take out the Jadgtiger ultimately gave the Germans a 43-38 VP edge, just enough to eke out a minor victory. |
| 0 Comments |