|
Tanks in the Jungle Saipan 1944 #10 |
||
|---|---|---|
| (Attacker) Japan | vs | United States (Defender) |
| Formations Involved | ||
|---|---|---|
| Japan |  |
136th Infantry Regiment |
| Japan |  |
1st Yokosuka Special Naval Landing Force |
| Japan |  |
47th Independent Mixed Brigade |
| Japan |  |
9th Tank Regiment |
| United States |  |
2nd Marine Division |

| Total | |
|---|---|
| Side 1 | 1 |
| Draw | 1 |
| Side 2 | 4 |
| Overall Rating, 5 votes |
|---|
|
4.6
|
| Scenario Rank: 6 of 913 |
| Parent Game | Saipan 1944 |
|---|---|
| Historicity | Historical |
| Date | 1944-06-16 |
| Start Time | 03:00 |
| Turn Count | 14 |
| Visibility | Day & Night |
| Counters | 155 |
| Net Morale | 0 |
| Net Initiative | 0 |
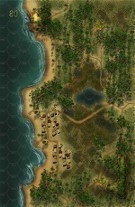
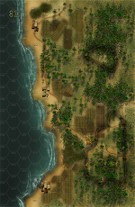
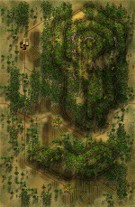
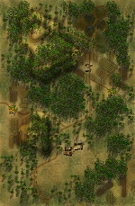
| Maps | 4: 80, 81, 82, 83 |
| Layout Dimensions | 86 x 56 cm 34 x 22 in |
| Play Bounty | 178 |
| AAR Bounty | 153 |
| Total Plays | 6 |
| Total AARs | 4 |
| Battle Types |
|---|
| Inflict Enemy Casualties |
| Rural Assault |
| Conditions |
|---|
| Off-board Artillery |
| Illumination |
| Scenario Requirements & Playability | |
|---|---|
| Saipan 1944 | Base Game |
| Introduction |
|---|
|
The Japanese counter-offensive began in the late night hours of June 16th and continued into the dawn of the 17th. One of the biggest tank battles in the Pacific broke out as the Japanese deployed their newest medium tanks, the Shinhoto Chi-Ha armed with a high-velocity 47mm gun. The Japanese Army and SNLF worked together in an attempt to drive the 2nd Marine Division back into the sea in one great effort. |
| Conclusion |
|---|
|
As dawn crept through the foliage, the rising sun found that 24 of General Saito's tanks were burning wrecks, and 300 of his infantry were killed in exchange for 100 Marine casualties and a few Marine 105mm and 75mm guns knocked out by counter-battery fire. Overall, the counterattack resulted in a total Japanese defeat. Marine bazooka teams, 37mm anti-tank guns, M2/75mm halftracks and some M4 Sherman tanks all helped to shatter the enemy armor. Had the Japanese launched this attack the night before when chaos still reigned on the beach, the result may have been different. |
| AFV Rules Pertaining to this Scenario's Order of Battle |
|---|
|
| 2 Errata Items | |
|---|---|
| Scen 10 |
Hex 0610 is considered on Map 80 for victory conditions. (JayTownsend
on 2013 Mar 06)
|

|
The 8-3 Marine Infantry counter appears in most of the Saipan 1944 and Marianas 1944 scenarios, replacing the 10-3 DF valued Marine counters for those scenarios and is currently published in the most recent Saipan printing. (JayTownsend
on 2015 Dec 26)
|
| Saipan 1944, scenario 10: Tanks In the Jungle | ||||||||||||
|---|---|---|---|---|---|---|---|---|---|---|---|---|
Disclosure, I am the Designer and feel all my scenarios fall into the range of 4-5, 90-100% or I wouldn’t have created them, so take my ratings with a grain of salt! The only reason any are a 4, is because they are more difficult to make from design to development. Saipan 1944, scenario 10: Tanks In the Jungle Post 1 I wanted to play another big Saipan scenario, I wanted to use all 4 maps and I wanted tanks, so I picked this one, as I doubt you will even play a Pacific Island battle with this many tank other than the Philippines. So I setup the largest tank battle of Saipan. The Marines have a rather large area to defend but they have the fire power and can try to bottleneck the main expected route the Japanese might use in their attacks. The decision on setting up a defensive area takes some thinking as does the Japanese attack plans, yes they have a ton of tanks but they have weak armor. So I brought the Japanese SNLF in one the north edge of map 80 to tie up some of the American units, up there and brought the Japanese tank-infantry army in on the western edge of map 83 or eastern edge of map 81 around the only east-west main road there but realized it was way too congested to support all the armor and infantry so I portioned out some of the tanks with infantry riders to go farther north and hit one or main east-west roads on maps 80-82 and maybe have a chance at hex 0610 on map 80 call the radio station hex. The first couple of turns the Japanese have been taking a fair amount of casualties on the main map 83 thrust and some in the very north of map 80 with the SNLF but I still have hope, as the main thrust still has a lot of armor and infantry power left in it, they just need to find or make a weak area in the Marine lines but those star-shells are not helping. They Japanese also still have that nice size armor with tank rider flanking north that still hasn’t hit the American lines yet. I am currently sending a M3/75mm halftrack up that way to help beef up the lines, as the Japanese have at least 6 steps of tanks headed that way including the dreaded Shinhoto tank, if there ever was a dreaded Japanese tank. I am looking forward into continuing play of this scenario, as currently the Marines have the edge, but it’s far from over! Posting #2 The Japanese continue their advance in three main areas, the main SNLF in the north, the end around flanking Tank-Infantry assault in the middle north and the main Infantry-Tank push in the south and they took the worst beating in the south, so many casualties but still I pushed them forward, as they could still achieve their victory conditions even if the Marines were already at the Major victory mark because of Japanese casualties. If the Japanese could control hex 0610 on map 80, the radio station hex or control any beach hexes and eliminate 20 or more steps, they could cancel out the American Major Victory and it would be a draw. The Japanese northern & central thrusts made the most progress and they were able to assault hexes 0610 and attack one beachhead before the Americans transferred some of their units from the south and central areas as these areas were under control. They blow the Japanese back off the one beach hex and the 0610 assault hex. After 14 turns, the Japanese could barely produce 14 American casualties for a minor victory but this was cancelled out, as the Marines had a Major Victory destroying over 60 Japanese steps. Most of the Japanese armor is burning, the only American armor lost was one step of LVT (A)-4 and the Shinhoto unit was destroyed by a M3/75 Halftrack on a side note. So the Sherman vs. Shinhoto match never happened but the Sherman unit took out it’s fair share of Japanese Infantry and Type 97’s while stacked with Marines Infantry for protection. Like in real life, the Japanese wasted their manpower and should have done this assault the night before when the American lines were less prepared. Instead then send their attack force demoralized back into the hills and jungle of Saipan, I even saw half step tank units heading that way to fight another day. I really enjoyed this scenario, as it used all four maps and it was my second played scenario with the actual Saipan materials. Red Beach was a much closer battle on my first play but this one has a lot of maneuver area, so there are a lot of possibilities and who does want to try pushing a lot of Japanese tanks on the map. I kind of felt like the Western or Eastern Fronts at times accept for the terrain. |
||||||||||||
| 0 Comments |
| Saipan: scenario #10: Tanks in the Jungle (the second time)! | ||||||||||||
|---|---|---|---|---|---|---|---|---|---|---|---|---|
Saipan: scenario #10: Tanks in the Jungle (Posting #1) I thought I would play this scenario again because when do you ever get to push 9 Japanese tank platoon counters around with three types even and I messed up badly the first time I played the finished version of this scenario. The major problems for the Japanese are coordinating the attacks of the SNLF on one map and the Army on the other and bring them together somewhat, also finding good terrain avenues for all that Japanese armor to attack in strength. The Major problem for the US Marines are long lines to defend, not knowing where the Japanese will hit, other than the obvious roads and trails but if you put too many units in just those areas the Japanese could easily slip Infantry through to the beach right through the jungle, sugarcane fields and other terrain. The other problem is that it is dark for the first 11 turns with only two hexes of visibility but star shells can be use but with little artillery available at this time, it needs to be used wisely. The first couple of turns the Japanese maneuver forward and try to hit the American’s infantry with armor direct fire, followed by infantry and off board artillery which the Japanese have a nice dose of in this scenario, to help with the dug-in Marines and town hexes. If the Japanese can find gaps in the thin stretched out American lines, they may be able to get units on the beaches or hex 0610, causing the Americans casualties to retake them. So far the Japanese have lost two steps of armor which count double and one infantry step vs. the US Marines which have lost one infantry step and one 37mm AT Gun step. Very close so far but very early in the battles. So far the Japanese are avoiding the Americans Tanks and AFVs with the exception the LVT (A)-4. Good stuff really enjoying replaying this scenario so far and the fact that it has four maps to maneuver on! Saipan: scenario #10: Tanks in the Jungle (Posting #2) I got in a few more turns and the Americans now have 11 points for eliminated Japanese steps verses the 4 lost American steps but situation is still very much in doubt, as the Japanese are setup to assault across the map boards in the next turn, as the darkness has helped them close in but at a price. The south is heavy engaged but in the northern central the Japanese have found a small gap where some armor has slipped through adjacent to a town with no AT weapon close at hand. In the far north, if the US Marines can knockout some of the SNLF infantry they could pull out and reinforce other troubled area in the south and central but those SNLF units are very hard to kill with a 8/8 morale in this scenario. I need to pull out either my M4 Sherman tank or M3/75mm halftrack or an LVT A4 unit to help with the Japanese armor in the south and central, as the Japanese Armor: Type 95/Type 97/Shinhoto have avoided the conflict with American armor but which to pull out of my already weak line, as most are committed in engaging Japanese Infantry. The Japanese off board artillery is really helping them suppress stronger American units. This one is far from over. Saipan: scenario #10: Tanks in the Jungle (Posting #3) A few more turns completed and it has turned into a slugfest in many areas but in some places the Japanese have avoided the conflict and found holes in the American lines. The Marines are readjusting their forces to try and plug these holes but these units are now losing their dug-in status. As it stands now, the Japanese have lost 23 steps as armor counts double and the Americans have lost 13 steps. The Japanese are doing better than my first game so far but there is a lot of turns left and at this rate many more casualties to come. I have no idea of the outcome, but the Japanese can’t waste too much more man power, unless it counts. The Americans lost the M3/75mm half-track platoon to a stack of 3 platoons of Japanese armor that activated first. I many have to pull that Sherman tank platoon out of the line after all to counter this Japanese armor that broke through in the north central area, as the Japanese armor in the south is still bottled up a bit. Saipan: scenario #10: Tanks in the Jungle (Posting #4) The battle continues! The Japanese have achieved a breakthrough in the south, as too many American units are tied up in the north. Now is the time to pull them out of the line and bring them south but unfortunately my Sherman Tank platoon got tied up in assault combat and I badly need to pull it out in the next turn and I lost a LVT A4 unit to those Japanese tanks, as the LVT’s of all types have just as weak as armor protection value as the Japanese tanks. It is whoever rolls higher first. I am playing the Japanese much better this game, as they are find the holes, not trying to force things as much as last time but still keeping the Americans pinned down in all areas of the map but now that the gaps have developed I need to play much better American strategy. We will see as currently it is a draw by victory points, as both sides have minor victories already and both sides are in position to move up to major victory conditions. Saipan: scenario #10: Tanks in the Jungle (Posting #5) After some pushing back and forth the Japanese easily achieved a major victory this time with the Americans losing over 26 steps eliminated and at least 5 beach hexes with Japanese in control and units on them! The Americans tried to deny the Japanese their major victory by taking back the beach hexes not could gather enough strength in all the locations to do it, in fact a platoon of Sherman tanks went down the coastal road out of a jungle hex and ran into stack of Japanese armor that consisted of two steps of Shinhotos and three steps of Type 97 tanks. The Shin rolled first against the Sherman tank rolling a 10 plus 1 for being adjacent, and 3 for the armor attack factor, thus the Sherman Tank took a step loss and went demoralized. My first Shinhoto victory against a Sherman tank! It wasn’t until the last turn when an American INF & HMG roll a 12 against a full step of SNLF INF eliminating both step and achieving and American Major Victory bring their total Japanese eliminated steps from 33 to 35 on almost the last dice roll of the game. If it weren’t for that dice roll it would have been a Japanese victory but instead it was a Draw as both sides achieved a Major Victory. This scenario played out much closer than my first attempt and all so close to a Japanese victory but a draw will work for now. The difference being, the Japanese didn’t waste valuable resources trying to push numbers through the whole front! They kept the Americans busy and occupied on the whole front but only pushed strong forces through the gaps or weak areas and didn’t waste their armor against American armor and AFV when possible. Bring my SNLF forces on map 82 instead of the north map 80 helped as well. The darkness helped the Japanese in this scenario and the nice off-board artillery but still with only 14 turn, this is a very tense scenario. |
||||||||||||
| 0 Comments |
| Marines try to hold the line | ||||||||||||||
|---|---|---|---|---|---|---|---|---|---|---|---|---|---|---|
Background: I've played 8-ish or so PG games so still somewhat new to the system. This was my first Saipan battle. The map was setup in a 2x2 grid longways with the Marine's backs to the ocean. Their goal was to keep the Japanese off the beach and to hold the radio station. When setting up I didn't take into account the strength of the Marines vs their Japanese counterparts. I never looked at my opponents units and just setup my line. As such I double stacked where I could and made a line in the jungle running from the Marine far right edge of the map across to the far left where the line dipped down to the ocean to avoid a swamp.On the left I didn't run the line to the edge of the map, instead I anchored it in the village along the coastline where the radio station was. I kept the armor in back on road so they can move to where they are needed and the on board art was stacked together near the beach. My opponent, being the crafty devil he is, pushed much of the Japanese troops along the Marine right edge of the map. There were some troops in the middle to pin my troops there and the Japanese Marines were deployed on the far left to hit the village. With it being night time and the spotting range being 2, there are many, many assaults. After fierce fighting the Japanese force a gap between the map edge and the Marine line and pour in towards the beach. The pinning force in the middle is crushed under US Marine firepower and assaults as the US commander finally figures out just how tough his troops are. On the far left the Japanese Marines slowly make their way to the unguarded beach but hold off attacking. A new line is hastily formed on the US right between the Japanese and the soft belly of the US forces so the US troops are now in a crescent along the beach. So far the armor on both sides have not been committed as each is wary of the other. As daylight approaches this changes as the Japanese small tanks move in to attack and try to break though the US right flank. A platoon of armor moves in to counter but is soon destroyed by an enemy armor platoon that manged to make it's way though the Jungle. Incensed by this the US Marines assault 3 platoons of tanks which goes amazingly well and the Japanese attack is beaten off. With the sky getting brighter the Japanese are desperate for victory. They have suffered enormous causalities (40+, enough for a US major victory) and their only hope is to inflict enough causalities of their own to cause a draw. In short, they go head hunting, fighting wherever possible. The US troops, sensing victory is near, disengage closer to the beach. One last organized attack is made by the Japanese Marines onto the far left flank guarding the beach village and radio station. The troops rush forward and slam into the Marine line. The Japanese are hit with effective art fire and massive close range firepower cutting their troops apart. All that is left is damaged, disrupted and demoralized troops. In the end the Japanese came within 3 steps of pulling out a draw. Very close but a US major victory is had. |
||||||||||||||
| 0 Comments |
| Tanques en la jungla o PG en todo su esplendor |
|---|
|
En este escenario una poderosa fuerza del ejército de tierra japonés, integrada por dos batallones de infantería del ejército regular y dos compañías de tanques, apoyada por un batallón de infantería de marina, con el apoyo de varias secciones de morteros y una poderosa artillería fuera del mapa (3x10, 2x16) atacan las posiciones defensivas americanas en las playas. Por su parte los invasores cuentan con dos batallones de marines, apoyados por varias secciones de morteros, cañones antitanque, baterías de artillería sobre el terreno (75mm, 105mm y autopropulsada), una sección de tanques Sherman, dos de blindados anfibios LVT A4 y artillería fuera del mapa (1x18). La batalla tiene lugar de noche y con escasa visibilidad (dos hexes casi todo el tiempo). Dado que la duración del escenario es breve (14 turnos), los japoneses se despliegan lo más cerca posible del enemigo y atacan inmediatamente. Al principio los japoneses llevan la peor parte, ya que sufren el fuego de oportunidad de los defensores, pero poco a poco se acercan a distancia de asalto tras una poderosa cortina de artillería y morteros. Los atacantes se benefician de su mayor eficiencia en el asalto y consiguen destruir algunas unidades de la vanguardia enemiga, que dado el amplio terreno a defender se han tenido que desplegar en unidades aisladas. Los japoneses no cometen el error de adelantar sus tanques, como correspondería a una verdadera "blitzkrieg", ya que saben que serían víctimas fáciles de los tanques americanos y de los marines. Por ello, golpean siempre en bloque y contra unidades previamente debilitadas por la infantería y artillería. Por ejemplo, tres secciones de tanques Tipo 97 asaltando conjuntamente supone golpear en la letal columna 24 de la Tabla de Asalto. De esta manera, los nipones consiguen abrir brechas en el dispositivo americano y logran controlar un hex de playa ya en el turno 12. Los contraataques americanos fracasan en su intento de desalojarlos a causa de la artillería y de la tenaz defensa de los imperiales. Al final los japoneses consiguen una brillante victoria mayor, al causar 22 steps de bajas al enemigo. Por su parte los americanos sólo consiguen destruir 18 steps. Comentarios: este es uno de los mejores escenarios que he jugado. Tiene, a mi juicio, la amplitud de espacio más idónea (cuatro mapas), el número suficiente de unidades (alrededor de 110 más los líderes) y la suficiente diversidad (tanques anfibios, tanques ligeros japoneses, ingenieros lanzallamas, artillería autopropulsada, unidades de infantería de marina japonesa...), así como la variedad de terreno (playas, hexes de ciudad, pueblos, jungla, jungla ligera, marismas, pantanos...) para hacer la partida muy interesante. Por otra parte se nota que el diseñador, Jay Townsend, es un jugador habitual y concienzudo. El escenario tiene la duración precisa y el despliegue adecuado para permitir la acción desde el turno primero; acción , tensión e incertidumbre hasta el último turno. En definitiva, un escenario extraordinario. |
| 0 Comments |

 Saip009


