
|
Green Beach Saipan 1944 #2 |
||
|---|---|---|
| (Defender) Japan | vs | United States (Attacker) |
| Formations Involved | ||
|---|---|---|
| Japan |  |
136th Infantry Regiment |
| Japan |  |
43rd Divisional Support Battalion |
| United States |  |
8th Marine Regiment |

| Total | |
|---|---|
| Side 1 | 1 |
| Draw | 4 |
| Side 2 | 4 |


| Overall Rating, 10 votes |
|---|
|
4.2
|
| Scenario Rank: 38 of 913 |
| Parent Game | Saipan 1944 |
|---|---|
| Historicity | Historical |
| Date | 1944-06-15 |
| Start Time | 08:45 |
| Turn Count | 16 |
| Visibility | Day |
| Counters | 138 |
| Net Morale | 0 |
| Net Initiative | 1 |
| Maps | 2: 80, 81 |
| Layout Dimensions | 86 x 28 cm 34 x 11 in |
| Play Bounty | 160 |
| AAR Bounty | 147 |
| Total Plays | 9 |
| Total AARs | 5 |
| Battle Types |
|---|
| Amphibious Landing |
| Urban Assault |
| Beach Control |
| Conditions |
|---|
| Entrenchments |
| Minefields |
| Off-board Artillery |
| Scenario Requirements & Playability | |
|---|---|
| Saipan 1944 | Base Game |
| Introduction |
|---|
|
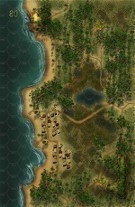
The 8th Marines expected Afetna Point to present a significant defensive position for the Japanese defenders on Green Beach. It straddled the boundary between the 2nd and 4th Marine Division landings. Therefore, the area received particular attention from the navel support fire, getting two days of heavy bombardment. What would the Devil Dogs find waiting for them? |
| Conclusion |
|---|
|
Despite two assault battalions landing on the same beach boundary, miraculously the Japanese defenders destroyed very few LVT's However, some of the amphibious tanks became engaged in extended firefights within Chalan Kanoa, slowing the advance of the troop-carrying Amtracs behind them. |

|

|
|---|
| AFV Rules Pertaining to this Scenario's Order of Battle |
|---|
|
| Imperial Japanese Army |
|---|
|


| Marine Corps |
|---|
|


| Navy |
|---|
|

| 1 Errata Item | |
|---|---|

|
The 8-3 Marine Infantry counter appears in most of the Saipan 1944 and Marianas 1944 scenarios, replacing the 10-3 DF valued Marine counters for those scenarios and is currently published in the most recent Saipan printing. (JayTownsend
on 2015 Dec 26)
|
| Saipan, scenario #2: Green Beach | ||||||||||||
|---|---|---|---|---|---|---|---|---|---|---|---|---|
After playing Red Beach a few months ago as a finished product, I took a very close Japanese lose and applied the lessons I thought I learned and used them on Green Beach. As the Americans I decided to clear the areas north down, that way I would only have to conquer half of the city hexes on map 80 and it would be the best place for the Japanese to defend down there and win as well, trying to deny the Americans their 28 by 4 corridor. The American landed most of their units north and worked their way south and things really got hung up on the center of the map but slowly the Marines steamrolled south and the battle for the city was on but very late in the game. At one point I almost gave up, as I had three critical assaults going on with only 2 turns left but those added APC’s LVT 4’s helped tilt those combat values in the Americans favor. It took the last assault dice roll to see if the Japanese Infantry unit would recover from demoralized status to see who won the whole game and it did not recovery, an American victory by the thinnest of margins by far. Great stuff, I love the amphibious assault scenarios! On a side note, the Japanese lost 34 steps and 8 leaders and the Americans lost 21 steps and 2 leaders with one Major at the bottom of the ocean. |
||||||||||||
| 0 Comments |
| Millions of bullets can't be wrong | ||||||||||||
|---|---|---|---|---|---|---|---|---|---|---|---|---|
This is the second of the major amphibious landing scenarios, and the US was able to claw out a victory. In the first landing, I landed the US forces as far away from Japanese defenders as possible, but then lost the battle because they couldn't come to grips with and defeat the Japanese in time. In this battle I concentrated the landings right in the midst of the defenders, suffered higher initial casualties, but ultimately succeeded. I also changed the tactics of the Japanese defenders. In the first battle I moved them around a lot in reaction to the attack, counterattacking locally in many places. Here I largely left the defenders in place, in the best cover they could get. They won the first battle, even though they suffered many losses, but here they lost even though for hours they took no losses at all. My experience of PG in general is that I tend to waste my forces by being too aggressive, not using the clock to patiently develop attacks. In these scenarios the aggressive approach paid off. The clock was limited and the Marines had crazy firepower available. I like that the scenario threw me a curve ball like this, it shakes up my attitude toward the game and keeps it fresh. |
||||||||||||
| 0 Comments |
| Failing to Hold | ||||||||||||
|---|---|---|---|---|---|---|---|---|---|---|---|---|
This beach landing scenario gives lots of opportunity to try an alternative approach, both to the approach taken in scenario 1 and to the ways others have reported playing it in their AARs. I split my attack force with the Marine Colonel taking the force containing all the engineers and Flame units to go after the city on the southern board, while the rest hit the beaches to clear the Japanese from the north end trying to clear the necessary 28 hex by 4 hex area to be completely clear of Japanese troops. The Japanese win if that doesn't happen and they control the whole multi-hex town on the southern board. This sort of contradicts since the US has to take at least the northern 2 hexes of the town to clear the 28 hex area by my count. But in setting up the Japanese side, I set out the AT guns to cover as much beach front as possible and set up outposts of HMGs and infantry in every town and heavy jungle hex possible facing the beaches. The Marines got ashore in pretty good shape, only having lost one LVT offshore, and that LVT having one of the Flame engineers and an LT. The assault on the town went pretty well with the Marines rolling up the north flank at the same time they hit it from the shore, and Japanese had lost about half of the town when my time limit expired. The Marines to the north had cleared most of the northern board, but the small hill along the beach, right in the middle of the board, still had a pair of AT guns defended with an infantry and an HMG and lead by a good Captain. With the number of turns available, it was very likely that the Marines would have taken that hill from the north, but funny things happen when one gambles on what is likely. With the town having lost about half of it's area to the Marines, that kept the Japanese from having kept the whole town, but now in looking at those victory conditions again, this isn't a draw as much as a Japanese win since the Marines still don't have the full 28 hex length area they need. Good game all the same, and one I will be anxious to try again in face to face play when I have the time to run the full scenario. In review, the Japanese failed to take advantage of their infantry bonus by deluting their strength mixing with AT guns and HMGs. Japanese OBA actually did more friendly fire damage than damage to the enemy, especially since the Marines got just aobut the best quality leadership in the mix and the Japanese drew mediocre at best, allowing Marines to shrug off many of the OBA shots but the friendly fire landing adjacent didn't get shrugged off so well. Great game. |
||||||||||||
| 0 Comments |
| Had it made! | ||||||||||||
|---|---|---|---|---|---|---|---|---|---|---|---|---|
The American Commander tried a center punch with an eye toward mopping up the flanks (with emphasis on the Japanese town that would have given them the victory). Everything was going well, the timetable was within reach and then I threw eight sevens in a row... which really threw a wrench in the works. (Now THAT WAS a bit uncalled for.) At any rate, the Americans did not fully integrate their movements and the Japanese, with cleverly placed minefields, stopped the Americans from switching units from flank to flank easily. (Rommel WAS right, "meet them at the waters edge and throw them back into the sea!") |
||||||||||||
| 0 Comments |
| Study in American beach landings | ||||||||||||
|---|---|---|---|---|---|---|---|---|---|---|---|---|
This scenario is an interesting study of American beach landings. There is two approaches to there victory, land in uncontested area's and build up an attack or land straight into the Japanese defenses. Both options are viable but both will have pitfalls to success. Slamming headlong into the Japanese will incur man casualties while a landing and build up will cost time and with sixteen turns they will need to move fast. The Marines have the firepower to close and attack with DF and assaults, but lacking BF to those times needed to soften up the targets. They will have plenty of leaders with good bonuses so they should be able get them moving, but terrain will limit some for that command and movement. Planning and terrain knowledge will be key to getting the most out of the Marines. As for the Japanese, they have a small defense force with good AT capabilities for defense. Supported by OBA with two shots of 30 and 42 will make the Marines keep their heads down. They also have good static defenses with entrenchments, mines and dugin units. They will tend to setup in Chalan Kanoa as well as key areas along the landing beaches. With my play they concentrated the units in village hexes of Chalan Kanoa . To the south the Japanese setup, the 47mm in the northern village of board 80 and the 37mm in the middle village. Both will be able to cover the landing in the south. A company is stationed on the 40m hill to the south to hassle the Americans that try to control the southern beaches. In the north a long platoon and LT cover the northern bay on board 81. Everyone else is in the town. The town is the key for the Japanese, but I feel that the best that the Japanese can do is get a draw for the game as I don't think they can hold off the American hordes for long. For the American landings, as states two approaches. I thought about a direct landing just south of Chalan Kanoa but the AT cross fire would be deadly on the advancing AMTRAC's. Same for going straight at the village. But the issue of clearing the beaches and town required them for be close. I choose a two pronged build up approach. Landing a battalion to the southern end to clear board 80, while the other two battalions land in the bay to the north. This approach will minimize the AT fire from the Japanese and allow the Americans to build a force to clear the beaches. The first turn starts with the LVT A1 and A4's advance toward the two landing sites. Japanese artillery open up on the open-top tanks scoring a hit on a LVT A4. So much for the minimal AT fire. The next turn the Japanese fire repeats its killing capability with a second loss. The LVT's appear as well and the second OBA scores a hit on the LVT's. This is starting to be a blood bath for the Americans. But the Marines do get to the beaches and start to advance. To the north the Marines need to deal with the lone platoon and leader spotting for the OBA. They quickly defeat them and begin to move inland and south along the beach. A trail is spotted and allows the Marines to advance around the flank of the Japanese. They also push down the beach road to directly advance on Chalan Kanoa. As they move down the Japanese open fire on the Marines. This stacks up the Marines on the road. As they jump off the AMTRAC's and return fire. They boldly advance platoons but quickly get shot up by the heavily stacked Japanese. For now the Marines will need to be satisfied with trading shots as the AMTRAC's won't go through the jungle hexes very will. But the flanking force makes progress and hits the Japanese supporting mortars and guns. The Marines are able to destroy the 75mm gun and drive the mortars into the jungle. This opens the inland road to CHalan Kanoa. To the south the battalion lands near the southern village and moves inland. The Japanese platoon on the 40m hill moves down to confront the Marines. They continue to spot for the OBA and they are able to score a step loss on a INF. But their best defense is to slow down the American advance. Blocking and moving, blocking and moving slowing the Marines advancing. But as they close on the center village the Japanese company needs to make a stand. They try to hold out but are easily overrun by the Marines. But time has been lost and the Marines have to assault the entrenched village with AT guns. OBA fire keeps some of the Marines out and the Americans get in but are disrupted, burning more precious time. Bu back to the north. With the Marines on the east side of Chalan Kanoa as well as reduced force to the north, the Marines coordinate an attack on the town. Moving through the cane fields the AMTRAC's drop off their Marines right on the edge of the village. The Japanese defenders don't have much they can do except take DF shots at Marines. The Marines charge into Chalan and contest the first hexes eventually reducing and killing the Japanese defenders. At this point the Americans secure the draw, next the win. But their are only four turns left and more beach to secure. To the south the Marines are having trouble reducing the entrenched Japanese in the middle village. They are able to bring up the FLM unit that removes the first fire effect of the entrenchment. This gives them the edge to destroy the INF and 37mm gun, but they have one more to go. Fortunately they sent a company and the LVT A1's and A4's to get position on the northern village. The Japanese have placed the 47mm in the entrenched village. With this deadly gun it will be hard to bring in LVT's with Marines, so they move the A1's and A4's in first. Luckily, the 47mm misses with there opening shots. The LVT's move the Marines to close, but the must take care of a dugin INF first. They get into the hex for the assault but are bogged down when they are disrupted. This requires the LVT A4 and A1 to close on the AT gun on their own. This ends badly as the A1 is reduced leaving the A4 to close on their own but this does not work as the 47 mm is able to reduce the A4 as well. This ends the advance of the southern force. To the north the battle for Chalan Konana continues, with the Japanese slowly giving more town hexes. The northern force starts a second push for the village, but again is cut down by Japanese HMG and casement fire. Even a second amphibious assault across the marshes is not able to dislodge the Japanese defenders. The forces advancing from the south clears the southern end of Chalan Kanoa, but does not have time to assault the stubborn defenders. In the end a draw. With a couple of more turns they probably could have taken the village. As for the Japanese, as stated earlier the best I feel they can do is a draw. |
||||||||||||
| 0 Comments |