
|
Australia Will Be There South Africa's War #14 |
||
|---|---|---|
|
(Attacker)
Germany
(Attacker) Italy |
vs |
Australia
(Defender)
Britain (Defender) South Africa (Defender) |
| Formations Involved | ||
|---|---|---|
| Australia |  |
2/13th Infantry Battalion |
| Britain |  |
1st Essex Infantry |
| Britain |  |
1st Royal Northumberland Fusilier Machine-gun |
| Britain |  |
4th "Black Rats" Armoured Brigade |
| Britain |  |
4th Royal Tank Regiment |
| Germany |  |
15th Panzer Division |
| Germany |  |
Kampfgruppe Bottcher |
| Italy |  |
132ª Divisone Corazzata "Ariete" |
| South Africa |  |
4th South African Armoured Car Regiment |

| Total | |
|---|---|
| Side 1 | 0 |
| Draw | 2 |
| Side 2 | 1 |


| Overall Rating, 4 votes |
|---|
|
4
|
| Scenario Rank: --- of 913 |
| Parent Game | South Africa's War |
|---|---|
| Historicity | Historical |
| Date | 1941-11-29 |
| Start Time | 13:00 |
| Turn Count | 48 |
| Visibility | Day & Night |
| Counters | 170 |
| Net Morale | 0 |
| Net Initiative | 1 |
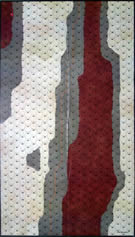
| Maps | 2: DR4, DR5 |
| Layout Dimensions | 116 x 88 cm 46 x 35 in |
| Play Bounty | 213 |
| AAR Bounty | 165 |
| Total Plays | 3 |
| Total AARs | 2 |
| Battle Types |
|---|
| Hill Control |
| Road Control |
| Rural Assault |
| Conditions |
|---|
| Off-board Artillery |
| Terrain Mods |
| Scenario Requirements & Playability | |
|---|---|
| Afrika Korps | Counters |
| Desert Rats | Maps + Counters |
| South Africa's War | Base Game |
| Introduction |
|---|
|
The Afrika Korps' planned "concentric attack" finally hit the New Zealand Division late in the afternoon of the 29th. Over the same ground where the motley troops of the "Afrika Special Division" had made their raid on the 28th, the much-depleted 15th Panzer Division now advanced despite heavy British artillery fire. Overrunning a British battalion, the German infantry dug in to await an Allied counterattack. |
| Conclusion |
|---|
|
The German advance crushed the Essex battalion and occupied their positions, while to their south infantry from the Afrika division did little and the Italians from Ariete carried out their part of the plan by skirmishing with the British armor to prevent them from intervening in force. But with darkness came a fresh Australian battalion from the Tobruk garrison, their distinctive greatcoats flapping behind them and fixed bayonets in front. Along with two dozen closely-packed British tanks, they in turn overran the German infantry and threw the panzer division back beyond its starting point. |

|

|
|---|
| AFV Rules Pertaining to this Scenario's Order of Battle |
|---|
|
| Army |
|---|
|


| Army |
|---|
|


| Heer |
|---|
|


| Regio Esercito |
|---|
|


| Army |
|---|
|


| 5 Errata Items | |
|---|---|

|
Two British infantry have their full strengths printed on the back. They should both be "2-3" when reduced. (Shad
on 2010 Dec 15)
|

|
The reduced direct fire value of the Heer HMG became 5-5 starting with Fall of France. (plloyd1010
on 2015 Jul 31)
|

|
The Pz IVe appearing in the original Panzer Grenadier game had an Anti tank value of 4-7. As of Afrika Korps (2002), continuing onward through the 3rd and 4th edition games, the anti tank value has been 4-4. (plloyd1010
on 2016 Jul 25)
|

|
All SPW 251s have an armor value of 0. (Shad
on 2010 Dec 15)
|

|
Four counters (ID#s: 1502 to 1506) have the incorrect NATO symbol (infantry in lieu of armor). (Shad
on 2010 Dec 15)
|
| Mayhem in the Desert | ||||||||||||||
|---|---|---|---|---|---|---|---|---|---|---|---|---|---|---|
Played FtF v Vince this is a two map desert battle with 48 turns and five nationalities. Axis troops have to clear a ridge of all Allied units and not loss more than 20 steps. The Axis have good armour support and have even better off board artillery support to assist the mixed German and Italian infantry making the attack. The dug in British have reinforcing Australian INF and HMG coming on turn one to turn back the tide. Throw in South African armoured cars and Valentine, Crusader and Stuart tanks you have all the makings for an epic battle. The first turns were fairly quite as Herr Hughes positioned his attack line while trying to avoid losses from the Commonwealth artillery, the tanks skirmished to the south but with little effect the British tanks eventually retreating to the ridge line to protect the rear of the Allied position. The German commander ordered a flanking attack in an aim to encircle the dug in British troops but the Stuart light tanks came to the rescue and nipped that attack in the bud causing heavy Italian casualties. The Panzer's then attacked and pushed the Valentine's back with some losses. Only a Aussie 2 pdr holding them up for a while. Meanwhile the German artillery was all the time pounding the line and Commonwealth losses were heavy particularly among the officers as they moved from trench to trench encouraging the infantry. However the German losses were also creeping up and the British commander saw a chance to inflict more when a lone PzII platoon was spotted, attacked by overwhelming Brit armour it was eventually eliminated pushing the Axis step losses over 20 this meant that there would be Axis victory could there be an Allied win. No is the short answer as the Commonwealth counterattack ran into a storm of fire and wilted away in very quick time. This is a cracking scenario with lots going on, never enough time to do what you want (we always play FOW and there were several times turns ended just at the wrong time for both players) and a good mix of units. It would merit a 5 rating but I feel that the VC are a little too simplistic and that a draw is in fact the most likely result in any game between well matched opponents. |
||||||||||||||
| 0 Comments |
| Australia Wished They Wern't There ! | ||||||||||||||
|---|---|---|---|---|---|---|---|---|---|---|---|---|---|---|
This scenario for me narrowly misses a ‘5’ rating ! It is a sweeping two map desert battle involving Germans, Italians, British, Australians and South Africans. It has lots of different counter types and at some point, both sides need to attack. What’s more, I highly doubt that two battles of this scenario would ever pan out the same as there are many different options for deployment, entry and maneuver so as to minimize the chance of repetition. Why not a ‘5’ then and just a ‘4’ instead I hear you bay ? The VC’s were just a little short on being cute. I have no recommendations as to what they could have been instead, but the way it is set up probably lends more to a draw although victory by either side is definitely still feasible. Well on to the report then I guess. I will admit to being more severe on the allies than Wayne’s report as he made it sound a lot closer in battle terms than it was. Make no mistake here, the Allied losses were Eastern Frontesque losing 66 step equivalents to the Axis 23 and no less than 12 leaders (a record for our games). Had the battle continued there would probably have been a sack-full more Allied losses too. To battle ! At 1300 hours, the Axis forces advanced from the west in three main prongs. The northernmost pushed along the major ridge and high-ground where English troops from Essex were covering. The centre prong, slightly to their south and named Kampfgruppe Bottcher was next and south of this gruppe was an Italian force of Bersagliari. Both the centre and Italian prong needed to make for the ridge very quickly in order to get out of the enemy observers sights working for the numerous allied artillery support. Whilst making this desperate dash over the following 2 hours, the Italians lost a number of steps before reaching relative safety. Further south, a Germo-Italian tank force made up of PzIII’s & IV’s as well as M13’s and Sem 75/18’s pushed deep to the east in order to head off British armour advancing from the south-east. These Axis tanks also chased off a large force of South African armoured cars. Whilst the Axis forces gathered their troops to concentrate on the ridge and wait for dusk, thus allowing their forces to advance more coherently as one, the English were soon realizing a serious mistake. Due to earlier communication errors (misread VC’s by their commander), they would, should they desire a chance of winning, now be required to deploy their line further in advance of their current position and would be backed up by a large Australian force making their way to their aid. The trouble with this new advance was the horrendous shelling they were getting from the massive OBA support of the Axis being called in by enemy artillery spotters. Four steps were lost within the first hour with many many more to follow. Once the Axis forces were grouped and began their advance to bring the two sides into shooting range, it was most definitely the Axis that was getting the better of the exchanges. Over the first 10 turns, 3 Axis steps were lost to a total of 10 Allied and this ratio would continue throughout the battle. By 1600 hours it certainly appeared if the German and Italians were getting the upper-hand in the battle as the pressure being put on the English/Australian line was forcing it back. Using their artillery they were weakening parts of the Allied line before sending infantry to close-in each time. Meanwhile, the Allies seemed to be trying to frantically plug gaps. Further more, a tremendous toll on Allied officers was being extracted as they had to place themselves at the forefront of any action. However, help was not far away! A substantial force of around 6 platoons of Stuarts had slipped the German/Italian armoured net and made it back to the main battle location and here it was that the German plans were eventually thwarted. It had been the German doctrine in this battle to use observers to bring down the OBA, pummeling on the enemy lines whilst at the same time, keeping their own forces OUT of sight of the enemy in the ever growing gloom BUT keep them within range of the spotters should the enemy try and advance upon them. The Stuart tank force completely befuddled this plan. Coming in concentrated in two groups, they made for parts of the Italian line where no AT guns were yet in place. Despite a small band of Bersagliari assaulting some of these Stuarts, the tanks machine guns mowed many of them down causing plenty of casualties (3 steps). At the same time, the Allied OBA observers were also calling in some pretty accurate artillery fire of their own. Just before 1800 hours, these two factors combined had suddenly driven Axis losses from 8 steps to 16 steps in just 15 minutes. It had been a tragic game turn despite the Allies 30 step loss equivalents so far. From here-in, the Axis forces needed to step cautiously so as not to lose too many casualties in the battle. Overall, they managed a pretty good job of it and at the same time guided their tank force into an advantageous tank battle with the enemy Valentines and Crusaders. But slowly, losses were inevitable, and finally besting a German PzII platoon, some British armour eliminating them meant that 21 Axis steps were too many for the Germans to gain a win. Now the Allies needed the Axis step count to exceed their own in order to win themselves, but with well over 35 step equivalents lost, there was only one way to possibly achieve this. Attack ! And attack they did, but it was oh so basic. Lines of infantry surged forward in scenes more reminiscent of 1914 than 1941. Two companies of Australian and British infantry leapt forward at the Italian line and were cut down and bombarded to pieces in minutes. Even their Lieutenant-Colonel and a Captain perished in the ill-fated charge ending repeating such ideas obsolete and very quickly too . In all, including tank losses, the allies from turn 21 to 27 lost no less than 22 Infantry steps and 7 tank steps. And so it was. With the Allies the only side that could supposedly win had they overturned the step-loss deficit, and trailing by a huge 66 to 23, the Allied commander called a halt to the battle and settled for what really was, from a biased pen such as mine a phyric draw for him. With the title ‘Australia Will Be There’, one must see the irony with the losses involved that it should have been named ‘Australia Probably Wished They Weren’t There’ ! A classic and very involving desert battle this one. |
||||||||||||||
| 0 Comments |