

| Total | |
|---|---|
| Side 1 | 1 |
| Draw | 1 |
| Side 2 | 0 |


| Overall Rating, 2 votes |
|---|
|
4
|
| Scenario Rank: --- of 913 |
| Parent Game | Road to Dunkirk |
|---|---|
| Historicity | Historical |
| Date | 1967-06-08 |
| Start Time | 17:00 |
| Turn Count | 13 |
| Visibility | Day |
| Counters | 46 |
| Net Morale | 0 |
| Net Initiative | 2 |
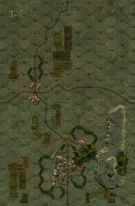
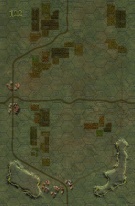
| Maps | 2: 120, 122 |
| Layout Dimensions | 56 x 43 cm 22 x 17 in |
| Play Bounty | 154 |
| AAR Bounty | 171 |
| Total Plays | 2 |
| Total AARs | 1 |
| Battle Types |
|---|
| Delaying Action |
| Exit the Battle Area |
| Hill Control |
| Urban Assault |
| Conditions |
|---|
| Hidden Units |
| Reinforcements |
| Smoke |
| Terrain Mods |
| Scenario Requirements & Playability | |
|---|---|
| Road to Dunkirk | Base Game |
| Introduction |
|---|
|
After the failure of the Somme attacks on 27 May, the 3rd Armoured Brigade had been bled white and went back to Rouen to refit. The 9th Royal Lancers, brought up to strength by a composite squadron of Bays and 10th Hussars, had been supporting 51st Highland Division both in its defensive battle on 5-6 June and in rounding up infiltrators on the south bank of the Bresle River. Early on 8 June, the regiment set out to join the rest of the division east of Rouen but it was eventually deployed on the railway lines facing east. Meanwhile, 5th Panzer Division pushed towards Rouen. |
| Conclusion |
|---|
|
Behind the Rouen railroad line, the British tanks fought a sharp little action in which their 2-pounders showed themselves quite able to deal with Panzer IIIs when facing equal numbers. German strength was still overwhelming and the regiment was lucky to escape and cross the Seine River to temporary safety. |

|
|
|---|
| AFV Rules Pertaining to this Scenario's Order of Battle |
|---|
|
| Army |
|---|
|


| Heer |
|---|
|


| 2 Errata Items | |
|---|---|

|
All Bren carriers should have a movement value of 7. (Shad
on 2010 Dec 15)
|

|
The reduced direct fire value of the Heer HMG became 5-5 starting with Fall of France. (plloyd1010
on 2015 Jul 31)
|
| Road To Dunkirk, scenario #43: Shot Noise | ||||||||||||
|---|---|---|---|---|---|---|---|---|---|---|---|---|
Road To Dunkirk, scenario #43: Shot Noise A fun asymmetrical, puzzle scenario to play and figure out. I played solitaire so no hidden units on this game. The British have all armor units and one leader to ride around in the Bren unit to hopefully defend some city hexes on map 120. The Germans have both Infantry and armor units. The Germans have five victory objectives, while trying not to lose too many steps. The major fighting will be on the 20-meter hill mass and the major town on map 120. The British setup most of their A9 & A13 Armor on the hill to strike at the eastern road approaches of the main German Army and put the rest of their A10, Matilda I & Mk VIb units defending in the town hexes and blocking the hex 0717, a German exit and victory condition. The German get a pretty large Infantry reinforcement group on turn 4 of this 13 turn scenario. With only 13 turns the Germans have a lot to do but don’t want their weaker units to get slaughtered by the British blocking armor, so they lead with their Pz IIIE, Pz IVD & Pz II armor. They lose a Pz II step early but a shooting match begins holding up the Infantry until they unload and flank units either into town or help assault British armor on the hill, with the help of their Pz Is. After the Germans overcame the hill fighting the larger town on map 120 became the major focus of this battle. The Matilda I is a tough unit to knockout but only has machineguns and no main gun, so assaulting it with Infantry, Engineers and armor, plus a leader was the best solution. By the end of turn 13, the German control all the hill hexes and more town hexes than the British, as they still has some demoralized and disrupted units in town but had a full strength A10 armor unit blocking the Germans exit hex, hex 0717. The Germans get 4 out of 5 victory conditions for a Minor Victory. With that said, I left the British A10 in a blocking position for two long, it should have taken action against some of the weaker German armor in the later turns, as the Germans would not of had time to exit 10 steps anyway, and it could have given the British a Draw or even a Minor Victory, but even that would have been close, depending on the dice. A fun quick scenario to play, with only 13 turn, action happens fast and planning is difficult. |
||||||||||||
| 0 Comments |