

| Total | |
|---|---|
| Side 1 | 1 |
| Draw | 2 |
| Side 2 | 0 |


| Overall Rating, 3 votes |
|---|
|
3.33
|
| Scenario Rank: --- of 913 |
| Parent Game | Road to Dunkirk |
|---|---|
| Historicity | Historical |
| Date | 1940-05-15 |
| Start Time | 15:00 |
| Turn Count | 15 |
| Visibility | Day |
| Counters | 81 |
| Net Morale | 0 |
| Net Initiative | 1 |
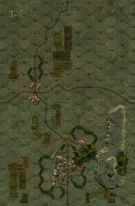
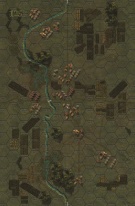
| Maps | 2: 120, 125 |
| Layout Dimensions | 56 x 43 cm 22 x 17 in |
| Play Bounty | 163 |
| AAR Bounty | 171 |
| Total Plays | 3 |
| Total AARs | 1 |
| Battle Types |
|---|
| Inflict Enemy Casualties |
| River Crossing |
| Urban Assault |
| River Control |
| Conditions |
|---|
| Anti-infantry Wire |
| Entrenchments |
| Terrain Mods |
| Scenario Requirements & Playability | |
|---|---|
| Road to Dunkirk | Base Game |
| Introduction |
|---|
|
In accordance with Plan “D” the British 3rd Division took up its position on the line of the River Dyle, deployed in and about the old city of Louvain. The defenses in this section of the Dyle had been slightly improved by the Belgians despite their strict neutrality. Opposite 7 Brigade, north of the town, the Germans heavily engaged the Coldstream Guards throughout the morning but every move to throw pontoons across the river was checked by accurate fire from guns and mortars. In the afternoon, the 2nd Company moved back to the eastern outskirts of Herent and the Germans took the opportunity to cross the Dyle canal and made a lodgment in 1st Coldstream’s sector. |
| Conclusion |
|---|
|
A reserve company mounted a quick counterattack supported by medium and field artillery and two tank troops of the 5th Royal Inniskilling Dragoon Guards. The “Skins” – normally 4th Division’s armored recon regiment – were temporarily supporting 3rd Division and their Adjutant was Lt. (later General) “Monkey” Blacker who was to command the division 25 years later. He remembered that the counterattack had little difficulty in restoring the situation, the enemy having pulled back under the weight of artillery fire. |

|
|
|---|
| AFV Rules Pertaining to this Scenario's Order of Battle |
|---|
|
| Army |
|---|
|


| Heer |
|---|
|


| 4 Errata Items | |
|---|---|

|
All Bren carriers should have a movement value of 7. (Shad
on 2010 Dec 15)
|

|
Two British infantry have their full strengths printed on the back. They should both be "2-3" when reduced. (Shad
on 2010 Dec 15)
|

|
The reduced direct fire value of the Heer HMG became 5-5 starting with Fall of France. (plloyd1010
on 2015 Jul 31)
|

|
The morale and combat modifiers of German Sergeant #1614 should be "0", not "8". (Shad
on 2010 Dec 15)
|
| Static Defense Loses Cohesion |
|---|
|
I wavered between rating this game a 2 or a 3. It is not a fluid scenario. The tGermans have no AFVs or transport. They are attacking a well defended line behind a major river. The British ha more of everything- Troops, armor, artillery and .Casemates ( even the biggest one, a 16-4 direct fire). In addition, they have the entire compliment of wire that the game provides (12 pieces) and a couple of entrements. All of this provides for a very well equipped defense especially in the middle what with a large town behind a major river (the Dyle). The British could also throw 50 points of artillery a shot. The Germans also had a fair amount of artillery- 48 points/shot. The historical result was somewhat different. The German 19th Infantry Division pushed the British 3rd Infantry Division (Reinforced) out of Louvain, but suffered serious casualties. They then had to pull back out of the town. So what happened in this scenario? The Brits couldn’t shoot straight, especially with their artillery. The Germans, however, had opposite luck. Their artillery zeroed on the strongest position in Louvain. This hex had 32 direct fire points. The casemate disintegrated as I made a die roll to determine which unit in the stack was hit with the X. But this area was not the focus of the German attack. It was the small town on the west side of the Dyle, south of Louvain. Here the Germans put pressure on the 3rd Division by attacking with the strongest amount of direct fire that they could muster, led by a lieutenant rated 10-2-1. A vicious assault battle developed. The British tried to respond with equal force but couldn’t match the German strength. Both sides held one hex each for six turns. But the Brits lost this battle of attrition and its line weakened as a result. They lost six steps trying to hold this. town. The 19th Infantry lost one. The 3rd was doomed in this surprisingly one sided shooting match. However, the Germans were too weak to take Louvain and satisfy the major victory condition of taking eight town hexes. But they did win a minor victory by building the pontoon bridge and eliminating 10 British steps. |
| 0 Comments |