
|
Ambush Road to Berlin #65 |
||
|---|---|---|
| (Attacker) Germany | vs | Soviet Union (Attacker) |
| Formations Involved | ||
|---|---|---|
| Germany |  |
11th SS "Nordland" Panzer Division |
| Soviet Union |  |
19th Mechanized Brigade |
| Soviet Union |  |
219th Tank Brigade |

| Total | |
|---|---|
| Side 1 | 1 |
| Draw | 0 |
| Side 2 | 1 |


| Overall Rating, 2 votes |
|---|
|
3
|
| Scenario Rank: --- of 913 |
| Parent Game | Road to Berlin |
|---|---|
| Historicity | Historical |
| Date | 1945-04-18 |
| Start Time | 09:00 |
| Turn Count | 30 |
| Visibility | Day |
| Counters | 137 |
| Net Morale | 1 |
| Net Initiative | 0 |
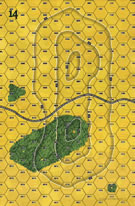
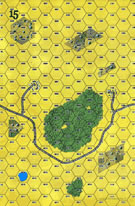
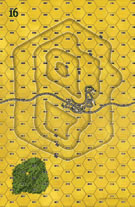
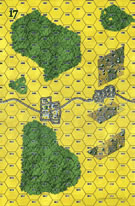
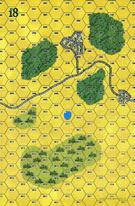
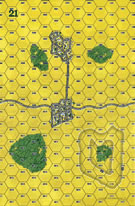
| Maps | 6: 14, 15, 16, 17, 18, 21 |
| Layout Dimensions | 86 x 84 cm 34 x 33 in |
| Play Bounty | 142 |
| AAR Bounty | 171 |
| Total Plays | 2 |
| Total AARs | 1 |
| Battle Types |
|---|
| Inflict Enemy Casualties |
| Meeting Engagement |
| Road Control |
| Conditions |
|---|
| Off-board Artillery |
| Scenario Requirements & Playability | |
|---|---|
| Road to Berlin | Base Game |
| Introduction |
|---|
|
With their first lines of defense breached, the Germans finally summoned reinforcements to help stem the Soviet assault. Fuel shortages left many troops stranded along the march route and trying to catch up on foot, but the armored elements of the 11th SS "Nordland" Panzer Grenadier Division showed up on the morning of the 18th and sought out ambush positions to await the expected Soviet tank attack. They had arrived just in time. |
| Conclusion |
|---|
|
The Germans separated their armor into combined-arms teams of Tiger platoons supported by assault guns and infantry, and took up positions with wide fields of fire. The Soviets attempted to rush the Germans before they could dig in, and flung between 70 and 100 tanks at the ridge line. The Germans claimed to have destroyed more than 50 of them before the attacking force broke up. |

|
|
|---|
| AFV Rules Pertaining to this Scenario's Order of Battle |
|---|
|
| Heer |
|---|
|


| Schutzstaffel |
|---|
|


")
")
")
")


| Army (RKKA) |
|---|
|


| 4 Errata Items | |
|---|---|

|
All SPW 251s have an armor value of 0. (Shad
on 2010 Dec 15)
|

|
The reduced direct fire value of the SS HMG is 5-5 in Beyond Normandy and Road to Berlin. (plloyd1010
on 2015 Jul 31)
|

|
The reduced direct fire value in Kursk: Burning Tigers is 4-4. (plloyd1010
on 2015 Jul 31)
|

|
Kommissars never get morale or combat modifiers. Ignore misprints. (Shad
on 2010 Dec 15)
|
| Just in Time Indeed | ||||||||||||
|---|---|---|---|---|---|---|---|---|---|---|---|---|
The Soviet player is faced with some interesting choices here. There are two main E/W roads either of which can be cleared for a victory. The problem is that the Soviets must cross two board widths to reach the Westernmost boards (14 & 16) which represent the Seelow Heights. Thinking that playing for a set-piece approach using the massive Soviet OBA and an infantry screen behind which armored forces (T-34 & M4's) could advance and work for crossfires is balanced by the problem of giving the SS Nordland elements an opportunity to dig-in. So more out of curiosity than thinking about the "best" strategy, I decided to see whether the Soviets could "swarm" the Germans. The Germans essentially divided their total force into two equal parts (with the Puma actually moving between to two large (60m) hills in the center). The Soviets deployed six T-34s + 3M4 with SMG tank riders in the south along with the two engineer platoons; the nine remaining M4s + SU-76s to the north along with all of the infantry and HMGs. The Germans didn't get dug-in, but the Russians were slowed sufficiently simply due to: being strung out along a road; lack of significant leadership (few leaders and none with a combat bonus); the delay due to unloading; and simply keeping organized for an advance gave the Germans the two-three turns needed to set their skirmish line of grenadiers (with 2xHMG's holding the roads) on the eastern slopes. The German armor, including a platoon of PzVIb's sat at 40-m surveying a ripe killing zone (with hetzers or StuGIIIG + 75mm gun holding the flanks). The Russians did their best to infiltrate or move into/past the blockage, but OF proved devastating to their 7/6 morale. The RKKA armor was badly shot up in two turns. By turn seven, the Germans had lost a Gren platoon to OBA; a half-step each of StuG and Puma (which had made an "end-around" and shot up some Soviet M3's and four of their SPW-251's. The Soviets ten full armored units (half their force); six steps of INF/SMG; 4 M3's; with DEM and DIS units scattered about, with survivors cowering/recovering in the hill and town on board 21 or the town and forest on board 18. Extraction of the units still surviving adjacent to the German line costs further steps and, though the Germans did not pursue, it was Turn 18 before most of the Soviet survivors were in any way "regrouped." Whilst this left 12 turns in the scenario, I could see no reasonable hope for the Soviets to clear a road, especially given that SS Nordland were now all dug-in on higher terrain. I should add that the German Victory was thus "minor" as the Russians did have an M3+T-34 hunkered down on the 20-m line of board 16 just west of the 04xx line. The Germans just saw so reason to pursue them. Of course, this is just one play, so it is still a question as to whether the swarming approach might work. The Russians just don't have much time to get themselves organized and having their Col or Maj DIS/DEM early breaks up the chain-of-command effectively. It doesn't help knowing that the Tiger II's can see and hit effectively (certain trucks and M3's) from 14 hexes away (and behind towns and woods!) given they are parked at 40m. Another approach I considered was swinging the southerly group up to the north: this might work well, but it then invites a German counter-attack from their southern group (i.e. advancing east to board 18, then north into 21). Yet another might be a dash-and-cover for what limiting terrain is available. The problem though is that the Russians eventually have to come to the road ... they can't simply move past the Germans and exit: the VC's demand clearing one of the E/W roads. So I rated this one a '3' because, apparently like history, the Soviets were cut to pieces. But I think this one has a lot of potential for alternative, less frenetic attacks: though whether they might be successful ... The bottom line is approaching across flat, clear terrain a King Tiger holding the high ground with a bit of armor and infantry screening support is not a pleasant situation. |
||||||||||||
| 0 Comments |