
|
The Ego Unleashed Road to Berlin #60 |
||
|---|---|---|
| (Attacker) Germany | vs | Soviet Union (Attacker) |
| Formations Involved | ||
|---|---|---|
| Germany |  |
21st Panzer Division |
| Germany |  |
Führer Begleit Brigade |
| Soviet Union |  |
111th Tank Brigade |
| Soviet Union |  |
162nd Tank Brigade |
| Soviet Union |  |
175th Tank Brigade |
| Soviet Union |  |
20th Mechanized Brigade |
| Soviet Union |  |
25th Tank Corps |

| Total | |
|---|---|
| Side 1 | 2 |
| Draw | 0 |
| Side 2 | 1 |


| Overall Rating, 3 votes |
|---|
|
3.67
|
| Scenario Rank: --- of 913 |
| Parent Game | Road to Berlin |
|---|---|
| Historicity | Historical |
| Date | 1945-04-16 |
| Start Time | 09:00 |
| Turn Count | 36 |
| Visibility | Day |
| Counters | 220 |
| Net Morale | 1 |
| Net Initiative | 2 |
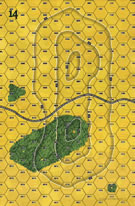
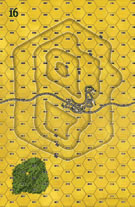
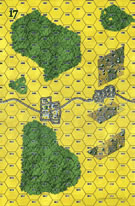
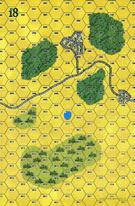
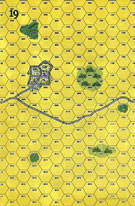
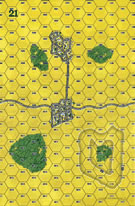
| Maps | 6: 14, 16, 17, 18, 19, 21 |
| Layout Dimensions | 86 x 84 cm 34 x 33 in |
| Play Bounty | 165 |
| AAR Bounty | 159 |
| Total Plays | 3 |
| Total AARs | 3 |
| Battle Types |
|---|
| Exit the Battle Area |
| Meeting Engagement |
| Rural Assault |
| Urban Assault |
| Conditions |
|---|
| Off-board Artillery |
| Randomly-drawn Aircraft |
| Smoke |
| Terrain Mods |
| Scenario Requirements & Playability | |
|---|---|
| Road to Berlin | Base Game |
| Introduction |
|---|
|
While Zhukov's 1st Byelorussian Front tried to smash its way through the Seelow Heights position and on to Berlin, to the south Marshal Ivan Konev's 1st Ukrainian Front launched its own assault along the Neisse River to draw off German reserves. Once Zhukov ran into fierce resistance, Konev pressed his own attacks heedless of casualties, in hopes of racing into Berlin ahead of his hated rival. Once again ego had been proved far more destructive than any weapon made by the hands of man. |
| Conclusion |
|---|
|
The Soviets took enormous casualties, but were grinding down Germany's last reserves and Konev considered this a more than adequate trade. Every tank and crew lost on the Neisse line was one less to keep Konev from his prize. The Soviet tank armies continued their relentless advance, while from his bunker Adolf Hitler reveled in the situation maps and called on phantom panzer divisions to strike Konev's flanks, trap 1st Ukrainian Front and reverse the war's outcome. |

|
|
|---|
| AFV Rules Pertaining to this Scenario's Order of Battle |
|---|
|
| Heer |
|---|
|


| Army (RKKA) |
|---|
|


| 6 Errata Items | |
|---|---|

|
The reduced direct fire value of the Heer HMG became 5-5 starting with Fall of France. (plloyd1010
on 2015 Jul 31)
|

|
All SS PzIVH tanks should have a movement of 8. (Shad
on 2010 Dec 15)
|

|
The morale and combat modifiers of German Sergeant #1614 should be "0", not "8". (Shad
on 2010 Dec 15)
|

|
Liberation 1944's Tiger movement and armor ratings are backwards. They should be Armor 7 and Movement 5. (petermc
on 2014 Feb 14)
|

|
The reduced direct fire value in Kursk: Burning Tigers is 4-4. (plloyd1010
on 2015 Jul 31)
|

|
Kommissars never get morale or combat modifiers. Ignore misprints. (Shad
on 2010 Dec 15)
|
| RtB Scenario 60 | ||||||||||||
|---|---|---|---|---|---|---|---|---|---|---|---|---|
Panzer Grenadier Road to Berlin Scenario 60 Ego Unleashed April 16, 1945 1st Ukranian Front across the Neisse River The Soviets are in full beast mode in this scenario. The objective is to clear two corridors along both road from west to east. Failing in that, they can claim a minor victory in exiting 60 or more units off of the west board edge. Standing in their way is a german force that is armor heavy with little artillery support. The Soviets are rolling deep with motorized infantry and are very armor heavy as well, with 6 platoons of JS-2s as well as air support. The terrain is dead flat open and favors the Germans. They have several platoons of King Tigers and Tigers which look to make some scrap metal out of the Soviet tanks, especially the Sherman contingent. Losses are not an issue. Step losses will only count towards initiative. Turn 1. Both sides move on to the map. The Soviets are pushing more armor to the center and the right. The Germans are moving two separate combined arms groups, one in to each town. Turn 2. The Soviets push nearly all their infantry on the left with some armored support. Three platoons of Soviet infantry go with the armor on the right. The Soviet armor in the center split between the left and right. The Germans, seeing this split, still leave an armored screen across the woods in the center, not wanting to leave a hole in the line. German armor has a line covering the front from town to town. The only weak spots are just south of the southernmost village across the swamp and north of the northern village behind some woods. Those areas will have to be covered so as to not allow the Soviets to exit. Turn 3. The Soviets mass their motorized infantry and armor on their left just out of range of the Germans. The Soviets lose some T-70s and armored cars. The Soviets also mass armor on the extreme right, obviously heading for the gap behind the woods in the north. Turn 4. German infantry and armor move towards the gap in the north, attempting to block the Soviet armor. This is going to be a close in fight in a very narrow area. The Soviets have gave up room to maneuver, choosing instead to attempt to bludgeon through a small area with much greater numbers. The Germans are digging in with their infantry, hoping to hold both roads, as well as block the northern thrust on the Soviet right. The Soviets are looking to bypass the greatest concentrations of German armor in an attempt to go around both flanks. Turn 5. The Germans get dug in across from the Soviet left. It will be a tall order to blow open a corridor along the southern road. German armor, wary of the Soviet air threat, has remained in woods or town hexes. The Soviet infantry company on the right gets caught by opfire on the move. The halftrack carrying its leader is eliminated. The other 2 platoons are virtually useless as all the other infantry leaders are on the other side of the battle. Turn 6. The Soviets are moving deeper on the flanks and German armor has to move out of cover to be able to position itself to block the Soviet onslaught. Soviet air takes out a step of Tiger IIs. Even so, the Germans are making a mess of the advancing Soviets and losses are high. Turn 7. The slaughter gets in full swing as the Soviets attempt some cover fire, but are more intent on firing smoke to cover their dash to the western map edge. The Soviets suffer a leader decapitation as the Colonel and the Kommissar are with an infantry platoon in a halftrack at the rear of the Soviet column. The halftrack is hit and eliminated. Six units are halted until the next turn. Turn 8-11. The carnage reaches a crescendo as the Soviets race to the western edge. In the south, covering fire is foregone and units only push for the edge. German losses are relatively light in the south. In the north it is a grind as Soviet armor, without infantry support, attempts to assault through the small gap, which is now crowded with German armor and infantry. As the column drives in deeper, the German Tigers move around to the Soviet rear. Turn 12-16. The Soviets on the right had made a tragic mistake and have paid. The T-34s and Shermans were cut to pieces by the German Mk IVs, Stugs and then the Tigers. The JS-2s were too few in number to make a difference. The Soviet air caused a few losses, but they were at this point irrelevant. Turn 16-36. All went by fairly quickly. The Germans hunted down the unlucky few Soviets who were left. The end result was the Germans held the field but the Soviets had pushed through. The final count was 52 Soviet steps having exited the western map edge, not quite enough for a minor Soviet victory. This was a fun, fun game. With losses having no bearing on victory, it made for a different scenario. It took som wow the tactical considerations out of play, though I do admit that if I had kept those considerations the Soviets would have done better. This will be a good one to revisit! |
||||||||||||
| 0 Comments |
| A Long Time Ago | ||||||||||||
|---|---|---|---|---|---|---|---|---|---|---|---|---|
A long time back, possibly around 10 years, I played The Ego Unleeashed. I picked it because it was a typical RtB scenario, full of armor. Since then , I’ve never played with so much armor, although I’m just biding I my time for say, Afrika ‘44 #18. The play began with Marshal Konev launching his famous Spring 1945 offensive toward Berlin. A mish-mash of German armor attempted to stop him. They possess Tigers, the latest anti-tank guns, assault guns: all kinds of goodies, but the outcome is never in doubt. All Konev has to do is launch a typical seamroll attack. You’ll laugh, you’ll cry, but just remember what year it is and you’ll be happy! |
||||||||||||
| 0 Comments |
| Road to Berlin, scenario #60: The Ego Unleashed | ||||||||||||
|---|---|---|---|---|---|---|---|---|---|---|---|---|
Posting #1 Road to Berlin, scenario #60: The Ego Unleashed I decided to setup another large battle from the Eastern Front Theater. This battle is one of the largest tank battles in the PG series, so I have to play it at least once and since Kursk seems months away from being released, this will hit the spot. I have noticed that other gamers who have played this, think it favors the Germans, so maybe I'll give them all the Soviet Armor tank leaders, as it is 1945 and maybe I don't want to keep track of it? Not sure yet! Also, one of the gamers who posted, forgot to use his smoke, which would really could effect this scenario, so maybe no adjustment is needed. Whatever the case, this looks like a blast to play with large armor formations & type variations on both sides. The victory hexes are about control of roads or exiting units or both, casualties are irrelevant, so they will be high! Both sides have a nice mix of infantry and support units as well and the Soviet have a larger off board artillery and aircraft as well and they will need them to challenge a strong German force. Also, did I mention, that very are so many types of armor in this scenario, it would take forever to list them all! Posting #2 I thought about bring the Soviets on as one big attack force but there are too many units and I didn’t want to have them bunched up and cut off from being able to make flanking moves. I also will try for the exit strategy for a minor Soviet victory as my main objective and if things are going well, then I might attempt a major Soviet Victory and control one of the East-west roads. I will need to screen my Soviet forces with some serious armor which will most likely be lost but orders are to move forward. Smoke, artillery & air cover should help. I made my Soviet forces a little stronger in the south but so did the Germans as I guess their recon is still doing ok this late in the war. Presently the Germans have put up a wall in the North but there is a little room to do an end-around. In the South, the Germans need to get their act together pretty fast, as the Soviets have a large flanking force and a screening armor group hitting them dead-on. One thing that I overlooked and it is now helping the Germans, is they have armor efficiency and the Germans are now spreading their forces out to try and contain the Soviet breakout attempt. At his point, it’s anybodies game! Posting #3 In the beginning my emotion went back and forth on which side was going to win, first the Germans, then the Soviets, then the Germans again. The German were able to pinch off the flanking moves of the Soviets pretty easily and the long distant shooting ability of their armor smashed most of the Soviet armor before it could be too effective and close with the German armor. The Soviets were only able to exist 17 steps of units, a far cry from the 60 steps needed for a minor victory and their air-force did score a small victory in taking out two steps of the monster Tiger II armored units but their army will have to regroup as most of their armor is smashed and the infantry units paid a huge price in losses trying to make a dash for the exit, loaded in M3 Halftracks and that is where a large portion died. Maybe I should have unloaded them but I still feel this scenario favors the Germans, as their armor out shines the Soviets, their armory efficiency & higher morale wins out over the Soviets Air-cover & Artillery as well. The End result was a minor German victory. It should have been a Major one but they setup incorrectly in the beginning to block off the earlier Soviets that escaped. I wanted to give this scenario a try for a long time, but I believe it favors the Germans, but it’s worth trying! I wish I could rank this a 2.5. |
||||||||||||
| 0 Comments |