
|
A Day Late Roer River Battles #10 |
||
|---|---|---|
| (Defender) Germany | vs | United States (Attacker) |
| Formations Involved | ||
|---|---|---|
| Germany |  |
275th Infantry Division |
| Germany |  |
344th Volksgrenadier Division |
| United States |  |
4th "Ivy" Infantry Division |

| Total | |
|---|---|
| Side 1 | 3 |
| Draw | 1 |
| Side 2 | 1 |


| Overall Rating, 6 votes |
|---|
|
3.83
|
| Scenario Rank: 160 of 913 |
| Parent Game | Roer River Battles |
|---|---|
| Historicity | Historical |
| Date | 1944-11-20 |
| Start Time | 08:45 |
| Turn Count | 18 |
| Visibility | Day |
| Counters | 66 |
| Net Morale | 0 |
| Net Initiative | 1 |
| Maps | 2: 10, 9 |
| Layout Dimensions | 56 x 43 cm 22 x 17 in |
| Play Bounty | 155 |
| AAR Bounty | 159 |
| Total Plays | 5 |
| Total AARs | 3 |
| Battle Types |
|---|
| Urban Assault |
| Conditions |
|---|
| Entrenchments |
| Off-board Artillery |
| Terrain Mods |
| Scenario Requirements & Playability | |
|---|---|
| Battle of the Bulge | Maps + Counters |
| Cassino '44 | Counters |
| Roer River Battles | Base Game |
| Introduction |
|---|
|
The American attack on Grosshau was aborted on the 19th, and when they finally launched it on the 20th they found the Germans had not been idle during the wait. |
| Conclusion |
|---|
|
Spearheaded by armor, the veteran German 275th Infantry Division counterattacked the Americans as soon as they broke into the clear. With only bazookas to combat the assault guns, half of G Company would became casualties including all the officers. First Battalion fared better against the newly arriving Volksgrenadiers, taking Hill 136 before fighting off a counterattack. They spent the rest of the day clearing half-trained, dispirited German soldiers north of the road from their bunkers. |

|
|
|---|
| AFV Rules Pertaining to this Scenario's Order of Battle |
|---|
|
| Heer |
|---|
|


| Army |
|---|
|


| 5 Errata Items | |
|---|---|

|
The reduced direct fire value of the Heer HMG became 5-5 starting with Fall of France. (plloyd1010
on 2015 Jul 31)
|

|
Strongpoints are single step units and can be eliminated with X results like any other single step unit. (Shad
on 2010 Dec 15)
|
|
|
The standard mix of strongpoints may be downloaded from Avalanche Press: http://www.avalanchepress.com/German_Strongpoints.php This is the standard mix found in Airborne, Airborne-IE, and Edelweiss Expanded. The strongpoint mix in Cassino '44 is different from that of other PG games. (plloyd1010
on 2012 Feb 01)
|
|
|
Strongpoints are affected by the terrain in their hex just like any other unit.
Even though they can't move, they can attack using Assault Combat if an enemy unit moves into their hex.
They may not dig in or benefit from entrenchments.
(rerathbun
on 2014 Apr 21)
|

|
The movement allowance on the counters in Airborne is misprinted. It should be "3." (rerathbun
on 2012 Jan 30)
|
| But Not a Dollar Short | ||||||||||||
|---|---|---|---|---|---|---|---|---|---|---|---|---|
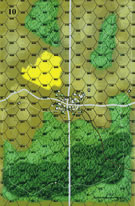
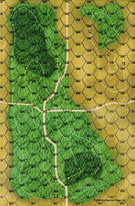
No MUD; only terrain modifications are the lack of 40-m hill lines and the N/S road of B9 is treated as a trail. US objectives are: control of all hill terrain on B9, but particularly Hill 139 (the NE hill of B9); control of Grosshau (B10 town); and control of the entire E/W road. VG morale is particularly weak at 7/5, but the Heer units (holding Grosshau are 8/6. US is 8/6. German Set-Up: 344th VG: 2xGREN B9/0714; 2xGREN B9/1003; 2xGREN B9/1107; HMG+75mm B9/1207; 2x81mm B10/1114; SP 9-4 B9/1105; SP 3-4 B10/1011; SP 5-4 B10/1106 275th INF: 2xGREN B10/0809; GREN + HMG B10/0808; StuGIIIG + GREN B10/0709. Note: The 275th drew the 9-0-2 hauptmann and the 10-1-2 leutnant. This will be particularly significant in the end game approach/assault phase. US Attack Plan: 6xINF move eastwards along the “southern” third of the board. Objectives are to clear VG units on B9 and converge on Grosshau (town on B10) from the south. Remaining units attack eastwards along and to either side of the E/W road. Two companies of INF vector NE to attack the B9 NE hill area (major objective) whilst the remainder, including most of the HMG and ENG continue due eastward adding supportive fire/units to attack VG units holding the southern part of Hill 136. Play: The southern prong began well for the US 4th INF. OBA disrupted both GREN platoons on the first attack allowing close approach whilst the VGs recovered. German return artillery fire combined with a German initiative win results in two demoralized US platoons (the units in the center of the US approach – thus effectively separating the northern and southern platoons. Grim-faced GIs began close assault with the VGs using the woods to their advantage. It was not until Turn 7 that the US had cleared these two troublesome platoons. They began their march eastwards, but in fragmented order as it was until Turn 9 that the last platoons had recovered to good order. Glory did await one of these platoons, however (see below). The center attack moved ahead to the two boards edge where they encountered StuGs and a GREN platoon of the Heer that had moved forward westwards out of Grosshau. The first few shots from this blocking force caused demoralizations and disruptions, but otherwise did no serious harm other than forcing the US to take the time to fan out and try to encircle to avoid the DF/OF. Meanwhile, units from this group also aided attacks northwards, particularly vs. the AT gun/HMG. Likewise the force sent NE found success against the strongest German strongpoint and GREN units holding the northern hill areas. Without recording specifically blow-by-blow, the US really fared well here despite German advantages in being dug-in. In particular, Turn 7 saw multiple VG casualties from X-results; compound demoralizations; and OF vs. fleeing units. By Turn 11, the US controlled B9 and was forming attacks north and down the B10 trail (taking out the 81mm mortars as they went); moving eastward along the E/W road following up on the retreating assault guns and (now) reduced GREN. Likewise, the southern units were marching across with the lead units now engaged by the strongpoint guarding that area. At this point, German step losses = 19, US step losses = 5. Grosshau, however, was another kettle of fish. How does one describe this frenetic and wild battle? Several strong US OBA strikes (M2’s) were shrugged off by the determined Heer who hunkered down, grim-faced in their home village. The infantry held the front, the StuGs the crossroads. German OBA dialed in and lead to two further step losses and several morale failures. Just as determined, US Ivy Division soldiers and engineers braved horrid small arms fire to approach the outskirts of the town; literally a sea of olive surrounded all but the western buildings. The US must reduce three assaults in five turns. Versus StuGIII’s: OF from the assault guns kept US approach (from the southern attack axis group) at bay for a turn or two until out of sheer desperation, Captain 10-1-1 (Distinguished Service Cross) lead a single platoon into assault simply in the hopes of tying down the German machines. With bazooka’s blazing, the US rolls a ‘12’ on the AT fire destroying four or five of the StuGs. The Germans did not go down without a fight, disrupting both the captain and his platoon. Fortunately, friendly units moved in for support. Versus the 2xGREN (9-0-2 hauptmann): three separate assaults by US HMG + INF failed to break this fully; eventual addition of an ENG and a lucky shot, killing the valiant Heer company commander, had this hex cleared on Turn 16. Versus the HMG+GREN (10-1-2 leutnant). US bodies piled up as platoon after platoon was shuffled in fresh to the attack. It came down to Turn 18, with the unfazed, but exhausted leutnant and a good order reduced HMG facing a 30-col US assault roll (net = +1 for leader+morale+ENG-2forTown). Had the US rolled a ‘1’ for an M2 result, the US would most likely not have made ANY victory condition given the high German morale. A roll of ‘3’ however, eliminates the last resistance in Grosshau and the US claims a Major Victory. The Germans earned a minor victory for their valiant defense, but the US advance into Germany would continue. German Step Losses: 33 US Step Losses: 12 US morale at End: 8 units demoralized; 6 units disrupted (there wasn't much left in good order). In retrospect, I should have pushed the board center (along the E/W road) attack earlier in order to put pressure against the town sooner. I think the success against the VGs on Hill 136 lulled me a bit regarding the attack against Grosshau: certainly I had enough experience trying to flush out high morale SS from towns in Winter Soldiers and Black SS to know that even 6-7 turns is not much time to defeat such units save for a very lucky OBA or DF softening attack (or very poor morale rolls). I gather than PLloyd will be playing this at some later date as part of his 4th Infantry Division series. I look forward to reading his and subsequent AARs. In this play, it was a nail-biter right down to the very last attack (roll) with basically “victory or defeat” hinging on its outcome. I also felt that the timing on this one was excellent: the US is very hard pressed, but it can be done. |
||||||||||||
| 0 Comments |
| I could blame it on General Mud, but.. | ||||||||||||||
|---|---|---|---|---|---|---|---|---|---|---|---|---|---|---|
The scenario is a basic infantry attack under a time crunch. We played with our standard rules, but with the 4th edition charts and combat mods, and we incorporated a modified version of the BB random events. The Germans were mostly deployed in the board on board 10 with an infantry road block on board 9. I cleared the road block quickly with some losses. That is when it started to rain, and it rained for 3 turns. That was quite important as the scenario is only 18 turns long and a town needed to be cleared. The rain letup about when I got my road march organized. I quick moved on the town, when i got my own lucky event. Misunderstood orders caused the StuG IIIg to drive out of position. It came roaring back, but not before I was able to place my own infantry block to detour its return. The real problem came with the assault on the town. While the time constraints were a problem, the issue became casualties. I lost at least steps to German firepower and assault combat. Those added to the earlier casualties clearing the road block took me over the step limit, giving my opponent a minor victory. With more time I might have been able to gain a major victory by clearing the town. In the end there were more German bodies than American, but still too much American blood to clame a victory. |
||||||||||||||
| 2 Comments |
| When Sitting Still Is A Viable Option |
|---|
|
A unique set of victory conditions meant the attacking Americans had to do two things to win the game; prevent the Germans from having any units on the small hill on board 9, and take the town on board ten. The Germans set up with the town heavily defended (with a 10-1-2 leader at the center) and the remainder of their units dispersed among the large western hill and the key small hill. The small board 9 hill also got two of the three pillboxes while the other sat on the large board 9 hill. The GI's entered from the west en masse and were barely slowed by the German defenses on the large hill. It was when they reached the clearing on the east side of the large hill that they ran into problems. In addition to the defenses the Germans had initially set up on the small hill, they had also moved a platoon of Hetzers to the top of it as well. The Americans moved toward the hill but took many losses due to accurate small arms and artillery fire. They assaulted the hill (including the Hetzer hex) and were eventually able to eliminate all German units, but it took quite a few turns and cost them a few more step losses. With five turns to go they had secured board 9, but the town on board 10 looked like an impregnable fortress. The Americans had the choice of charging the well defended town to try and take it in the five remaining turns or sit back and be happy with a draw. If they lost three more steps in the assault of the town they would lose the game so they decided discretion was the better part of valor and they stayed put. Not a bad scenario, but I don't like these types of victory conditions. |
| 0 Comments |