
|
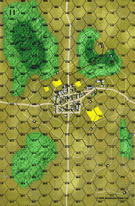
Bad Road to Hastenrath Roer River Battles #2 |
||
|---|---|---|
| (Defender) Germany | vs | United States (Attacker) |
| Formations Involved | ||
|---|---|---|
| Germany |  |
12th Infantry Division |
| United States |  |
3rd "Spearhead" Armored Division |

| Total | |
|---|---|
| Side 1 | 6 |
| Draw | 1 |
| Side 2 | 3 |


| Overall Rating, 10 votes |
|---|
|
3.3
|
| Scenario Rank: 547 of 913 |
| Parent Game | Roer River Battles |
|---|---|
| Historicity | Historical |
| Date | 1944-11-16 |
| Start Time | 12:30 |
| Turn Count | 12 |
| Visibility | Day |
| Counters | 49 |
| Net Morale | 0 |
| Net Initiative | 2 |
| Maps | 2: 11, 24 |
| Layout Dimensions | 56 x 43 cm 22 x 17 in |
| Play Bounty | 145 |
| AAR Bounty | 141 |
| Total Plays | 10 |
| Total AARs | 6 |
| Battle Types |
|---|
| Inflict Enemy Casualties |
| Rural Assault |
| Conditions |
|---|
| Entrenchments |
| Off-board Artillery |
| Terrain Mods |
| Scenario Requirements & Playability | |
|---|---|
| Battle of the Bulge | Maps |
| Cassino '44 | Counters |
| Elsenborn Ridge | Maps + Counters |
| Roer River Battles | Base Game |
| Introduction |
|---|
|
Second and 3rd Armored Divisions had already deployed England when the rest of the American armored divisions had been reorganized. This was unfortunate, as their "heavy" organization was very unbalanced, and if infantry from another division was not available it left them vulnerable in many tactical situations. With no other infantry available, Combat Command B sent out two task forces, each with a battalion of tanks supported by only one company of infantry. |
| Conclusion |
|---|
|
According to ordnance officer Belton Cooper, mines on the road to Hastenrath cost the Americans 15 Shermans and the Wild Buffaloes claimed 13 more. Four Shermans managed to reach the town, but by then they'd been separated from their infantry support. One of the tanks was promptly destroyed, and the Americans called it a day. |

|
|
|---|
| AFV Rules Pertaining to this Scenario's Order of Battle |
|---|
|
| Heer |
|---|
|


| Army |
|---|
|


| 6 Errata Items | |
|---|---|

|
The reduced direct fire value of the Heer HMG became 5-5 starting with Fall of France. (plloyd1010
on 2015 Jul 31)
|

|
The morale and combat modifiers of German Sergeant #1614 should be "0", not "8". (Shad
on 2010 Dec 15)
|

|
Strongpoints are single step units and can be eliminated with X results like any other single step unit. (Shad
on 2010 Dec 15)
|
|
|
The standard mix of strongpoints may be downloaded from Avalanche Press: http://www.avalanchepress.com/German_Strongpoints.php This is the standard mix found in Airborne, Airborne-IE, and Edelweiss Expanded. The strongpoint mix in Cassino '44 is different from that of other PG games. (plloyd1010
on 2012 Feb 01)
|
|
|
Strongpoints are affected by the terrain in their hex just like any other unit.
Even though they can't move, they can attack using Assault Combat if an enemy unit moves into their hex.
They may not dig in or benefit from entrenchments.
(rerathbun
on 2014 Apr 21)
|

|
The movement allowance on the counters in Airborne is misprinted. It should be "3." (rerathbun
on 2012 Jan 30)
|
| Dress rehersal (I hope not) | ||||||||||||
|---|---|---|---|---|---|---|---|---|---|---|---|---|
I played this one solitaire as I thought is was a similar scenario to No 2 in West Wall which I was due to play v Vince Hughes later in the year. Here was a chance to experiment and get another scenario under my belt. The GIs were held up in the mud and the entrenchments refused to fall. The strongponts also were stubbon and as American losses grew it was obvious that the Americans were running out of time and troops. Did I learn any lessons from this. Read our AARs on West Wall 2 to find out! |
||||||||||||
| 0 Comments |
| Don't Fight A Buffalo On Muddy Ground - You'll Slip Up And Come To Grief | ||||||||||||||
|---|---|---|---|---|---|---|---|---|---|---|---|---|---|---|
Yet more travails on the German Westwall. Those Amis keep pushing. This time saw us at the town of Hastenrath on a miserable muddy day, and once more those 12th Infantry Division 'Wild Buffaloes' were charged with holding back the American invaders. 2nd and 3rd Armoured Divisions had already deployed from England when the rest of the American armoured divisions had been reorganized. This was unfortunate as their ‘heavy’ organization was very unbalanced, and if infantry from another division was not available, it left them very vulnerable in many tactical situations. With no other infantry available, CCB sent out two task forces, each with a battalion of tanks supported by only one company of infantry. Meanwhile in the village of Hastenrath, the two companies of German infantry from the famed 12th Wild Buffaloes had busied themselves preparing the town for its defence. This was in spite of and against the wet and windy conditions of the last week, turning the ground of the locale into something of a quaggy mire. Entrenchments had been constructed to the south of the town to face on the expected and inevitable Ami advance, whilst mines had been placed to the west of the town in case the enemy tried to come through the tilled land that surrounded that approach. On the morning of the enemy attack, a platoon of StGIV’s had hunkered down on the south-side to support the entrenchments and some mortars positioned themselves in Hastenrath too. More northerly and hidden in the fields were a battery of 75mm AT guns. The two companies of Buffaloes had readied themselves and were positioned to defend the perimeters of the town. At 1230 hours the first of the American CCB were spotted making the advance down the road to Hastenrath. Make no mistake, this was not a proper road and had been turned equally to slush as the surrounding countryside. This initial sighting of the enemy masked their flanking attack to the west consisting of infantry, M3 half-tracks and M4 tanks that had set-off at the same time. As the frontal attack of CCB came into range, the aforementioned StGIV’s belched out their opening salvo. Two M4/76’s burst into flames (1 step) on the road with the rest of that platoon scurrying for the cover of the fields. Other American tanks replied. Their missiles speared toward Hastenrath and the StG’s. Most missed, but a couple of shots found their target only to skim off the German armour and ricochet off the walls of homesteads. The battle was now underway ! 1300 hours, and events were rolling along pretty fast. The determined StG’s had hit and destroyed another 4 M4’s (2 more steps), whilst a German artillery spotter was bringing accurate fire down on a US Recon platoon. Where were the rest of the Americans ? They were bogged down and moving slowly around the west and quite unable to assist on the frontal attack at all ! Whoever was in charge of the frontal attack was far too cautious. Instead of using superior numbers of tanks to engage in the battle and accept a few but necessary losses to boot, they instead fought piecemeal and were seen off emphatically. The road to Hastenrath was most definitely littered with American tin far too numerous for the situation faced. Eventually, the maneuver in the west made it to the edge of the fields. As they came into sight of Hastenrath, one American infantry platoon moved forward to assume firing positions. What they saw and what they were greeted with must have been a most terrible sight. German MG’s entrenched, pillboxes and an infantry platoon opened up with devastating accuracy. The platoon was cut down completely. The engineer platoon following up could only hear the noise of battle, but as they too entered the killing zone, the German bullets scythed them down like a hot knife through butter. Within fifteen minutes, two complete US platoons had been wiped out. The German StG’s had redeployed to this part of the town and they too began loosing shells off at approaching American armour scoring some successes. The German Major in charge of the town had collected two of his platoons of grenadiers and in true Buffalo fashion, jumped on the confused American armour. This whole American attacked had been utterly and devastatingly stopped in its tracks. All that remained were a mass of demoralized tankers and little order at all amongst the Amis. There was little good news that the Americans could take from the battle. Their OBA had removed any of the major casualties suffered by the Germans (2 steps), and maybe, for the rest of the campaign the Americans might have picked up a bloody lesson or two ? But this battle had been all bad news. At 1500 hours, the remaining US forces withdrew from the attack and had found themselves at the end of a major German victory having only captured an outlying hamlet and none of the main town. Casualties: Germans 2 steps, Americans 25 steps. Points Tally: German 53pts, American 4pts The American commander was far too cautious with his armour in this one and after the growing confidence Joe showed in our last battle, I think to be fair, there were far too many different types of units in this one to get his head round and utilise to their best advantage. To be honest, as the defender, I think what would have been worse for me was for the US armour to go forward, accept a couple of losses and then use their mass of guns to guarantee a hit on the German StG's. In the event, these StG's were allowed to pick the American tanks off bit by bit. But a win is always welcome, and even without all that, the assault on the town against the Buffaloes is always going to be a close battle. Rated a solid 3 from me. |
||||||||||||||
| 0 Comments |
| Blood Bath on the Road to "Bad" Hastenrath | ||||||||||||||
|---|---|---|---|---|---|---|---|---|---|---|---|---|---|---|
Played via Skype with Vince Hughes Weeks of trying to break through the West Wall were beginning to take a toll on Capt. Woosey and his company. Ordered to accompany Combat Command B (CCB) of the 3rd Armored "Spearhead" Division, Capt. Woosey and his men left the warm, dry shelter of their recently captured German village quarters and loaded onto their M3's. The dreary, wet November weather had turned the surrounding German agricultural lands into a quagmire of mud and slow-going. Capt. Woosey neglected his instructions to coordinate closely with the tanks of CCB and most of the division's Shermans, Fireflies, and Stuarts attempted to circle around to the west and flank the German defenders in Hastenrath. The equally exhausted tankers cursed the infantry for being cowardly slaggards and not properly defending them from the feared Kraut AT prowess and refused to head straight down the road. The tankers had also heard tales of heavily mined roads and powerful German StuGs and had no intention of facing them without a proper infantry screen. Both the infantry company and armored platoons seriously underestimated the terrible weather conditions and soon found their forward progress to be extremely slow as boots, tracks, and wheels all slogged through the muddy farm land. The frustrated and fairly timid Captain Woosey(7.0.0) eventually decided his men could move almost as fast on foot as their laboring halftracks and ordered the company to unload and advance. Alas, a German spotter in the Hasternath church steeple called in mortars and artillery on the doughboys. Capt. Woosey was the first to find cover in a deep, soggy shell hole (disrupted) where he remained for the rest of the battle. Disgusted with the behavior of his commanding officer, Lt. 10.0.1 assumed command and order the company to continue slogging through the fields to the southeast of Hastenrath. The first men to make it to the edge of the farmfields in sight of Hastenrath, an infantry and engineer platoon, were obliterated by the German Grenadiers and machine guns on the edge of town. The German StuG IV's fired several effective shots demoralizing the few foolhardy Shermans and Fireflies who had boldly moved down the main road. Laughing at the poorly coordinated American movements and realizing that any threat from the south had been effectively terminated, the German armor leader ordered the StuG IV's to move to the opposite side of Hastenrath and fend off the rest of Combat Command B that had finally broken through the German fields. Not to be outdone by the armor, the German Major ordered his grenadiers and engineers to assault the encroaching American AFV's. Even though no panzerfausts could be found, the Germans clearly sensed the uncoordinated and hesitant movements of the American tanks and rushed forward to assault. In no time at all, fully two thirds of CCB's tanks had been reduced and demoralized and the American attack had become a complete disaster. Lt. 10.0.1 cursed the futility of the day, called in some artillery, and took some small satisfaction in demoralizing or disrupting the German infantry that were still swarming around the burning hulks of Shermans. The West Wall would not be breached today! Result: Major Victory for the German defenders. |
||||||||||||||
| 0 Comments |
| Potholes |
|---|
|
Following my newly found desire to play each scenario to its final denouement I played a perfect example of why you should do that. A large pile of American armor with a company of infantry attached must attack an understrength German battalion with the ubiquitous StG platoon attached, and take a town (or as much of it as they can handle). There is, of course, the glutinous goo called mud to make the going so much easier for the Americans. The Germans set up wtih a minefield along the road and their AT gun and StGs at the front of the town facing the Americans. The Americans decide to flush the guns and StGs by putting some tanks out on the road to highlight the shooting. This was a particularly bad idea as 4 steps of tanks are vaporized on the first turn. The M10s seeing this run out to take a couple shots at the StGs in the following turn. In the first four turns 6 tank steps and another four steps (several halftracks) are destroyed at a cost of three steps lost for the Germans (the Strongpoints turned out to be not so strong. It would be at this point that a towel would generally have been tossed in. The victory point totals as of the end of turn 3 were a whopping 30-3 and the Americans hadn't a clue as to what to do. I was sorely tempted but I "soldiered" on and found that advancing through the fields gave me enough cover to pass the AT gun and the StGs while I kept overwatch with some M4/76s to keep the StGs from trying to peek under the covers at me. Meanwhile the infantry with the remaining halftracks took the outlying town and began to move towards the main town. The town itself is too large for the Germans to hold in total and this began a path of small maneuvers which led to the Americans getting back into the game. After six turns the score was 25-17 and the fight seemed more worthwhile. Especially since the StGs had been dispatched by some point blank gunnery from a company of Shermans. The final score was Germans 25, Americans 23 for a draw and a well earned one on both sides. This is a messy fight as the Americans do not have the infantry force to fight well in the towns but the Germans don't have the force to stand up with the American firepower in all those tracked vehicles. All in all an interesting little battle where the American has everything they need to take town hexes and nothing they need to hold any. I give it a "3". |
| 0 Comments |
| Bad, Bad Road | ||||||||||||
|---|---|---|---|---|---|---|---|---|---|---|---|---|
This shorter scenario provided a nice look as a small American combined arms unit moving to attack a German town in the Roer River campaign. The Germans have a unit of the Wild Buffaloes, a famed unit for the defensive stands during the Americans initial advance into Germany. They have a nice defensive position in holding the town of Hostenrath. With mines, fortification and the town terrain they look to fortify the town and dare the Americans to advance against it. The Germans position their AT gun and Stug to cover the main road as well as the east and west flanks from any armor maneuver. Infantry cover the close hexes with others deep in the town to counter attack when need. Their entrenchments are also positioned close to the town to extend fields of fire for the AT and INF guns. The mines are place in the lone town to the east as well as one lone hex in Hastenrath. The Americans are forced to setup in the southern town on board 11. Here the task force loads up with the M4's and M4/76's leading the way behind the recon units. The Captain will bring up the INF/HMG/ENG in M3's once the AT threat is minimized. The advance starts with the I&R and armored car advancing up the road to try to spot or draw German fire. They do as the German OBA demoralized the I&R unit, before it is double-demoralized for a step lose. But the armored car makes it to the fields to spot the units on the edge of town. Two platoons of M4's advance to the west of town to try to flank but the 75mm AT finds its mark on one of them. The remnants as well as the other M4 platoon make it to the field east of the town. They find they cannot advance to far as the German Stug has the western advances covered. The other M4's and M4/76 advance to the cover of the fields nearest the lone town. The light Stuarts and M10 move to the east under the cover of the fields and will try to advance from the east to the Hastenrath defenses. The Captain orders the infantry company to advance up the fields and capture the lone town as well as position for a assault on the east side of town. The Americans and Germans trade OBA morale checks while the American tanks position for an attack. The Germans pull back some of the INF's out in front of Hastenrath and reposition for the American advance. The American M8 positions to spot the first strongpoint and discovers AT weapons as well as HMG's waiting for them. American OBA scores a key demoralization on the 75mm AT and the the M4's dash for the entrenchment. Seeing the opening the Germans switch the Stug to the east, leaving the west defended by INF and the ING gun. The M4/76's position for shots on the Stug once the firing starts. On the the next turn the German get the initiative and the Stug fire on the the two M4's, reducing them both. But the M4/76's get one step of the Stugs and they demoralize. At this point the other Stuarts advance but the strongpoint AT scores a hit on one of them. American HMG open up on the German GREN's but the morale checks are easily shaken off. The second group of M4's take up the advance on the entrenchment with on INF. They are able to get in and destroy the AT gun and a GREN but at a loss of another M4 step. At the point the Germans need to shift units to meet the growing threat, but the American M4's to the west as well as the I&R and LT. They are able to position on for seeing the German commandpost and call in OBA. A direct hit reduces the German ENG's and demoralizes the Major. The M4's advance to point blank fire on the, but the lone INF Gun scores an AT hit on the full strength M4, stopping the advance. But back to the fight in the east, the Americans consolidate there hold on the entrenchment and us this to assault the INF/HMG combo holding the southeast town hex. American OBA strikes again with a demoralization on the HMG. Losing the Majors command post to demoralization was the big hope for the Americans as the HMG needed the help. The American INF and M4 advance into the hex and are able to demoralize the INF and reduce the HMG through a double demoralization. The next turn they they do make it out of the hex as another GREN enters to provide cover. But this GREN is lost a turn later in the assualt, but not with out taking one American INF step as well. To the northwest the other American Stuart and the M10 position in the light woods to try to get the remaining Stug. The American M8 positions for a spot on the Stug but is reduced by the AT strongpoint. But this spot is what the M10 needed and finishes off the Stug struggling to recover. But with it being only 12 turn, the time runs out for the Americans and the Germans hold the town for the win. Final total were six town hexes for the Germans, two for the Americans, Germans loses were one and half GRENs, half HMG, half ENG, 75mm AT/wagon, Stug while the Americans losses were five steps of M4's, half M8, half Stuart, two steps of INF, half I&R. This gave the Germans 28 to the Americans 16 and the major victory. |
||||||||||||
| 0 Comments |
| The Tale of the Invincible, Undemoralizable AT Gun | ||||||||||||
|---|---|---|---|---|---|---|---|---|---|---|---|---|
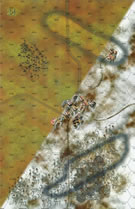
I played this with the Winter Soldiers post-harvest field rules: fields are not LT, do not block LoS, but do affect movement as per the TEC. I drew the minefields blind and randomly placed them without knowing their values (turns out, 2x3 + decoy). Interestingly, the decoy was actually on the road and was never encountered. US forces determined to go with the all-armor forward full speed approach. This cost them dearly, as the 75mm gun took out a loaded M3 and the StuGIV a full M4/76 but missed its second shot. An M5 discovered to its dismay the 3-factor minefield in hex 1109. US AT return fire next turn was deadly - a pair of '10' rolls put paid to the German assault guns. But, despite OBA and several '16' and '22' col DF attacks vs. the 75mm (in the 1105 hamlet protected by an adjacent entrenched (GREN+ENG), the thing simply wouldn't go away, making morale save after morale save and, not to mention, blowing away steps of M5 and M4 that approached. On the other hand, the US managed a 30 DF shot against aforesaid ENT rolling a '2' on the 30-col for the dreaded 3X (and killing the +1 morale bonus leader that had been assisting the 75mm). US armor simply swarmed over the remaining step and the AT gun. But, time was running short. Important too was that German OBA and mortar fire was able to keep the surviving US INF/HMG/ENG in a fit of perpetual one-step-forward-one-back with not infrequent morale failures. The Germans used the best defense is a good offense approach for the end game. As the US armor closed the town, single or double GREN units moved forward to initiate assaults with panzerfausts blazing. Whist the 3rd Armored defeated these harassing attacks, the US simply ran out of time to do more than take 2 town hexes and contest two others at game end (and were very lucky: one two unit assault had both units fire AT weaponry, but the die rolls were a '5' and a '6'). Germany: 4 towns held (x2) + 18 steps inflicted = 26 VPs America: 2 towns held (x2) + 12 steps inflicted = 16 VPs Major Victory for the Heer 12th Infantry Division. |
||||||||||||
| 2 Comments |