|
Night Attack Power of the East #8 |
||
|---|---|---|
| (Attacker) Japan | vs | Soviet Union (Defender) |
| Formations Involved | ||
|---|---|---|
| Japan |  |
28th Infantry Regiment |
| Soviet Union |  |
149th Motorized Rifle Regiment |

| Total | |
|---|---|
| Side 1 | 2 |
| Draw | 0 |
| Side 2 | 0 |
| Overall Rating, 3 votes |
|---|
|
3
|
| Scenario Rank: --- of 913 |
| Parent Game | Power of the East |
|---|---|
| Historicity | Historical |
| Date | 1939-07-07 |
| Start Time | 22:30 |
| Turn Count | 14 |
| Visibility | Night |
| Counters | 83 |
| Net Morale | 1 |
| Net Initiative | 2 |
| Maps | 2: 7, 8 |
| Layout Dimensions | 56 x 43 cm 22 x 17 in |
| Play Bounty | 169 |
| AAR Bounty | 165 |
| Total Plays | 2 |
| Total AARs | 2 |
| Battle Types |
|---|
| Hill Control |
| Inflict Enemy Casualties |
| Rural Assault |
| Surprise Attack |
| Conditions |
|---|
| Entrenchments |
| Reinforcements |
| Terrain Mods |
| Scenario Requirements & Playability | |
|---|---|
| Eastern Front | Maps + Counters |
| Guadalcanal | Counters |
| Power of the East | Base Game |
| Introduction |
|---|
|
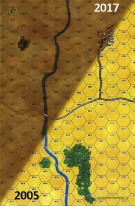
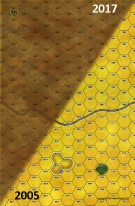
The 2/28 Battalion continued its advance against the Soviets on the east bank. After seizing the Hinomaru Heights, a hill very close to the Soviet positions, an opportunity for a night attack arose. But before the Japanese could pull it off, a Soviet counterattack rambled toward the just-occupied hill. |
| Conclusion |
|---|
|
Japanese theoreticians considered a night-time close assault as the masterpiece of ground combat doctrine. In practice, it turned into a chaotic brawl in which friendly units lost contact and even shot at each other. The Soviets didn't expect such a forceful strike and the first line of defense was taken. Nevertheless, the Japanese command proved unable to exploit this unexpected success and they stranded the single company that managed to break into the Soviet lines without support. When the Russians counterattacked again with combined arms, they forced the Japanese to fall back to their starting positions where they barely held the Hinomaru Heights. |
| AFV Rules Pertaining to this Scenario's Order of Battle |
|---|
|
| 2 Errata Items | |
|---|---|

|
The reduced direct fire value in Kursk: Burning Tigers is 4-4. (plloyd1010
on 2015 Jul 31)
|

|
Kommissars never get morale or combat modifiers. Ignore misprints. (Shad
on 2010 Dec 15)
|
| Dead Russians Tell No Tales | ||||||||||||
|---|---|---|---|---|---|---|---|---|---|---|---|---|
This scenario is pretty much spelled out on starting positions. Russians on the board start entrenched except for two stacks behind the hill on board 7, while Japanese start on and around that hill. Both sides have reinforcements, Japanese on turn 8 and Russians on turn 9. Both sides get points for eliminating the opponent while Japan gets points for occupying trenches and Russia gets points for occupying the hill at the end of the game. While the Japanese pushed the Russian forward troops away with heavy losses immediately, they also suffered with one attack force stack being disrupted, and that stack stayed that way for 3 turns before they could advance and assist in attacking trenches. The rest of the force found their way (this is a night scenario, so spotting range of only 1 hex) to the Soviet right and started to work on that edge of the Russian trench line. Things bogged down as assaults on trenches took their toll on both sides, while the better morale of the Japanese was helpful as long as they stayed out of the trenches - their morale drops from 8 to 7 when in the trenches. Reinforcements arrived but the Russians were closer to the trenches so reached the fight slightly ahead of the Japanese troops. The Russian tanks sped on towards the hill, where the Japanese AT guns and one stack of Japanese infantry held 2 of the 3 hexes. The soviet tank leader's platoon took the first step loss, and was then the first of the 2 tank units completely destroyed. While trench fighting raged in the center, the Japanese troops tried assaulting the Russian armor, succeeding in taking another step but becoming disrupted in the process. As it came to the final turn the Japanese troops fell back and allowed the AT guns another shot, and the AT guns finished off the Russian armor. The death toll was 20 Soviet steps to 10 Japanese, so even without either side holding an objective, the Japanese won a major victory. |
||||||||||||
| 0 Comments |
| You call THAT a victory?! | ||||||||||||||
|---|---|---|---|---|---|---|---|---|---|---|---|---|---|---|
We played double-blind. We decided that Soviet units could not establish pickets until released to move. To save time, we also assumed an OP on each entrenchment hex, until after the units were released. There were also other adjustments to address potential issues which may have come up during the game. The Soviets are deployed in 3 groups, on at the bottom of the against the Japanese, and in 2 trench lines. The Japanese deployed in a partial double-enfilade of the first Soviet group. Most of the Japanese were visible to the Soviets. Those not were the mortar & AT gun, probably deployed on the reverse of the hill. The battle opens with assaults on both hexes of the forward group. 700 hex losses a step and is demoralized. 600 hex isn't much better off. By the end of turn 3, only one reduced demoralized rifle platoon and the captain have survived. The Japanese do not pursue them into the night. What the Japanese are doing is moving to the eastern end of the northern trench line. Because I can have no scouts or pickets, I have no real idea of how well the Japanese are organized in their march. I do know one HMG unit had been digging in on top of the hill. I think it is still there. The support weapons are likely with it. The approaching Japanese are divided into 2 groups. My troops are not released until just before attack, I watch a somewhat helpless feeling. The attack begins with the advance against the southeast corner of the north line. My opfire does kill 1 INF step (my first blood & point) & demoralizes the survivor. The rest if the Japanese pile in. I move an HMG into the hex. I lose the initiative (big surprise there). The Japanese assault shrugs off the induced morale check, and disrupts or demoralizes the entire defending force, along with inflicting a step loss. I try to rally. The infantry, who are demoralized, retreat out. I move in another INF, but it looks bad. The demoralized units are in the way and I don’t have a lot of spare troops yet. The next round of pugilism demoralizes the reinforcing INF and the LT leading the defense. Somehow the disrupted HMG keeps hanging on. Again the INF retreats out, I rotate another in. A couple other demoralized guys do rally. Now there are demoralized & disrupted units in the way. Only one INF is available. I’m faking further down the line with an unemployed captain & an AT gun. (I hope it doesn’t guess.) The next turn actually goes quite well. I am not further injured in the next assault. The INF holds up. The HMG has still not rallied, but still hasn’t failed further. The Japanese reinforcements arrive and the southern line is released. Reinforcing infantry rush to northern line with HMGs following on. The fight in the assault hex is stabilizing. The rush is on to redress the western end of the north line. When the Soviet reinforcements arrive, the tanks rush to support the north line. Most reinforcements move to the southern line. More southern garrison troops move to the north. I plug the holes. A captain joins the lieutenant in the assault hex. Things are looking good, but I don’t have the manpower to march against the hill (I wouldn’t want to do that in the dark anyway). Another Japanese step dies in the assault hex, and all the survivors become disrupted. I rally the HMG (finally!). It’s turn 12, I’m ready for the next rush, and there is functionally no more time. As we look at each others maps, we both think this should really be considered a draw. The Japanese hold their start position. The Soviet entrenchments are still in Soviet hands, except for the disputed hex. The problem is that the victory points are 11 to 2. Most of those points were handed to the Japanese on a silver platter. I think how the victory points are awarded really ruin the scenario. If the Soviets were given 1 VP for each entrenchment hex controlled the results would balance better. Neither side made any progress, that is draw! |
||||||||||||||
| 0 Comments |

 PotE007


