
|
Second Parachute Regiment Parachutes Over Crete #32 |
||
|---|---|---|
| (Attacker) Germany | vs |
Australia
(Defender)
Britain (Defender) Greece (Defender) |
| Formations Involved |
|---|

| Total | |
|---|---|
| Side 1 | 0 |
| Draw | 1 |
| Side 2 | 0 |


| Overall Rating, 1 vote |
|---|
|
4
|
| Scenario Rank: --- of 913 |
| Parent Game | Parachutes Over Crete |
|---|---|
| Historicity | Historical |
| Date | 1941-05-20 |
| Start Time | 16:00 |
| Turn Count | 20 |
| Visibility | Day & Night |
| Counters | 135 |
| Net Morale | 0 |
| Net Initiative | 2 |
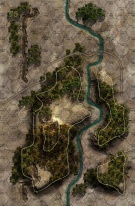
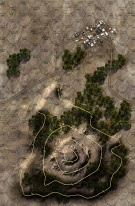
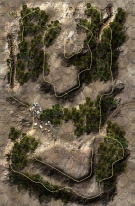
| Maps | 3: 96, 97, 98 |
| Layout Dimensions | 84 x 43 cm 33 x 17 in |
| Play Bounty | 190 |
| AAR Bounty | 171 |
| Total Plays | 1 |
| Total AARs | 1 |
| Battle Types |
|---|
| Airfield Control |
| Hill Control |
| Inflict Enemy Casualties |
| Paradrops |
| Conditions |
|---|
| Off-board Artillery |
| Randomly-drawn Aircraft |
| Reinforcements |
| Terrain Mods |
| Scenario Requirements & Playability | |
|---|---|
| Parachutes Over Crete | Base Game |
| Introduction |
|---|
|
Maj. Gen. Kurt Student included Rethymnon as an objective in order to spread and confuse the Allied defense; the airstrip at the nearby village of Pigi had been built by the Royal Air Force to handle light aircraft and had no support facilities. Aerial reconnaissance missed most of the defenders, and even worse for the attackers, the Australians were aware that the Germans had missed most of the defenders - a German plane bearing an intelligence report that included photos had been shot down. |
| Conclusion |
|---|
|
The Rethymnon landings would be a disaster for the Germans, relieved only by the poor supply situation of the Australians which kept them from finishing off the surviving airborne troops. Campbell asked for reinforcements to help counter-attack the Germans, but Freyberg at Creforce headquarters told him there were none to send. The Rethymnon garrison was on its own. |
| Additional Notes |
|---|
|
This scenario combined the previous two into a larger look at the Rethymnon airborne landings. The production print of map 98 is missing 3 town hexes, Avalanche press has created a Map 98 overlay to correct this oversight. Philippe Leonard has also created a very nice overlay for map 98 on Board Game Geek. |

|
|
|---|
| AFV Rules Pertaining to this Scenario's Order of Battle |
|---|
|
| Army |
|---|
|


| Army |
|---|
|

| Luftwaffe |
|---|
|


| Army |
|---|
|


| Once Again READ the Special Game Rules!!! | ||||||||||||||
|---|---|---|---|---|---|---|---|---|---|---|---|---|---|---|
I had very good landings with only one unit and leader drifting off the map. The problem started when the Greeks dug in on the airport. No No No. Around turn 12 I read in the middle of the terrain that airport hexes give a +1 to DF and Bombardment against units in the hex. First turn 5 planes and the next 4 turns a plane on a roll of 5 or 6. After that is roughly 12 turns before the possible appearance of a plane ends. 5 of those turns I rolled a 1 or a 2 and no plane appear. The rest of the time i rolled 3 - 6 to get a plane. Then every time I rolled a 1 or 2 for the plane to miss its target hex. Fortunately the designated hex was not next to any of units. Hurt as I got a 24 DF Stuka twice and an 18 He-111.The reinforcements that come the east edge on turn take a M -1 MC the first time an enemy unit DF on them. I assume leaders don't and can aid in the MC. Paras have many leaders, about 85%+ of the USMC for ratings. Gong p the hill on the east edge was a tough slog. Firing uphill against dug in units is a -2 on DF chart. After 4 turns of this ineffectual DF, I started to spread out go up hill. Worked until he was down to 2 unactivated units in none adjacent hexes. So with a +1 for OP FIre and me rolling 10 to 12 for units to disrupt or Demor'd. that stalled the close in as half my maneuver elements stalled. That used another 4 turns I conceded the west map and the hills to NZ troops. I landed on the middle board. Started moving toward the airfield. Started ineffectual fire at the dug in troops on the airfield. The north part of the NZ western forces started moving or sliding along north edge toward the middle map/airfield. I closed with Greeks and finally disrupted or DZ'd to get adjacent for DF +2 columns. The para guns were slowly dragged to 3 - 4 hexes away from the airfield. They could take a potshot at NZ along the north edge. The platoon moving went forward. Should have done that sooner. Can not abandon the guns as they are VP per unit. DO need to find where the missing town hexes go on map 96 or 95 as it was the center map. That may have made a difference when my troops dropped. May still have chosen those hexes or landed straight on the airfield. As I messed up the units defending on the airfield and rolling for MC on the 2nd turn reinforcement morale check, I am rating this high. If my scatter rolls were terrible and I landed on top of or next to NZ units I feel different. I recommend the the seam between the 2 maps west of the airfield be the drop zones for the various platoons. Another one I am going have to solitaire in the future. |
||||||||||||||
| 0 Comments |