
|
Crossroads in Hell Panzer Lehr #22 |
||
|---|---|---|
| (Defender) Germany | vs | United States (Attacker) |
| Formations Involved | ||
|---|---|---|
| Germany |  |
130th "Lehr" Panzer Division |
| United States |  |
115th Infantry Regiment |
| United States |  |
2nd "Hell on Wheels" Armored Division |
| United States |  |
803rd Tank Destroyer Battalion |

| Total | |
|---|---|
| Side 1 | 1 |
| Draw | 0 |
| Side 2 | 0 |


| Overall Rating, 1 vote |
|---|
|
4
|
| Scenario Rank: --- of 913 |
| Parent Game | Panzer Lehr |
|---|---|
| Historicity | Historical |
| Date | 1944-07-30 |
| Start Time | 08:45 |
| Turn Count | 14 |
| Visibility | Day |
| Counters | 118 |
| Net Morale | 0 |
| Net Initiative | 1 |
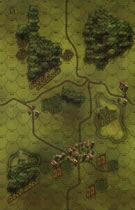
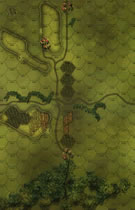
| Maps | 2: 31, 33 |
| Layout Dimensions | 86 x 28 cm 34 x 11 in |
| Play Bounty | 173 |
| AAR Bounty | 171 |
| Total Plays | 1 |
| Total AARs | 1 |
| Battle Types |
|---|
| Exit the Battle Area |
| Inflict Enemy Casualties |
| Road Control |
| Rural Assault |
| Urban Assault |
| Scenario Requirements & Playability | |
|---|---|
| Elsenborn Ridge | Counters |
| Fall of France 1 | Maps |
| Panzer Lehr | Base Game |
| Introduction |
|---|
|
Trying to move large bodies of troops in bocage country was an exercise in frustration. Keeping them supplied was even worse. With few good roads or navigational aids any decent road took on a significance out of proportion to those in other environments. A crossroads between two decent roads was a place worth fighting and dying for, or at least ordering others to do so. |
| Conclusion |
|---|
|
In the last 24 hours the front lines became so fluid staff officers had no idea where they were. Enemy tanks would suddenly materialize in areas thought secure. The Germans forced the 115th Infantry Regiment back just short of Percy, killing 60 men and wounding another 200. The unflappable Lieutenant Colonel John Cooper was visiting the front lines when the Germans struck, nearly running him down with a tank. Luckily for his family and future historians he survived. |
| Additional Notes |
|---|
|
American formations have non-cooperation rules. |

|
|
|---|
| AFV Rules Pertaining to this Scenario's Order of Battle |
|---|
|
| 130th "Lehr" Panzer Division |
|---|
|


| Heer |
|---|
|


| Army |
|---|
|


| 3 Errata Items | |
|---|---|

|
Counter is mislabeled, this is actually a 75/41. (rerathbun
on 2013 Mar 06)
|

|
All SPW 251s have an armor value of 0. (Shad
on 2010 Dec 15)
|

|
The M18 has a special rule in Battle of the Bulge but it applies globally: "A two-step M18 unit can fire one anti-tank shot and move half its movement allowance (retain fractions) in a single impulse. The order in which it does these two actions is the player's choice." (Shad
on 2010 Dec 15)
|
| Infantry First, or, "Get those damn tanks out from behind those damn bushes!" |
|---|
|
This scenario requires the Americans to push through two boards arranged the long way. As the German, I put my best tanks in a commanding position overlooking the approaches on the first board, and as a result the American tanks had to hang back while the infantry went up to assault the Panzers. After assaults were initiated the American armor started moving up, but there were just enough other German tanks to start brewing up a goodly number of U.S. tanks. Nonetheless, the infantry made it more or less through the first board, bypassing or isolating some towns along the way, to get to the second board, with its big town complex (Percy) which itself shielded the eponymous Crossroads behind. While the Americans took several hexes in Percy, they never got to the crossroads, and the 5 points for that proved to be the difference, with the Germans getting a 6 point victory (less than a 3 point advantage would have been a draw). In hindsight I probably should have sent two Sherman Platoons off the map (for points) rather than having them approach Percy from the rear and get their asses handed to them by a Panzer IV. Overall, a close and good scenario, and a lesson in using American tanks. |
| 2 Comments |
Nice to see you play again Pat
Thanks, Vince, it had been a while! Work and family keep me pretty busy!