
|
Tilly Seesaw Panzer Lehr #5 |
||
|---|---|---|
| (Defender) Germany | vs | Britain (Attacker) |
| Formations Involved | ||
|---|---|---|
| Britain |  |
7th "Desert Rats" Armoured Division |
| Germany |  |
130th "Lehr" Panzer Division |

| Total | |
|---|---|
| Side 1 | 0 |
| Draw | 0 |
| Side 2 | 3 |


| Overall Rating, 5 votes |
|---|
|
2.8
|
| Scenario Rank: 821 of 913 |
| Parent Game | Panzer Lehr |
|---|---|
| Historicity | Historical |
| Date | 1944-06-11 |
| Start Time | 12:00 |
| Turn Count | 15 |
| Visibility | Day |
| Counters | 95 |
| Net Morale | 0 |
| Net Initiative | 1 |
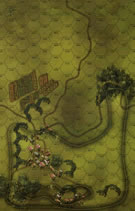
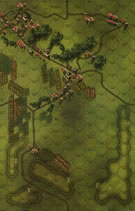
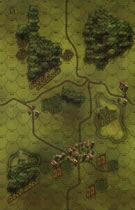
| Maps | 4: 27, 28, 31, 32 |
| Layout Dimensions | 86 x 56 cm 34 x 22 in |
| Play Bounty | 175 |
| AAR Bounty | 153 |
| Total Plays | 3 |
| Total AARs | 4 |
| Battle Types |
|---|
| Delaying Action |
| Exit the Battle Area |
| Inflict Enemy Casualties |
| Urban Assault |
| Conditions |
|---|
| Hidden Units |
| Off-board Artillery |
| Reinforcements |
| Smoke |
| Scenario Requirements & Playability | |
|---|---|
| Beyond Normandy | Counters |
| Cassino '44 | Counters |
| Fall of France 1 | Maps |
| Panzer Lehr | Base Game |
| Introduction |
|---|
|
The battle for Tilly began early in the morning and strong British pressure finally gave them the upper hand. The Germans knew that if the Brits forced their way through Tilly-sur-Seulles the Germans lacked the resources to contain the breakthrough. |
| Conclusion |
|---|
|
The commitment of Guderian's Ducks tipped the scales in the Germans' favor. Refusing to be sucked into the vicious street fighting, Captain Oventrop dug in his tank destroyers to the south of the town. When some British tanks attempted to advance out of the town his men popped three in quick succession. This ended the British effort to move south and they concentrated on securing the town. When they realized a while later that wasn't going to happen either that day, they withdrew. |

|

|
|---|
| AFV Rules Pertaining to this Scenario's Order of Battle |
|---|
|
| Army |
|---|
|


| 130th "Lehr" Panzer Division |
|---|
|


| Heer |
|---|
|


| 6 Errata Items | |
|---|---|
| Scen 5 |
The Note should mention that the scenario also requires pieces from Cassino '44. (rerathbun
on 2012 Sep 03)
|

|
The "Optional Values" for the Achilles---and by extension the Archer---given in an Avalanche Press Daily Content piece on the 17-Pdr Anti-Tank gun (and printed on a replacement counter sheet Download) are now the Official Ratings, published in games like Cassino '44, Grossdeutschland 1946, and Indian Unity. These are: 8-5 / 8-8 Full Strength and 4-5 / 8-8 Reduced Strength. (caryn
on 2012 May 03)
|

|
All Bren carriers should have a movement value of 7. (Shad
on 2010 Dec 15)
|

|
The "Optional Values" for the Firefly given in an Avalanche Press Daily Content piece on the 17-Pdr Anti-Tank gun (and printed on a replacement counter sheet Download) are now the Official Ratings, published in games like Cassino '44, Grossdeutschland 1946, and Indian Unity. These are: 5-5 / 8-8 Full Strength and 3-5 / 8-8 Reduced Strength. (caryn
on 2012 May 03)
|

|
Counter is mislabeled, this is actually a 75/41. (rerathbun
on 2013 Mar 06)
|

|
The morale and combat modifiers of German Sergeant #1614 should be "0", not "8". (Shad
on 2010 Dec 15)
|
| Playground Bully | ||||||||||||||
|---|---|---|---|---|---|---|---|---|---|---|---|---|---|---|
A number of people have suggested that Panzer Grenadier, as a series, is ill suited for urban combat. I would suggest that those individuals play this scenario. There are 80+ town hexes represented on the four boards and each and every one is worth 2 VPs. The play of the scenario is interesting and my opponent was quite capable. The rating is only a "3" because it seems virtually impossible for the Germans to capture a victory in this one. They only start out with a 36 point lead but they have to defend 50 town hexes and simply don't have the force to do it. The British, on the other hand, have a much larger and VERY mobile force made up of Cromwells, Stuart, Archer, Achilles and Fireflys. The slowest has a movement factor of 9. As you would expect in a highly urban environment, the area is loaded with roads which helps to magnify that mobility. This is just way too much for the Germans to handle. In our play, Daniel had to deal with seeing eye British artillery that shredded his larger concentrations of troops. My frontal assault on the large town in the center of the board was accompanied by a small flanking attack on the British left and a large mobile force on the right setting up a tank trap for the pending arrival of the "Ducks". It became apparent that the higher mobility of the British would permit them to pick up town hexes at will leaving the Germans with the need to constantly move from solid positions to chase me or permit me to pick lots of town hexes up easily. The Ducks were caught in a large cross fire and destroyed quickly with losses equal to the losses they caused. The only German force which was beyond destruction was the Panther platoon that escaped the crushing vise in the center town and was able to recapture much of the far easatern town hexes. It seems very difficult for the Germans to duplicate the historical result in this one. While it was fun to play I have to give it a "3" due to the lack of balance. I would suggest an alteration in the victory point schedule, perhaps reducing the British points per town hex to 1.5 or raising the VPs for towns held by the Germans to 3. |
||||||||||||||
| 0 Comments |
| Too Many Town Hexes, Not Enough Units | ||||||||||||||
|---|---|---|---|---|---|---|---|---|---|---|---|---|---|---|
Played face-to-face with Matt W in about 2.5 hours. How do you prevent a bunch of speedy British armored vehicles from infiltrating my lines? I sure was not able to answer this question correctly. I set up some troops forward to stop the British infantry from easily moving into the largest town. While I was partially successful on that front, it left way too much room for the British armor to maneuver. Matt took several Cronwells on sight-seeing tours of my town, gaining 2 victory points per hex visited. My troops gave chase and while was successful in catching a rabbit or two, the bunnies were too many and too fast on this day. My troops did much better on board 27 where one of my 75/41 took 4 or 5 British armor steps all by itself and rallying every time the British artillery rattled it. It was the best performance by a AT Gun unit by either side in 30 or so matches! When my duck entered the board, I was so far behind in victory points that I tried to return the favor and have visit the British controlled town. I took a huge chance, and killed 2 tanks outright by rolling two 11s, but at the price of being caught in a crossfire. The duck took a hit and was eliminated a turn of two later. I also tried to run some infantry forward but again, they were stopped before they could find cover into the British town. The British OBA is a real menace to German troops in the open in this scenario. My Germans surrendered with one or two turns remaining with the British ahead by many, many points. British major victory. I rated this one a “3”. Not only was it fun to play a scenario in an urban area, it felt the main battle was fighting for city block after city block. But given how many points are awarded per town hex, I believe the fast British armor will win the day. |
||||||||||||||
| 0 Comments |
| Smashing British Victory |
|---|
|
This was a strange one for me... I guess I wasn't fully understanding the scenario and VCs when I set up the Germans. They have a lot of ground to defend and in attempting to do this I created a setup that had a dramatic flaw. The British setup also seems to allow them to set up essentially in contact with part of the German setup zone, so I took advantage of this for the British and largely eliminated the usually dangerous approach battle. The British attack landed on a kink in the German line and quickly poured into the town, forcing a mad scramble by the Germans to pull back and reform a shorter line, effectively giving up most of the town. The British operational tempo was never slowed, they just kept flanking the Germans and forcing them back until the town was theirs. No German counterattack could ever achieve the mass needed to check the British advance. Very few casualties for either side, this was almost entirely a game of maneuver. Fun to play but, I don't know, weird. Was this the designer's intent? Something just doesn't seem right in the setup rules. Very unlike most other PG scenarios where a good hour or two of gametime can pass before combatants are fully at grips with each other. |
| 0 Comments |
| A Hard Urban Slugfest - Stick to SOLO in This one. | ||||||||||||||
|---|---|---|---|---|---|---|---|---|---|---|---|---|---|---|
This was a 5-session play-through with the clever and determined PANISTA leading the defending Germans garrison, and me playing the attacking British Deserts Rats (7th Armored) in a built up area. As others have noted in their AARs, there are an immense number of town hexes for the overstretched German force to try & defend. While this battle ended up as a decisive British victory, it was a major struggle against a fearless & wily opponent. We agree with others that this one is unbalanced against the Axis side and so I gave it a generous rating of 3, in testament to the fun that we had playing it to the blood soaked end. We used the FOW (to aid the German defense), consolidation, smoke-illim, excess initiative optional rules. There were 4 FOW-shortened turns in this scenario. We agreed that there is virtually no way for the defenders to prevail in this one. We lost count of the number of combat 7-die rolls thrown, especially in the last 4 game turns! Others have created fine, detailed AARs for this scenario, so here is a brief outline of our play through. The British side was a combined arms force with plentiful armor in a situation where boldness counts. Both sides drew decent leaders, but the PG fates favored he overwhelming British side, especially as regards AT fire, close assaults and OBA throws. There were many German leaders losses, and for a change, the Tommies had good luck in most of their frequent frontal assaults. There were many decision points in this scenario for both sides, but once German step losses begin to mount, it becomes very difficult for the Germans to respond with strength to British probes. Most Tommy-set-up-cross-fires were successful in our match as the Nazis ran out of assets. We heartily agree with others, that a change in the victory point schedule is called for if this one is to be worth playing in SHARED mode. As published, it is most appropriate for SOLO play only. As has been suggested, reducing British points gained per town hex to 1.5, or raising the number of points for German-held town hexes to 3, might well make for a more balanced scenario. |
||||||||||||||
| 0 Comments |