
|
Death of a Prince Panzer Lehr #4 |
||
|---|---|---|
| (Attacker) Germany | vs | Britain (Defender) |
| Formations Involved | ||
|---|---|---|
| Britain |  |
5th East Yorkshire |
| Germany |  |
130th "Lehr" Panzer Division |

| Total | |
|---|---|
| Side 1 | 1 |
| Draw | 0 |
| Side 2 | 2 |


| Overall Rating, 3 votes |
|---|
|
3.33
|
| Scenario Rank: --- of 913 |
| Parent Game | Panzer Lehr |
|---|---|
| Historicity | Historical |
| Date | 1944-06-11 |
| Start Time | 16:00 |
| Turn Count | 13 |
| Visibility | Day |
| Counters | 38 |
| Net Morale | 0 |
| Net Initiative | 1 |
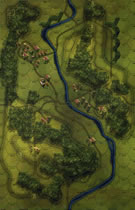
| Maps | 1: 29 |
| Layout Dimensions | 43 x 28 cm 17 x 11 in |
| Play Bounty | 144 |
| AAR Bounty | 159 |
| Total Plays | 3 |
| Total AARs | 3 |
| Battle Types |
|---|
| Breakout |
| Hill Control |
| Inflict Enemy Casualties |
| Conditions |
|---|
| Hidden Units |
| Off-board Artillery |
| Smoke |
| Terrain Mods |
| Scenario Requirements & Playability | |
|---|---|
| Beyond Normandy | Counters |
| Fall of France 1 | Maps |
| Panzer Lehr | Base Game |
| Introduction |
|---|
|
As part of their ongoing offensive the British continued to attack southward on a broad front. The Green Howards engaged the Hitler Youth Division at Cristot while the East Yorkshires advanced on Saint Pierre. As the latter directly threatened Tilly-sur-Seulles, 7th Army quickly assembled a combined arms battle group to counterattack. The lead company commander protested that the line of attack was too wooded and lacked enough infantry support to be successful; the commander of the Panzer IV Battalion soon arrived to lead them in person. |
| Conclusion |
|---|
|
Major Prince von Schonburg-Waldenburg led his battalion through the woods and into the British positions on Hill 103. After intensive fighting the Germans managed to break through to the thinly wooded northern slope. There an enemy antitank round found the turret of the commander's tank killing the Prince and his radio operator. This took the heart out of the Germans who soon retreated. |

|
|
|---|
| AFV Rules Pertaining to this Scenario's Order of Battle |
|---|
|
| Army |
|---|
|


| 130th "Lehr" Panzer Division |
|---|
|


| Heer |
|---|
|


| 3 Errata Items | |
|---|---|

|
All Bren carriers should have a movement value of 7. (Shad
on 2010 Dec 15)
|

|
The morale and combat modifiers of German Sergeant #1614 should be "0", not "8". (Shad
on 2010 Dec 15)
|

|
All SPW 251s have an armor value of 0. (Shad
on 2010 Dec 15)
|
| Try combined arms next time |
|---|
|
This was a small, fast scenario that pitted a German armor/infantry task force against most of a British infantry battalion. The British were defending two wooded hills, and the Germans split their force into a tank and an infantry force to assault each hill separately. This plan failed because the tanks struggled in the woods without infantry support and the panzer grenadiers waited to long to unload from their halftracks and suffered some early losses to PIAT fire that hurt. If I play this again I really need to keep the infantry and tanks mixed and mutually supporting. |
| 0 Comments |
| PIATs in the woods |
|---|
|
Sometimes a PG scenario reminds you of the need for combined arms. Sadly, armed forces can become infatuated with their weapons systems and forget that complex mechanical and electrical contraptions still need to work in battlefield conditions and that there are places where they can work well and places where that just isn't possible. Case in point, Panzer Lehr #4. A small but potent force of 20-25 Pz IVs along with a company of infantry borne in halftracks needs to take a ridge away from the British who are manning it with a battalion or so. The southern approach to the ridge is clear but the ridge itself and the northern approaches are heavily wooded (if this were a horror movie, as my daughter is currently watching on Netflix in a constant stream, the ominous music would start now). The British have a couple of AT guns but they are primarily an infantry force. While half of the force is hidden (and some deployed to the east to impede a German indirect approach to the ridge) the concrete objective makes it less of an issue in this scenario than in most. The German assault goes off very well and the ridge is cleared within 5 turns with the exception of one hex which fights on defying the cold hard logic of Pz IVs in your face. In order to deter a British counterattack the Germans launch a couple spoiling attacks to the northern woods and one of the GREN units becomes demoralized and flees. Another takes a step loss and is similarly demoralized and fleeing. This leaves the German with only two infantry types and therefore an area must be held with armor alone. Remember that the ridge is wooded... The British counterattack the tanks, despite the power of the tanks themselves in assault combat the British gain two column adjustments for the leader and the tanks in woods, the net one improvement makes it possible for them to attack on the 24 column (2 RIF, 1 WPN and a leader are attacking) and they cause a step loss and demoralization on the Pz IV. The German infantry continues to avoid recovery and the British continue their assault on the wooded ridge clearing two hexes and destroying four steps of Pz IVs, no doubt the Prince was in one. As a result the Germans abandon the ridge line to get into safer ground and the British consolidate their rewon position. Upon recovery, the Germans decide that there is no point in continuing the battle as their remaining forces cannot hold the ridge if they do win it again. The loss is entirely due to the sparse infantry support to the armored attack. A very satisfying small scenario. One which will play well in any venue. I give it a "4". |
| 0 Comments |
| Royalty Ascendant | ||||||||||||||
|---|---|---|---|---|---|---|---|---|---|---|---|---|---|---|
The fourth in Daniel and my playthrough of Panzer Lehr has the British on the defensive. The Germans have three goals, capture a wooded ridge, cause British losses and get troops to cross the battlefield to the north. This is a challenge for the British, who, although the substantially outnumber the German infantry, have little answer for the Pz IVs brought to the party by Lehr. This one is of interest, however, because the British are on defense and, for once, get to hide their units. My setup relied heavily on holding the ridge and was only lightly interested in keeping Lehr from passing to the north. In essence, I conceded the major victory by giving Daniel one victory condition right off the bat. I should have known that this was a mistake but I was a bit overconfident given the results of my previous solo play. My hidden units included every weapon and high level leader in the mix. I hid most of my strength (the WPN and Bren) just behind the ridge where they could reinforce the infantry that occupied the ridge. I left one lonely platoon in the town in the valley on the opposite side of the river and had AT support in the main town. Daniel split his force in two with a sizable component running straight north through the clearer terrain. I was relatively successful against the force attempting to move me off the ridge but the force in the valley ran through my sacrificial platoon quickly and was able to enter the town with no real trouble. In the end I continued to hold out on the ridge but had lost far more than the limit. Daniel had met his two victory conditions for a minor victory and there it ended. My solo play had left me with the impression that eliminating the "soft" support for the armor would lead to victory. It probably would have but I was not as capable in this play as I was in the previous play and that failure led to a continued strong presence of the armor in the battle. In my solo play the Germans went for the major victory and put their force into a strong push to clear the ridge. Doing so led to losses for the infantry and subsequent morale failures followed by a desperate attack by the armor which took losses in the woods due to the lack of infantry. The remaining demoralized mess failed to recover in time to accomplish anything, so in going for all they attained nothing. The key for the British is to find ways to cause step losses on as many of the PzIVs as they can, rendering them less useful in assault (the reduced unit morale is a 6) and depriving the attack of its bite (the column shifts for combined arms). Having said that it is highly difficult to accomplish. Daniel and I agree that this one leans heavily to a German minor victory, my previous play notwithstanding. I give it a "3" for this play. |
||||||||||||||
| 0 Comments |