
|
A Warm Afternoon in Hottot Panzer Lehr 2 #8 |
||
|---|---|---|
| (Defender) Germany | vs | Britain (Attacker) |
| Formations Involved | ||
|---|---|---|
| Britain |  |
24th Lancers |
| Britain |  |
69th Infantry Brigade |
| Germany |  |
130th "Lehr" Panzer Division |

| Total | |
|---|---|
| Side 1 | 0 |
| Draw | 0 |
| Side 2 | 0 |


| Overall Rating, 0 votes |
|---|
|
0
|
| Scenario Rank: of |
| Parent Game | Panzer Lehr 2 |
|---|---|
| Historicity | Historical |
| Date | 1944-06-15 |
| Start Time | 15:00 |
| Turn Count | 15 |
| Visibility | Day |
| Counters | 110 |
| Net Morale | 0 |
| Net Initiative | 0 |
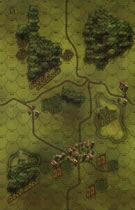
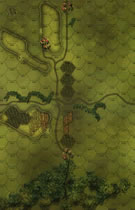
| Maps | 2: 31, 33 |
| Layout Dimensions | 56 x 43 cm 22 x 17 in |
| Play Bounty | 240 |
| AAR Bounty | 227 |
| Total Plays | 0 |
| Total AARs | 0 |
| Battle Types |
|---|
| Exit the Battle Area |
| Inflict Enemy Casualties |
| Urban Assault |
| Conditions |
|---|
| Hidden Units |
| Off-board Artillery |
| Smoke |
| Scenario Requirements & Playability | |
|---|---|
| Fall of France 1 | Maps |
| Liberation 1944 | Counters |
| Panzer Lehr 2 | Base Game |
| Introduction |
|---|
|
The British again attacked on a broad front, managing to take Hottot earlier in the day. The 69th Infantry Brigade then attempted to exploit eastward to cut the defending panzer grenadiers' communications. To prevent this, General Bayerlein ordered Major Markowski to use his Panthers to restore the situation. Late in the afternoon the forces moved into position. |
| Conclusion |
|---|
|
The British subjected Hottot to an intense artillery barrage, after which Major Markowski led his charges forward. The British took precautions against a counterattack and met the German counter-assault with a whirlwind of fire of their own. Cromwell tanks traded shots with the Panthers who slowly gained the upper hand and entered the town. There they received heavy fire from British infantry equipped with PIAT antitank weapons. Eventually the village fell to the Wehrmacht but the surviving Panthers were quickly withdrawn to Tilly to restore the deteriorating situation there. |

|
|
|---|
| AFV Rules Pertaining to this Scenario's Order of Battle |
|---|
|
| Army |
|---|
|


| 130th "Lehr" Panzer Division |
|---|
|


| 9 Errata Items | |
|---|---|

|
All Bren carriers should have a movement value of 7. (Shad
on 2010 Dec 15)
|

|
The "Optional Values" for the Firefly given in an Avalanche Press Daily Content piece on the 17-Pdr Anti-Tank gun (and printed on a replacement counter sheet Download) are now the Official Ratings, published in games like Cassino '44, Grossdeutschland 1946, and Indian Unity. These are: 5-5 / 8-8 Full Strength and 3-5 / 8-8 Reduced Strength. (caryn
on 2012 May 03)
|

|
Ignore the direct fire values. (Shad
on 2010 Dec 15)
|

|
Counter is mislabeled, this is actually a 75/41. (rerathbun
on 2013 Mar 06)
|

|
Leaders for the Panzer Lehr Division appear in the second release. Players with the first release should use the ILS for selection and substitute regular Heers leaders, if not using the Heers leaders originally specified. (plloyd1010
on 2016 Jul 13)
|

|
Leaders for the Panzer Lehr Division appear in the second release. Players with the first release should use the ILS for selection and substitute regular Heers leaders, if not using the Heers leaders originally specified. (plloyd1010
on 2016 Jul 13)
|

|
Leaders for the Panzer Lehr Division appear in the second release. Players with the first release should use the ILS for selection and substitute regular Heers leaders, if not using the Heers leaders originally specified. (plloyd1010
on 2016 Jul 13)
|

|
Leaders for the Panzer Lehr Division appear in the second release. Players with the first release should use the ILS for selection and substitute regular Heers leaders, if not using the Heers leaders originally specified. (plloyd1010
on 2016 Jul 13)
|

|
Leaders for the Panzer Lehr Division appear in the second release. Players with the first release should use the ILS for selection and substitute regular Heers leaders, if not using the Heers leaders originally specified. (plloyd1010
on 2016 Jul 13)
|