

| Total | |
|---|---|
| Side 1 | 0 |
| Draw | 2 |
| Side 2 | 4 |


| Overall Rating, 8 votes |
|---|
|
3.5
|
| Scenario Rank: 423 of 913 |
| Parent Game | Heraklion |
|---|---|
| Historicity | Historical |
| Date | 1941-05-24 |
| Start Time | 06:15 |
| Turn Count | 18 |
| Visibility | Day |
| Counters | 0 |
| Net Morale | 0 |
| Net Initiative | 0 |
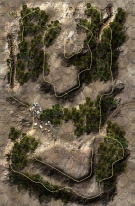
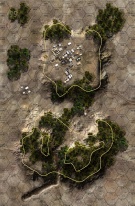
| Maps | 2: 98, 99 |
| Layout Dimensions | 56 x 43 cm 22 x 17 in |
| Play Bounty | 153 |
| AAR Bounty | 159 |
| Total Plays | 6 |
| Total AARs | 3 |
| Battle Types |
|---|
| Breakout |
| Inflict Enemy Casualties |
| Road Control |
| Urban Assault |
| Paradrops |
| Conditions |
|---|
| Randomly-drawn Aircraft |
| Reinforcements |
| Terrain Mods |
| Scenario Requirements & Playability | |
|---|---|
| Heraklion | Base Game |
| Parachutes Over Crete | Maps + Counters |
| Road to Dunkirk | Counters |
| Introduction |
|---|
|
On the previous day the Argyll and Sutherland Highlanders finally cleared Cheretis Farm and proceeded northward. Their attempts to clear the area south of Heraklion went poorly and a German counterattack drove them back to the Gournes area. During the night two more Highlander companies in addition to the battalion’s recon and command elements reached Gournes and made ready to move northward early in the morning. |
| Conclusion |
|---|
|
The Highlanders moved out at 0500 and quickly began taking heavy small arms and mortar fire. Anti-tank fire forced the Bren carriers to break off their advance and seek cover. At 0730 the German Air Force appeared and greatly complicated movement. To overcome this, battalion commander Lt. Col. R.C.B. Anderson sent Company C and the mortar platoon forward to keep the advance going. While the rest of the battalion attacked, Company D was cut off from them when a company of paratroopers who had been left behind in Greece due to a lack of transport planes dropped just behind them. Only 17 Scots managed to extract themselves from the confused fighting that followed and rejoin the battalion. The other companies involved suffered only light causalities before breaking off the attack. Having failed by daylight, after night fell the battalion infiltrated though the scattered German positions to reach friendly lines outside of Heraklion. |

|
|
|---|
| AFV Rules Pertaining to this Scenario's Order of Battle |
|---|
|
| Army |
|---|
|


| Luftwaffe |
|---|
|


| 5 Errata Items | |
|---|---|
| Scen 2 |
Wondering if the British reinforcements should enter from the south rather than the north as specified. If they enter from the north they can gain the VPs for exiting off the north edge much too easily. (joe_oppenheimer
on 2022 Feb 16)
|
| Scen 2 |
The British reinforcements enter from the south edge, not the north. This errata has been confirmed by Mike Perryman. (plloyd1010
on 2022 Feb 19)
|

|
All Bren carriers should have a movement value of 7. (Shad
on 2010 Dec 15)
|

|
Two British infantry have their full strengths printed on the back. They should both be "2-3" when reduced. (Shad
on 2010 Dec 15)
|

|
Reduce strength direct fire value be came 5-5 in Army at Dawn. (plloyd1010
on 2015 Jul 31)
|
| Heraklion, scenario #2: Hielan Laddie | ||||||||||||
|---|---|---|---|---|---|---|---|---|---|---|---|---|
Heraklion, scenario #2: Hielan Laddie Most of the game was focused around the farm hex of hex number 0308, as it is worth 4 points and probably the game, there are some other points awarded for various things but Cheretis Farm is the key. Maybe a little bit more interesting than the first scenario, as the Germans get an actual parachute drop. I always enjoy scenarios with airborne landings. The victory condition are very similar to the first scenario but the British get 4 points for having an undemoralized unit on or adjacent to the road hex on map 98 and the Cheretis Farm hex is worth 4 points and each eliminated enemy step is worth 1 point. Here lied my problem, the British easily secured the Farm and maybe should have sat back and let the scattered German forces come to them but with such a nice supply of British Infantry, I sent them forward to those four road points. This opened them up to a pounding from the German Airforce that pretty much saved the Germans and then the German paratrooper drop and the Germans were able to put a lot of pressures on the British. The End result was the British lost 9 steps & 2 Leaders while taking 4 points for the Farm and another 4 points for a road hex on map 98, while the Germans lost 3 steps and 3 Leaders, thus giving the British 11 points, while the Germans received 9 points. The margin of difference was only 2 points, so another Draw. |
||||||||||||
| 0 Comments |
| Many Scots and Futile Shots . . . | ||||||||||||||
|---|---|---|---|---|---|---|---|---|---|---|---|---|---|---|
This was a very long 3-session play-through with the patient and thorough, blackcloud6, as the attacking British Commander. I played the ill-equipped, German Airborne force assigned to hold the Cheretis Farm, as well as the north-south road – while inflicting as many casualties as possible. This was a scenario that is significantly unbalanced in favor of the Highlanders. It is suitable for solo play only IMHO. The 1st session (game turns 1-9) mostly consisted of a cat-and-mouse long range DF dice rolling contest with an extended left flank move by the Highlanders, led by a platoon of universal carriers. Later, a company-sized German paradrop was successful during turn 7, landing on Map 98 just northeast of the town of the road. No casualties were recorded this session, although a combined total of EIGHT, combat 7-die rolls were thrown. The balance of the Scottish troops arrived the same turn on the south edge of the battle map. Overall, the 2nd session (game turns 10-16) of this very tedious die-rolling competition featured numerous poor die rolls for the defending Germans and significantly better luck for the attacking Scots. The Highlanders methodically closed on the south and east of the Cheretis Farm and then several turns later, finally managed to break the morale of the small garrison, who eventually fled during the 15th game turn. In the north, the newly arrived paratroopers managed to push back the Scotties from the road but were not able to decisively engage this force, who managed to dodge to the west and south, where they then proceeded down the road to occupy a portion of the 3-hex town. In all sectors, German defenses were collapsing inward, and the end was clearly in sight. In hindsight, it was a serious mistake to send the reinforcement north to challenge the Highlanders in the olive orchards along the road. They should have been sent south to reinforce the southern front and perhaps recaptured the Cheretis Farm. Step losses at the end of this overlong session were at an even 4 for both sides, and after the German Major was eliminated, the defending side’s initiative fell to 0 due to decapitation. The victory point total had swung irretrievably in favor of the Highlanders, at 12 to 4, with all their geographical objectives achieved. A combined total of SIX, combat 7-die rolls were thrown in this session. The very slim hope was for the paratroopers to inflict an additional 5 steps losses, and perhaps secure a portion of the north-south to deny a major victory to the Scots. The final session (game turns 17-18 ) featured the abject rout of the remaining German troops in the vise that had formed north and south of the 3-hex town. The ultimate victory point total was: 14 for the victorious Highlanders and 5 for the defeated German paratroopers. A combined total of only THREE combat 7-die rolls were thrown in the last 2 turns. |
||||||||||||||
| 0 Comments |
| Let's Run Against the Wall Laddies | ||||||||||||||
|---|---|---|---|---|---|---|---|---|---|---|---|---|---|---|
I played this against the indefatigable Tredasaurusrex who covers the action well in his AAR. I figured in this one, the Scots had to get as many points as soon as they can and force the Germans to then counterattack. My plan was to try to run the Bren carrier quickly to the north to exit the one required infantry platoon for two points while a company of infantry covers the bran carrier's flank and then head to the road for those VC. Meanwhile the main attack would hammer away at the farm. The flanking plan worked and forced the German reinforcements come in by paradrop at the north end of the map, thus keeping them away from the bloody fight at the farm. Mid game was a long dice rolling match as both sides fired away at each oat the farm and at the Scots' road position, here they managed to dig. With both sides having high morale and the nasty Fallschirmjaegers have a few 2 morale leaders, it turned into a dice contest. But once the Scots' reinforcements came in, they gained fire superiority and thus more chance at good luck and the Germans in the farm crumbled. Then the northern Scot's ran south and got into the town on Board 98 and couldn't be rousted. Not a bad scenario, I gave it the two rating though because these urban assault against high morale troops canturn into a contest of luck and not skill. |
||||||||||||||
| 0 Comments |