
|
One Week Maple Leaf Brigade #8 |
||
|---|---|---|
| (Attacker) Canada | vs | Soviet Union (Defender) |
| Formations Involved | ||
|---|---|---|
| Canada |  |
27th Brigade Group |
| Soviet Union |  |
207th "Berlinskaya" Rifle Division |

| Total | |
|---|---|
| Side 1 | 1 |
| Draw | 0 |
| Side 2 | 0 |


| Overall Rating, 1 vote |
|---|
|
4
|
| Scenario Rank: --- of 913 |
| Parent Game | Maple Leaf Brigade |
|---|---|
| Historicity | Alt-History |
| Date | 1951-11-01 |
| Start Time | 11:00 |
| Turn Count | 20 |
| Visibility | Day |
| Counters | 160 |
| Net Morale | 1 |
| Net Initiative | 2 |
| Maps | 2: 23, 24 |
| Layout Dimensions | 56 x 43 cm 22 x 17 in |
| Play Bounty | 199 |
| AAR Bounty | 171 |
| Total Plays | 1 |
| Total AARs | 1 |
| Battle Types |
|---|
| Inflict Enemy Casualties |
| Road Control |
| Urban Assault |
| Conditions |
|---|
| Off-board Artillery |
| Randomly-drawn Aircraft |
| Smoke |
| Scenario Requirements & Playability | |
|---|---|
| Elsenborn Ridge | Maps |
| Hammer & Sickle | Counters |
| Maple Leaf Brigade | Base Game |
| Road to Berlin | Counters |
| Introduction |
|---|
|
Falling back toward their East German bases, the Soviet formations began to receive replacements that improved their personnel as combat-experienced reservists arrived at the front. Much of their “new” equipment came from the huge stockpiles left over from the Great Patriotic War, but was considered more than adequate for holding the defensive positions the Third Shock Army now assumed. It had been only a week since the Soviets had been advancing and looking forward to disrupting the NATO mobilization. Despite the replacements and reequipment, none of the rank and file were unaware that this was not what the STAVKA had anticipated. |
| Conclusion |
|---|
|
The Soviet defenses could not stand against the Canadian combination of morale and mobility. The big anti-aircraft guns employed in a ground-defense role briefly gave the oncoming Centurions pause, but the Canadian infantry dealt with them and the advance carried on. The Soviet bid to liberate the oppressed workers of the West appeared to be in dire jeopardy. |

|
|
|---|
| AFV Rules Pertaining to this Scenario's Order of Battle |
|---|
|
| Army |
|---|
|


| Army (RKKA) |
|---|
|


| 2 Errata Items | |
|---|---|

|
The reduced direct fire value in Kursk: Burning Tigers is 4-4. (plloyd1010
on 2015 Jul 31)
|

|
Kommissars never get morale or combat modifiers. Ignore misprints. (Shad
on 2010 Dec 15)
|
| Have the Canadians met their match?...Nope! |
|---|
|
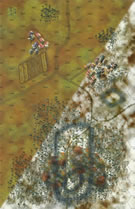
This 20 turn battle features the full Canadian brigade attacking a Soviet RKKA motor rifle regiment (dismounted). The Soviets need to prevent the Canadians from ejecting them from the westernmost of two boards, clearing the east-west road, controlling 10+ town hexes, and inflicting a 2:1 or better loss ratio. Achieving two or more of those is a Canadian minor victory, three or more is a major. The western board has two small towns and a large wooded hill mass. The eastern board has a larger town between a northern wooded ridge and a southern bare ridge. The Soviets put a battalion in one of the western towns, with another defending the wooded hill to the south of it. The last battalion defended the eastern city. The MGs from each battalion were stripped off and formed into a provisional MG battalion, dug in a line in front of the eastern city. All the mortars, including two batteries of 120mm and 4 of 81mm, were formed into a provisional mortar battalion just north of the MGs. The roughly 2 companies of T34-85s were held in reserve in the eastern city to see where they could be best deployed as a counterattack. The Canadians reorganized their 2 infantry battalions into 3 task forces. One to capture the western town, one to clear the western wooded hill mass (both together to clear all Soviets off the western map). The last task force would follow up the first, pressing past it to assault the eastern city from across the northern wooded ridge (behind the Soviet mortars). In this way they hoped to avoid the wall of carnage that the MG battalion was threatening between the ridges. The Centurions attacked as a group along the southern edge of the wooded hill mass, supporting the second infantry task group but mainly pressing on to the east to attack the city from across the southern ridge. Not to put too fine a point on it: the plan worked. Like a charm. The Soviet resistance largely melted in front of the Canadian attack. They had a few bright spots, like a few local counterattacks that disrupted and demoralized some key Canadian assaults, a few Centurions left burning on the southern ridge, and a probing attack that the Canadians sent toward the MG battalion that was shredded by Soviet fire. But the game was won with a major victory in the final 2 turns when Canada's assaults into the eastern city secured enough town hexes to satisfy three victory conditions (western board control, 10+ town hexes, better than 2:1 losses inflicted). Early in the battle plentiful American air support played an important role, but after two hours or so it seemed like the American pilots weren't trying as hard, and couldn't even find their targets much of the time. Canadian artillery in these battles isn't much to brag about, but they had as much as they are ever likely to get and it did help a little. In the end it was morale and organization that won this for the Canadians. Their command and sequencing of attacks from unit to unit kept up a relentless pressure on the Soviets. Fun game, but very one-sided. |
| 0 Comments |