|
Texas Horse Soldiers Leyte '44 #28 |
||
|---|---|---|
| (Defender) Japan | vs | United States (Attacker) |
| Formations Involved |
|---|

| Total | |
|---|---|
| Side 1 | 0 |
| Draw | 0 |
| Side 2 | 2 |
| Overall Rating, 3 votes |
|---|
|
3.33
|
| Scenario Rank: --- of 913 |
| Parent Game | Leyte '44 |
|---|---|
| Historicity | Historical |
| Date | 1944-11-30 |
| Start Time | 10:30 |
| Turn Count | 25 |
| Visibility | Day |
| Counters | 55 |
| Net Morale | 0 |
| Net Initiative | 0 |
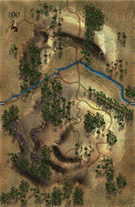
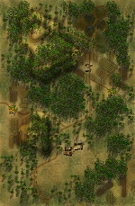
| Maps | 2: 100, 83 |
| Layout Dimensions | 56 x 43 cm 22 x 17 in |
| Play Bounty | 166 |
| AAR Bounty | 165 |
| Total Plays | 2 |
| Total AARs | 2 |
| Battle Types |
|---|
| Hill Control |
| Inflict Enemy Casualties |
| Road Control |
| Conditions |
|---|
| Entrenchments |
| Scenario Requirements & Playability | |
|---|---|
| Leyte '44 | Base Game |
| Marianas 1944 | Maps |
| Saipan 1944 | Maps + Counters |
| Introduction |
|---|
|
Despite the arrival of 32nd Infantry Division, X Corps’ strength continued to ebb and Sixth Army finally released the last corps reserve, the Texas National Guard’s 112th Cavalry Regiment, an independent unit and one of the last cavalry regiments to give up its horses. The regiment advanced past the ridges only to meet a well-prepared Japanese position perhaps three miles further on. |
| Conclusion |
|---|
|
The Japanese 1st Infantry Division had suffered enormous losses but remained fully capable of combat, and it stopped the Texas cavalry cold when the dismounted horsemen reached their fortifications in the rough ground about a mile east of Highway 2. Night-time harassment by patrols and sporadic artillery fire kept the cavalry from on its heels, and it would be another 10 days before they dislodged the Japanese from their jungle fortress. |
| AFV Rules Pertaining to this Scenario's Order of Battle |
|---|
|
| 2 Errata Items | |
|---|---|
| Scen 28 |
Under Victory Conditions, the third bullet should read: All 60-meter hexes are American-controlled at the end of play. (rerathbun
on 2020 Dec 23)
|

|
The A4 has an inherent leader and two combat steps. Its counter should have been given an amphibious armor symbol. (Shad
on 2013 May 06)
|
| Leyte 1944, Scenario Twenty-Eight: Texas Horse Soldiers | ||||||||||||
|---|---|---|---|---|---|---|---|---|---|---|---|---|
Leyte 1944, Scenario Twenty-Eight: Texas Horse Soldiers The 112th Cavalry Regiment bought their amphibious tank support inland to help eliminate stubborn Japanese resistance and it paid off! One small errata to note in the victory conditions, the 80 meter hill should say 60 meter hill hexes which are on map 100. The Americans have three victory objective and one is to clear both east-west roads of enemy units on both maps and their forces are big enough to split up. The biggest force went after the 60-meter hill mass on map 100 which included clearing it of two Japanese entrenchments and enemy units. The American lost a two-step LVT(A)4 unit early but once the enemy 70mm and 20mm guns were knocked out the remaining LVT(A)4s were free to stack together in three unit monster gun stack which could fire on dug-in Japanese Infantry from the safety of two hexes away and blast a path clear within a few turns. The American achieve all three of their victory objectives including the 2 to 1 advantage in step loses. The Japanese lost 14 steps while the American only lost 6 step but won a Major Victory. |
||||||||||||
| 0 Comments |
| A Near Draw in the Philippines | ||||||||||||||
|---|---|---|---|---|---|---|---|---|---|---|---|---|---|---|
This was a 4-session play-through in which the resolute, Tubac52, led the defending Japanese side, and I played the attacking, dismounted US Army 112th Cavalry Task Force. We used the FOW, smoke and excess initiative optional rules. There were 7 FOW-shortened turns in this play-through, that hurt the attacking GIs far more than the Japanese defenders. It was quite a chore to eliminate the dug-in Japanese AT assets, but eventually infantry numbers and the US amphib AFVs were able to breakthrough. The Japanese lost 19 steps and 3 leaders, while the American side lost 7 steps, on the way to a Major Victory in difficult jungle terrain. The Americans managed to achieve all 3 of their objectives, including securing both of the east-west roads on the battle map, and eventually taking the Japanese entrenchments on the 60-meter hill mass on Map 100. This was a hard fight and the outcome was in doubt almost to the last turn. This scenario rates a 3, mostly because it was enjoyable to play. The map art is confusing and is a real trial to interpret. There should be a clear & easy-to-read key, and some depictions of scenario-appropriate LOS situations included with this game. |
||||||||||||||
| 0 Comments |

 Leyt027


