
|
West of Carigara Leyte '44 #23 |
||
|---|---|---|
| (Defender) Japan | vs | United States (Attacker) |
| Formations Involved |
|---|

| Total | |
|---|---|
| Side 1 | 0 |
| Draw | 0 |
| Side 2 | 1 |


| Overall Rating, 0 votes |
|---|
|
0
|
| Scenario Rank: of |
| Parent Game | Leyte '44 |
|---|---|
| Historicity | Historical |
| Date | 1944-11-03 |
| Start Time | 07:30 |
| Turn Count | 20 |
| Visibility | Day |
| Counters | 65 |
| Net Morale | 0 |
| Net Initiative | 0 |
| Maps | 2: 81, 82 |
| Layout Dimensions | 56 x 43 cm 22 x 17 in |
| Play Bounty | 169 |
| AAR Bounty | 171 |
| Total Plays | 1 |
| Total AARs | 1 |
| Battle Types |
|---|
| Inflict Enemy Casualties |
| Road Control |
| Conditions |
|---|
| Off-board Artillery |
| Smoke |
| Scenario Requirements & Playability | |
|---|---|
| Leyte '44 | Base Game |
| Saipan 1944 | Maps + Counters |
| Introduction |
|---|
|
The first Japanese reinforcements to arrive on Leyte came from the 102nd Infantry Division, formed at Cebu just three months earlier from an independent mixed brigade. Several battalions landed on Leyte’s north coast, prompting American commander Walter Krueger of Sixth Army to pause his advance in case more Japanese landed behind his lines. By the time the Americans moved forward again, the newly-arrived Japanese had had time to prepare for them. |
| Conclusion |
|---|
|
The 34th Infantry Regiment’s advance began easily, and they encountered no resistance. When they did finally encounter the Japanese, they were in far greater force than anticipated, in well-prepared positions. Attempts to outflank them simply ran into more prepared positions manned by fresh troops. Even the heroism of 19-year-old Sgt. Charles Mower, who would be awarded the Medal of Honor after his death, could not bring the Americans through the Japanese positions. The Americans withdrew and applied a day-long artillery barrage to the Japanese positions, but they had already slipped away. |

|

|
|---|
| AFV Rules Pertaining to this Scenario's Order of Battle |
|---|
|
| Imperial Japanese Army |
|---|
|


| Army |
|---|
|


| 3 Errata Items | |
|---|---|
| Scen 23 |
In the order of battle, "LVT" should read "LVT-4." (rerathbun
on 2020 Dec 21)
|
| Scen 23 |
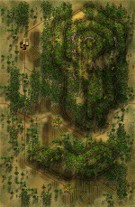
Map 81 should be oriented with the map number in the upper right corner (Ocean on north edge). (rerathbun
on 2020 Dec 23)
|

|
LVT 4 is a one step open-topped APC. Any scenarios where units and leaders start loaded on LVT 4's and enter the board via ocean hexes do not activate in the regular manner. While at sea, all LVT 4's activate like AFV's with leaders, and move toward beach hexes. While moving toward the beach hexes they don't need to use all MPs or move in a straight line. Once they are on the beach, they must follow standard activation rules for both land and water hexes. LVT 4's that are destroyed at sea do not trigger leader decapitation. (Shad
on 2013 May 06)
|
| Leyte 1944, Scenario Twenty-Three: West of Carigara | ||||||||||||
|---|---|---|---|---|---|---|---|---|---|---|---|---|
Leyte 1944, Scenario Twenty-Three: West of Carigara One little but important piece of missed errata: Map 81 should be configure with the ocean facing north or the number 81 located in the top right-hand corner. A good, fun scenario to play and it shows you why PG really shines in the Pacific Threat. The Americans are under a lot of pressure to try and achieve three objective in 20 turns. The Japanese have to figure out how to best defend against the American player achieving or not, these victory levels. Kind of an interesting puzzle to solve for both sides. The Terrain is usually always beneficial to the defender and the Americans are not very mobile either with only one LVT vehicle unit. The Japanese decide to defend the north-south road and spread out their support weapons across the two maps. At first it looked pretty bad for the Americans and the Japanese rolled very well inflicting three step losses very early but once the Americans, which were divided somewhat into two groups recovered, they were able to put a good offensive together and only lost two more steps through the rest of the game and one Major as well. They were able to eliminate 3 out of 4 of the Japanese support weapons and had more than a two to one advantage in steps losses but were not able to clear the whole north-south road. They needed maybe three more turns, as the Japanese still had units on the far southern section of the road including a 37mm AA Gun. So the Japanese lost 20 steps and 4 leaders, while the Americans lost 5 steps and one leader achieving 2 victory objectives and a Minor American Victory. |
||||||||||||
| 0 Comments |