| Author |
JayTownsend
|
| Method |
Solo |
| Victor |
Japan |
| Play Date |
2020-12-10 |
| Language |
English |
| Scenario |
Leyt013
|
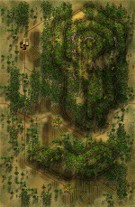
Leyte 1944, Scenario Thirteen: Failure at Buri Airfield
I love trying to fight through this type of terrain on maps 83 & 82 and this battle was a real life failure for the American 7th Infantry, so I wanted to see if I could do better on the board game playing field.
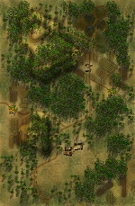
I have learned how to setup better Japanese defenses after playing many Pacific scenarios. Just remember the idea isn’t to win the war just the battle/scenario. The Americans actually have less units but counting on reinforcements to maybe help. The Japanese setup in the optimal defensive positions around the town hexes and airfield on map 83 with a few speedbumps on map 82.
Using rice paddies, followed by minefields and entrenchments not to mentions covering fields of fire the Japanese protected the town hexes and airfield. The American slow movement through the jungle terrain and into the teeth of the Japanese defenses but they plow into it anyway, as 20 turns goes fast in this type of battle and it they wanted a chance to win they had to go for as many victory objectives as possible.
For a change the battle was bloodier for the Americans than the Japanese. The Japanese lost 8 steps and 3 leaders while the Americans lost 9 steps and incredible 5 leaders. They also achieve zero out of three objectives for a Major Japanese victory. It didn’t help but as it was historically the reinforcements didn’t arrive until turn 20 after the show was over and it would have taken them another 5 turns just to get into the action.
This scenario is a real challenge for the Americans to win. I could maybe by looping around get at the Airfield and maybe destroying a two to one advantage in enemy steps killed and if the reinforcements arrive on turns 12-15 that maybe the outcome could be different but this scenario clearly favors the Japanese but is a really fun one to try and do better in. So for me I’ll try again someday, as I find the challenge very tempting and enjoyable.
I’ll be interested to see other player’s results in this scenario!
|