
|
A New Experience Liberation 1944 #11 |
||
|---|---|---|
| (Defender) Germany | vs | Britain (Attacker) |
| Formations Involved | ||
|---|---|---|
| Britain |  |
4th County of London Yeomanry |
| Germany |  |
130th "Lehr" Panzer Division |

| Total | |
|---|---|
| Side 1 | 1 |
| Draw | 0 |
| Side 2 | 4 |


| Overall Rating, 6 votes |
|---|
|
3.67
|
| Scenario Rank: 286 of 913 |
| Parent Game | Liberation 1944 |
|---|---|
| Historicity | Historical |
| Date | 1944-06-10 |
| Start Time | 07:00 |
| Turn Count | 20 |
| Visibility | Day |
| Counters | 56 |
| Net Morale | 1 |
| Net Initiative | 0 |
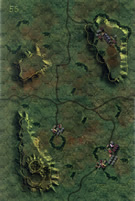
| Maps | 2: 56, 57 |
| Layout Dimensions | 86 x 28 cm 34 x 11 in |
| Play Bounty | 145 |
| AAR Bounty | 171 |
| Total Plays | 5 |
| Total AARs | 1 |
| Battle Types |
|---|
| Breakout |
| Delaying Action |
| Inflict Enemy Casualties |
| Urban Assault |
| Conditions |
|---|
| Hidden Units |
| Off-board Artillery |
| Randomly-drawn Aircraft |
| Smoke |
| Scenario Requirements & Playability | |
|---|---|
| Liberation 1944 | Base Game |
| Introduction |
|---|
|
The Desert Rats earned a name for themselves fighting in the wide open expanses of Egypt and Libya against Rommel’s men. Before dusk on D-Day they landed at Gold Beach to spearhead the advance inland. France’s well-kept farms and villages bore no resemblance to the harsh terrain where the division had earned its name. |
| Conclusion |
|---|
|
The Desert Rats felt totally out of their element. The terrain frustrated them, and having their supporting infantry at the back of the line did them no favors. Many in the army’s upper echelons questioned their desire as they showed virtually nonexistent progress despite extremely light casualties. When things went no better the following day the whispers of “burned out” became louder. |

|

|
|---|
| AFV Rules Pertaining to this Scenario's Order of Battle |
|---|
|
| Army |
|---|
|


| Heer |
|---|
|


| 7 Errata Items | |
|---|---|
| Scen 11 |
The British HMG should be a WPN counter. There are no HMG's in the Lib'44 counter mix. (plloyd1010
on 2016 Aug 03)
|

|
All Bren carriers should have a movement value of 7. (Shad
on 2010 Dec 15)
|

|
The "Optional Values" for the Firefly given in an Avalanche Press Daily Content piece on the 17-Pdr Anti-Tank gun (and printed on a replacement counter sheet Download) are now the Official Ratings, published in games like Cassino '44, Grossdeutschland 1946, and Indian Unity. These are: 5-5 / 8-8 Full Strength and 3-5 / 8-8 Reduced Strength. (caryn
on 2012 May 03)
|

|
The reduced direct fire value of the Heer HMG became 5-5 starting with Fall of France. (plloyd1010
on 2015 Jul 31)
|

|
All SS PzIVH tanks should have a movement of 8. (Shad
on 2010 Dec 15)
|

|
The morale and combat modifiers of German Sergeant #1614 should be "0", not "8". (Shad
on 2010 Dec 15)
|

|
One Wespe (ID# 1201) should have an armor value of 1 on the front and back of the counter. (Shad
on 2010 Dec 15)
|
| Liberation, Scenario Eleven: A New Experience | ||||||||||||
|---|---|---|---|---|---|---|---|---|---|---|---|---|
Liberation, Scenario Eleven: A New Experience A lot to say about this scenario as the two forces are very different, the British have a ton of armor and a little Infantry, while the Germans have a lot of Infantry and a small amount of armor. Note: (there are not enough British Bren & M3 counters for this scenario, so you will have to borrow two units from another game or just use two spotted mark to represent them). The British have three victory objectives to try and achieve and there is no easy way to start this scenario but charge ahead and take your initial loses to those German PzIVHs, PzIVF2s and Wespe armor units but you have a ton of Cromwells, Fireflys & Cromwell CS to absorb some of those hits. The off board artillery is a weak 26 points total and the air-support is only available for three turns. The British plow forward taking their armor loses but fortunately they active first the next couple of turns and were able to use their numbers to pound the German armor away. Next the British took the far town on map 56 from the Germans with their Infantry and some supporting armor and APCs but lost a leader and three steps of their valuable Infantry and demoralizing or disrupting many of the rest. This left the British Armor to try and take the town (Jerusalem) on map 57 without Infantry support. After many turns of direct fire, frustration set in and some ill-advised assaults took place, causing more British step loses. Realizing the British needed two victory objective to win, I gave up on the assault of Jerusalem and moved as much of my surviving armor and ACPs across the southern east-west road on map 57, giving them 22 steps across that line and a second objective and they took the towns on map 56 earlier, so The British achieved a Minor Victory and just in time, as then had no chance to take the town hexes of Jerusalem and they had lost over 15 steps, so with three turns left they crossed the line or the Germans would have won. A bloody combat, as the British lost 30 steps and a very valuable Leader, as they didn’t have many to begin with and I could have used him to maybe rally some the Infantry. The Germans lost 17 steps and the game. With that said, as few dice rolls differently and it’s anybody’s game. |
||||||||||||
| 0 Comments |