
|
Escoville Liberation 1944 #9 |
||
|---|---|---|
| (Defender) Germany | vs | Britain (Attacker) |
| Formations Involved | ||
|---|---|---|
| Britain |  |
2nd Oxfordshire & Buckinghamshire Light Infantry |
| Germany |  |
21st Panzer Reconnaissance Battalion |

| Total | |
|---|---|
| Side 1 | 2 |
| Draw | 0 |
| Side 2 | 5 |


| Overall Rating, 7 votes |
|---|
|
3.43
|
| Scenario Rank: 448 of 913 |
| Parent Game | Liberation 1944 |
|---|---|
| Historicity | Historical |
| Date | 1944-06-07 |
| Start Time | 09:00 |
| Turn Count | 12 |
| Visibility | Day |
| Counters | 56 |
| Net Morale | 0 |
| Net Initiative | 1 |
| Maps | 1: 58 |
| Layout Dimensions | 43 x 28 cm 17 x 11 in |
| Play Bounty | 137 |
| AAR Bounty | 165 |
| Total Plays | 7 |
| Total AARs | 2 |
| Battle Types |
|---|
| Inflict Enemy Casualties |
| Urban Assault |
| Conditions |
|---|
| Hidden Units |
| Off-board Artillery |
| Randomly-drawn Aircraft |
| Smoke |
| Terrain Mods |
| Scenario Requirements & Playability | |
|---|---|
| Liberation 1944 | Base Game |
| Introduction |
|---|
|
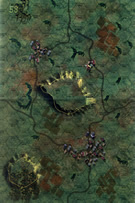
On D-Day the Ox and Bucks landed among the first wave of British troops and promptly secured their objectives in a daring coup de main with few casualties. A day later their objective, the town of Escoville, lay ahead guarded by the thinly spread 21st Panzer Division. |
| Conclusion |
|---|
|
While the 21st Panzer Division was a mediocre outfit, the recon battalion was a cut above the rest of the formation. In heavy fighting the British managed to take Escoville but a counterattack soon drove them back out. The day’s fighting cost the Ox and Bucks battalion 80 casualties plus their commander. Already suffering from wounds incurred on D-Day, he died after extracting his men from Escoville that evening. |

|
|
|---|
| AFV Rules Pertaining to this Scenario's Order of Battle |
|---|
|
| Army |
|---|
|


| Heer |
|---|
|


| 6 Errata Items | |
|---|---|
| Scen 9 |
The scenario calls for 5 Bren, there are only 3 on the counter sheet. I used M3s as a substitute for the other 2. (J6A
on 2017 Sep 28)
|

|
All Bren carriers should have a movement value of 7. (Shad
on 2010 Dec 15)
|

|
The reduced direct fire value of the Heer HMG became 5-5 starting with Fall of France. (plloyd1010
on 2015 Jul 31)
|

|
The morale and combat modifiers of German Sergeant #1614 should be "0", not "8". (Shad
on 2010 Dec 15)
|

|
The SK 7/2 appearing in 1940: Fall of France is actually a SK 6/2, but misprinted by APL. Hence it should be unarmored in that game. The SK 7/2, which appears in other games is correctly printed with an armor of 0. (plloyd1010
on 2022 Apr 28)
|

|
All SPW 251s have an armor value of 0. (Shad
on 2010 Dec 15)
|
| I could swear I left my artillery around here somewhere |
|---|
|
This is an interesting scenario. The Germans have a small, recon heavy force consisting mostly of GREN, APCs and several armored cars. They are opposed by the British who have a good sized force, mostly infantry althoug a bunch in Bren carriers (there weren't enough counters for them in the game, I substituted M3s), along with a couple of Tetrarch light tanks for support. Compared to the German armored cars, the British are outclassed in the armor department, and we're not talking Panthers vs. Centurions here. A small number of the German units get to set up hidden. To win, the Brits have to take both of the smaller towns on the board, or the large town (Escoville). They get a major victory if they get all 3 towns. The Germans have to prevent the British from fulfilling either objective, and also to kill 11 steps for a major victory. I set up a solid combined arms defense in each of the small towns, leaving just the mortars for support in Escoville, and hiding units closer to Escoville. This may have hurt the Germans in the long run. The British entered and on the right side of the battlefield (German left) quickly unloaded HMGs from the Bren carriers. With a 1 leader, 3 HMGs and 3 Bren carriers in adjacent hexes get the Brits to 45 DF factors, and they put intense fire on the town. This made the infantry keep their heads down, and the armored cars were too scarce do to much to stop this. The Tetrarchs and 6 lb AT guns stayed off the board at the beginning, not wanting to get shredded by the armored cars. The eastern town was invested by infantry. Things did not go great for the Germans. They fought hard and killed a lot of steps, and there were just too many British. Once the 6lb guns were finally deployed, they started picking off armored cars in assault hexes (after the armored cars had slaughtered the Bren carriers). The German OBA was non-existent. There was a 1/3 chance of getting 2x16 each turn, and I didn't get any until turn 7, and had it only 2x in the 11 turns I played. Eventually, sheer weight of numbers took down the Germans in the front towns, although the larger small town (3 hexes) didn't fall until turn 11. The British were putting pressure on Escoville, however there was no way they were going to take the entire town by the end of the scenario. It had just taken too long to clear the front towns. As mentioned, casualties were high. The Germans had lost 14 steps, the British 15 when I called it. And that was without the Germans taking a big shot from Escoville at the infantry trying to take it (a reduced armored car, 2 APCs and an HMG platoon firing adjacent). This was an interesting scenario with a lot of movement. While the British prevailed here with heavy casualties (which was the historic results), better luck with the German OBA and better placement of the hidden units could have easily changed the outcome. It's going to be a challenge for the Germans in any case, because they are seriously outnumbered. However, they do have strong units, and the armor advantage can cut down on the British firepower by taking the thin skinned British APCs out of the fight, while the British will have more trouble with the German halftracks. It was my 1st Liberation 1944 scenario, and a good intro to the module. |
| 0 Comments |
| Liberation 1944: scenario #9: Escoville | ||||||||||||
|---|---|---|---|---|---|---|---|---|---|---|---|---|
Liberation 1944: scenario #9: Escoville I really like the huge selection of vehicle/armor types in Liberation but I don’t care so much for the very dark maps but still it won’t keep me from playing good scenarios! In this scenario both sides start right up against each other, so the action starts immediately in this 12 turn scenario where the objective is mostly about controlling the towns, especially the larger one called Escoville. The Germans can also get some level of victory from eliminating British steps but that is conditional on the British controlling or not controlling the town hexes. The Germans have mostly an Armored Recon of mostly armored cars and halftracks of various types and a company of Infantry to try and hold three towns while the British have three times the Infantry, support units & a couple of platoons of the light Tetrarch tanks. In my game play, it was a bloody struggle for most of the game, with the Germans losing 13 steps and the British losing 17 steps and a leader but in the end the British numbers were too strong for the Germans to hold back. The British control Escoville and one other town but were in too bad of a shape to be able to take the third town, thus no major victory. The British achieved a Minor Victory in this one. Kind of a fun scenario to play. |
||||||||||||
| 0 Comments |