
|
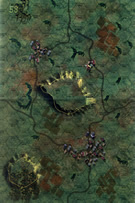
St. Gabriel Liberation 1944 #5 |
||
|---|---|---|
| (Defender) Germany | vs | Britain (Attacker) |
| Formations Involved | ||
|---|---|---|
| Britain |  |
4th/7th Dragoon Guards |
| Britain |  |
5th East Yorkshire |
| Germany |  |
736th Infantry Regiment |

| Total | |
|---|---|
| Side 1 | 3 |
| Draw | 0 |
| Side 2 | 6 |


| Overall Rating, 11 votes |
|---|
|
2.82
|
| Scenario Rank: 810 of 913 |
| Parent Game | Liberation 1944 |
|---|---|
| Historicity | Historical |
| Date | 1944-06-06 |
| Start Time | 15:30 |
| Turn Count | 15 |
| Visibility | Day |
| Counters | 41 |
| Net Morale | 0 |
| Net Initiative | 2 |
| Maps | 1: 58 |
| Layout Dimensions | 43 x 28 cm 17 x 11 in |
| Play Bounty | 131 |
| AAR Bounty | 159 |
| Total Plays | 9 |
| Total AARs | 3 |
| Battle Types |
|---|
| Breakout |
| Delaying Action |
| Inflict Enemy Casualties |
| Urban Assault |
| Conditions |
|---|
| Hidden Units |
| Naval Bombardment |
| Off-board Artillery |
| Smoke |
| Scenario Requirements & Playability | |
|---|---|
| Liberation 1944 | Base Game |
| Introduction |
|---|
|
The 5th East Yorkshires landed near La Riviere but the German defenders immediately pinned them down behind the seawall. A call to the supporting naval vessels soon put an end to that obstacle. They then encountered a concrete gun emplacement that a flail tank knocked out, followed by clearing La Riviere at a frightful cost. The troops then advanced to Ver sur Mer where they passed through the Green Howards and assaulted Crepon. The attack ran according to plan until the lads neared St. Gabriel. |
| Conclusion |
|---|
|
Before leaving Ver sur Mer the battalion combined Companies C & D due to heavy casualties. In the fighting at St. Gabriel the new company commander fell wounded while leading his men. Nevertheless, the British prevailed and pushed on to Brecy just 2,000 yards shy of their objective before ceasing their attacks for the day at 2300 hours. |

|
|
|---|
| AFV Rules Pertaining to this Scenario's Order of Battle |
|---|
|
| Army |
|---|
|


| Heer |
|---|
|


| 3 Errata Items | |
|---|---|

|
Ignore the direct fire values. (Shad
on 2010 Dec 15)
|

|
The reduced direct fire value of the Heer HMG became 5-5 starting with Fall of France. (plloyd1010
on 2015 Jul 31)
|

|
The movement allowance on the counters in Airborne is misprinted. It should be "3." (rerathbun
on 2012 Jan 30)
|
| British steamroller |
|---|
|
This was a small, quick game that pitted roughly two British reinforced companies against a single German reinforced company, for possession of a town. The Germans deployed some forward positions that were quickly eliminated, and concentrated their surviving stack of infantry and HMGs in 1 hex of the town. It took a few hours of bloody assaults but the British rooted them out in the end. They could have afforded to just pound the Germans in that last hex for a few turns first, but as always I dove into the assault too quickly. British casualties were still light, but they were pretty well disrupted by the effort. |
| 0 Comments |
| A bit of a walk over for the Brits | ||||||||||||
|---|---|---|---|---|---|---|---|---|---|---|---|---|
In my first venture into Liberation, unfortunately was less interesting than expected. The British have a larger force and the Germans have much to protect. The odd setup for the hidden British forces did seem to add value for for them. But I played it out "as is" with somewhat predictable results. The meager German forces look to protect the large town to the south east and the low hill to the south west. In the town the bulk of the German forces setup with HMG, 75mm and mortar support, while two GREN's and the 75IG hold the western hill. The light woods and help hide these blocking units but I am afraid they will be sacrificed. In the town the 75mm takes up a position to cover as much open area to the west and center of the board, but this leaves a slot on the east side that has to be covered by just infantry. For the British, the will advance down the west side of the board and look to overrun the south western hill and exit units off the board. That will get them a minor victory and if they can avoid losses they can win the game. With the start the British move infantry down the western road from the northwest town. One forward observing lieutenant moves up the center hill and looks to get a spot on the south east town to try to suppress it with OBA. He eventually positions to see the outskirts of the town. This proves dangerous for the German 75mm trying to cover the ground. It holds its position in the town but is subject to heavy OBA attacks. A good German leader, 9-1-1 keeps it in good shape. Back to the British infantry, they start to cross the open ground south of the hill German OBA starts falling around. British leaders keep the troops moving and advance to the hill. At this point the reduced German company begins to engage the two companies of Tommies. Tank support is called for but the German 75mm is still in action. The British Major calls back to the beaches for naval fire and a cruiser responses with its 8" guns. Spotted by the forward lieutenant it opens up on the town scoring a direct hit an leveling the 75mm. At this point the German AT capability is limited to the 75IG that is now engaged with the advancing INF's and WPN's and the British Shermans advance to support the assaults. The German platoons are quickly reduced and the 75IG is out of action. Only German leaders with radios can do any damage at this point. They do score one hit on the British but that is about it. With the Shermans advancing off the board the British have a minor victory. Final losses, German 2 GREN, 75mm, 75IG, wagons. British 1 INF step. My disappointment for this is due to the feeling that the Germans really have slim chances for victory with this. I suppose a more aggressive defense may pose some trouble for the British, but it will not be for long as the British have powerful artillery in the form of naval guns that have a good chance to come to bear. Once the 75mm is eliminated the Germans have little AT defense against the Shermans which will support any assault at that point. Advancing off the board is the easiest win, leaving the Germans to wonder how to stop them. |
||||||||||||
| 0 Comments |
| Roll Britannia - German speedbumps | ||||||||||||
|---|---|---|---|---|---|---|---|---|---|---|---|---|
Bottom Line: BRITISH MAJOR VICTORY - no casualties, St. Gabriel seized, all forces exited/ Germans destroyed. Top British lessons: 1. Smoke, Smoke, Smoke - superior artillery assets and terrain allowed for good use of smoke to screen the advance of forces right up to objective areas. 2. Engineers with leaders riding tanks behind the smoke allowed for awesome town clearing capability in the assault. Summary: This scenario presents a Brit force with sufficient combat power approaching, and in most cases exceeding 3:1 force ratio; especially in terms of artillery, leadership, and armor. The Brit objectives are to seize the largest town (St. Gabriel) on the map and/or exit off the map. the Germans must prevent both British objectives. The German Plan: Assessment - The German dilemma is either to make St. Gabriel a strong point and try to prevent British exit by fire (unliklely) OR to defend in zone in an attempt to sufficiently frustrate British attempts by inflicting casualties. The Germans arrayed in the following: (1) 2 x GREN w/ LT dug-in on reverse slope of central hill with the task to defend in order to delay Brit use of the high ground; On Order displace to reinforce St. Gabriel. (2) GREN Co (3 x GREN) w/ 75mm IG and CPT defend St. Gabriel (0912,1012) in order to retain. (3) Weapons Co (75mm AT, HMG, and 81mm Mortar) conduct support by fire from Southwest Hill in order to disrupt British attack. The British Course of Action: The Axis of Attack would be along the eastern road. 1 x INF Company (3 x INF) attack to secure intermediate objective HILL 0708 in order to allow WPN CO (3 x HMG) to establish a support by fire position. 1 x WPN CO follows and support attack on Hill 0708 and then establish support by fire position to enable Main Effort attack on St. Gabriel. The Main Effort was the second INF CO arrayed in the NE fields to attack to Seize St. Gabriel. The Armor Company with Engineer Company riding would Follow and Assume the Main Effort to Seize St Gabriel and Be Prepared to exploit success by exiting South. Artillery: 3-in Mortars establish Support by Fire in Hex 0405 to suppress enemy on Hills 0708 and 0315. OBA priority would be smoke screens to Objective areas and then destruction fires of AT systems. Naval Artillery, when received, would be dedicated to destructive fires. Execution: Turns 1-4 (1530-1615). (Shaping Operation 1) Securing Hill 0704: British execution went off with almost no issues. While German Artillery demoralized a RIF platoon early on, Brit smoke covered hill 0704 to adequately to cover the advance of infantry and WPN platoons within 2 hexes of the German position on the hill. German Op Fire from St. Gabrielle did some awesome rolling to pin down and demoralize British Infantry when they reached the edge of Hill 0704, but it wasn't enough to break them. Naval Artillery obliterated German positions on the hill before RIF platoons closed in and got locked in melee, killed the Germam LT, thereby allowing the HMGs to set up their supporting positions. Some of the Brits would spend some time mopping up the hill of a dug-in platoon, but the intermediate objective was accomplished. Turn 5 -9 (1630-1730), Seizing St. Gabrielle (Decisive Operation): The Brits laid a smoke screen adequate enough to allow the INF Company, Tanks, and Engineers to advance down the East road up to the edge and eastern side of St. Gabrielle, out of Observation view of the 75mm AT Gun on the SW hill. German op fire and arty was largely ineffective as the 4 x RIF, Platoons, 2 Shermans, and Engineers encircled and prepared to enter St. Gabrielle. The 3-in Mortars successfully suppressed German use of their own 81mm mortars during this time. British prepatory Direct Fire into St. Gabrielle demoralize the Germans and forced their Captain to flee. Attempts to use the HMG from the SW hill to reinforce teh East side of St. Gabrielle were interdicted by supporting fire from Hill 0704. When the tanks and engineers entered St. Gabrielle, they made fairly quick work of the defending Germans. A Sherman platoon advanced through and cleared East St/ Gabrielle, eliminated the demoralized German Captain, and then withdrew upon receiving 75mm AT fire from the Hill. Naval Gunfire was not provided this period as British success apparently did not warrant it. By 1730 (Turn 9) St. Gabrielle and Hill 0704 were secured and the Germans Weapon Company (mortar, LT, HMG, and 75mm) were attempting recover and prepare to interdict British units exiting off board. Turns 10-15: Exploitation and Clearing Operation (1745-1900) The remainder of the game, the Brits used all Artillery to suppress and eventually destroy the 81mm mortar. A Brit Rifle Company and HMGs continued to advance and clear the SW hill, all remaining German forces eventually broke or were captured and failed to inflict casualties. All British forces displace off board by the end of the operation. The Germans were eliminated except for a wagon that fled off board. The Brits sustained no step losses and exited all forces off board in good order. Assessment: It was hard to enjoy such a one sided victory, and I think chances of a German victory are slim unless you have an inept British player and very lucky German rolls. As a tactical dilemma, this is an adequate scenario and shows the advantages of integrating smoke screens, and combined arms for the Brits to truly get exponential results. I do love it when a plan comes together though, and my enjoyment in this was watching how well the British plan came together and how little the Germans were able to do to stop it; even with some very good rolls at times. German leadership is a very limiting factor that if it can be suppressed, so can the German artillery. |
||||||||||||
| 0 Comments |