|
A Good Day Liberation 1944 #2 |
||
|---|---|---|
| (Defender) Germany | vs | Britain (Attacker) |
| Formations Involved | ||
|---|---|---|
| Britain |  |
231st Infantry Brigade |
| Britain |  |
79th Armoured Division |
| Germany |  |
915th Volksgrenadier Regiment |

| Total | |
|---|---|
| Side 1 | 0 |
| Draw | 2 |
| Side 2 | 7 |
| Overall Rating, 12 votes |
|---|
|
3.58
|
| Scenario Rank: 352 of 913 |
| Parent Game | Liberation 1944 |
|---|---|
| Historicity | Historical |
| Date | 1944-06-06 |
| Start Time | 11:30 |
| Turn Count | 16 |
| Visibility | Day |
| Counters | 90 |
| Net Morale | 0 |
| Net Initiative | 2 |
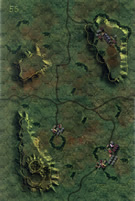
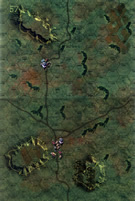
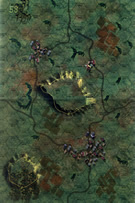
| Maps | 3: 56, 57, 58 |
| Layout Dimensions | 84 x 43 cm 33 x 17 in |
| Play Bounty | 155 |
| AAR Bounty | 147 |
| Total Plays | 9 |
| Total AARs | 5 |
| Battle Types |
|---|
| Breakout |
| Delaying Action |
| Inflict Enemy Casualties |
| Urban Assault |
| Conditions |
|---|
| Hidden Units |
| Minefields |
| Naval Bombardment |
| Off-board Artillery |
| Randomly-drawn Aircraft |
| Smoke |
| Terrain Mods |
| Scenario Requirements & Playability | |
|---|---|
| Liberation 1944 | Base Game |
| Introduction |
|---|
|
The 1st Dorsets spent the first half of the war as part of the Malta garrison, and then took part in assault landings on Sicily and at Reggio di Calabria in Operation Baytown. Well-experienced in hitting enemy-held shores, the Dorsets managed to clear their sector of Jig Beach quickly, then started their advance inland toward Bayeux. With the landing going smoothly reinforcements soon arrived to help. |
| Conclusion |
|---|
|
The 1st Dorsets gathered up the ready armor and two infantry companies from the second wave and worked their way far enough to the south of Le Hamel to avoid becoming entangled in the vicious fighting there and swung west. While unable to reach Bayeux they did subdue Ryes. These accomplishments, along with the capture Arromanches, secured the beachhead from the west. |
| AFV Rules Pertaining to this Scenario's Order of Battle |
|---|
|
| 6 Errata Items | |
|---|---|
| Scen 2 |
There is an error in the published version of Liberation 1944: Scenario 2, A Good Day. The British side may roll for 4 turns of naval gunfire support. As published, these are to be rolled on turns 5, 10, 15 and 20. However, the scenario is only 16 turns long. The correct language is as per the following paraphrased note from the game designer: "The scenario was shortened in development. Roll for these OBA increments on turns 3, 7, 11 and 15." (treadasaurusrex
on 2022 Jul 09)
|

|
All Bren carriers should have a movement value of 7. (Shad
on 2010 Dec 15)
|

|
Ignore the direct fire values. (Shad
on 2010 Dec 15)
|

|
The reduced direct fire value of the Heer HMG became 5-5 starting with Fall of France. (plloyd1010
on 2015 Jul 31)
|

|
The morale and combat modifiers of German Sergeant #1614 should be "0", not "8". (Shad
on 2010 Dec 15)
|

|
The movement allowance on the counters in Airborne is misprinted. It should be "3." (rerathbun
on 2012 Jan 30)
|
| I thought "forks" were only a chess term... | ||||||||||||||
|---|---|---|---|---|---|---|---|---|---|---|---|---|---|---|
I had the chance to play this scenario with Daniel (Hugmenot) and we found it to be an interesting play. One very important note is that the victory conditions provide the British player with an incentive to pursue an exit strategy that can provide for a significant victory if pursued with vigor. As the German player, I appreciated Daniel's decision to forego the simple victory and instead pursue a conquest victory, at least until it appeared that such a victory would prove elusive. My Germans were able to hold up the British and cause significant losses on the British but were unable to effectively stop their advance on the first boards. The battle became very interesting, however, towards the end of the game as Daniel entered the final board. The Germans needed to hold and control several of the town hexes, meaning that the British needed to be kept at arm's length. If they were able to enter the towns in assault, the Germans would lose needed victory points. While I did well with this (and Daniel's leaders had some trouble keeping themselves and their troops in good order!), Danile was able to slowly put his troops in position to threaten some towns or to exit the board. Given that the number of victory points for exiting was much higher than giving up a town hex, I chose to give up the hex and then watched the victory seep away as a couple of step losses brought me below the cutoff for a minor victory. It was, however, a very competitive play and a good afternoon. I give it a "4" as played but, as mentioned previously, a British strategy of "exit" would make this a less interesting play. |
||||||||||||||
| 0 Comments |
| A average day | ||||||||||||
|---|---|---|---|---|---|---|---|---|---|---|---|---|
Played solo as due to unforeseen circumstances I had a spare morning. This scenario has a strong British forces trying to take towns and exit units against a German GREN force with some A/T support. The Brits get A/C on five turns and possibly Navel bombardment support on GT 5,10,15 and 20. Which is strange as there are only 16 turns. This kind of stupid proof reading error really makes me pissed (in the American sense). I played it that it was a typo for the navel support and played 16 game turns. Those extra 4 turns would have turned this into a Brit victory I believe but there you go. The British commanders plan was to advance strongly on the Southern flank take town hexes 1014/1114/1113 and 0611 then exit that force for the win. The Sherman's were kept in reserve until the A/T guns had been disposed of. A company sized force with the Crab platoon would keep the Germans busy on north of the map. The German commander had put up hedgehog defenses around all the towns on board 56 and the tow hex town of board 57 and hoped to inflict enough losses and morale checks to slow the British juggernaut. The first few turns saw little happen in the way of death and destruction even the promised Navel support failed to appear. The Dorset's advanced methodically in true English style pushing back the few German picket units, after 90 mins the northern diversionary force were in position to assault the first town, fail tanks moved forward to dispose of the small minefield covering the front of the German positions while INF assaulted the A/T position in the town. A larger attack with WPN support also piled into the rest of the town. In fact this town then held out almost to the end of the scenario and was as far as the British troops in this sector would advance. In the south though accurate German MTR and OBDA had disrupted the main British advance. This forced the British commander to throw in the reserves (3 Sherman platoons). The remaining Ger 75 A/T guns had on good shout which it missed and then the tanks were out of range, the LT in charge of that battery decided to move it in daylight this attracted a Typhoon squadron who eliminated the last of the German A/T batteries in a hail of rocket and cannon fire. The advance seemed to gain some momentum from then on, but British casualties were beginning to mount and time was running out. The assault on the major town on board 56 began with a dramatic shift in fortunes as German units warn down by Navel bombardments, Off board artillery, On board mortars and Sherman HE shells began to give up and either flee or surrender. But one part of the town under a charismatic leader rallied and held out to game end. When all the dust had settled the VP count was Germans 25 points Brits 27 points so a draw was declared. Good solid action this ideal for solo play (I did not use hidden units but added 3 GREN and 1 MG to the German forces as suggested in the special rules). Probably more exciting if played FtF. This was my first game from Lib 44 and I must comment on the components of the game. They are the worst of the PG genre in my opinion. The maps are a dark green with the hills looking like moon craters, the counters are way too thick and even in this smallish game I was getting 2" high stack in assault hexes I also noted that several counter facings were beginning to lift. AP must do better or I will stop buying new PG products. |
||||||||||||
| 0 Comments |
| Pushing back the Jerries South of El Hamel | ||||||||||||||
|---|---|---|---|---|---|---|---|---|---|---|---|---|---|---|
This was a fast, 2-session play-through with the playful, yet cunning goosebrown, as the defending German Commander. I managed the invading British side. We used the optional smoke, consolidation, excess initiative – and unfortunately – the miserable Fog of War rules. The 1st session (game turns 1-3) was all about the British movement-to-contact led by an armored spearhead that was primarily focused on the northern half of the Map 57 and 56. This right flank approach quickly secured the 2-hex town on Map 57 (Hexes 57-0612 and 57-0613). By the end of game turn 3, British Sherman platoons was probing the northern margin of the northeastern 20-meter hill mass on which the bulk of the east-facing, German force was dug-in. A much smaller, company plus, British left flank probe, secured the single hex village in Hex 57-0506 during the 3rd game turn. So far, no sign of the dreaded Jerries with their fiendish AT guns . . Already, 3 steps of German mortar units, and a single British step had been eliminated. The 2nd session (game turns 4-6) featured the continuing of the remorseless British left flank approach the end well-defended hill mass with the 2-hex town. RAF bombing and Royal Navy shelling in support of this phase of the operation ere either completely ineffective, or deadly. The last German mortar platoon was destroyed on the northeastern edge of the hill leaving the Captain that had been directing their mayhem all alone in his rifle pit. In what turned out to be a foolish move, a Sherman platoon bolted forward to try and capture the Captain, only to discover that the clever Germans had dug in their mortar units in the middle of a minefield! The Captain was eliminated by the charging tanks, which then promptly hit a mine and was demoralized in-place. This surprise, forced a re-alinement of the rapidly closing Tommy infantry in hopes of rescuing the tank from a likely counter attack. As it turned out, another German leader was left alone by a pair of fleeing infantry in the adjoining hex – here was another baited trap as that hex contained another minefield. The German Commander conceded the game in the next turn, as the final result seemed a foregone conclusion for the outnumbered fascists. As this is only a 16-turn scenario, it would be improved by correcting the “as published” Royal Navy shore bombardment rolls to occur on turns 3, 7, 11 and 15; and not in turns 5, 10,15 and 20. This was what the game’s designer intended and we have noted the correction as an erratum. I give this exciting and very fun scenario (for the British side) a 4, but recommend it for solo play only, as it is seriously unbalanced in favor of His Majesty’s troops. |
||||||||||||||
| 2 Comments |
"There were never in the world two options alike, any more than two hairs or two grains. Their most universal quality is diversity."
- Michel Montagne, 1533-1592
| Lopsided |
|---|
|
This is one of those scenarios that you can play if you want to test your ability to face overwhelming odds, or how good a spoiler you can be. I apparently am not good at it, because the Germans barely scratched the paint on the British behemoth. It was still fun to play, because you rarely get to see a plan go so well for one side or the other. Most of the time both sides just muddle along, lurching from setback to setback until one side collapses. In this game the British finished their tea and had a go at Jerry, and still had the energy for a three-day cricket match afterwards. |
| 1 Comment |
| That really does seem to be an awful lot of infantry... | ||||||||||||||
|---|---|---|---|---|---|---|---|---|---|---|---|---|---|---|
The Germans thought about their defense position here for quite some time. The advancing British had a huge preponderance of infantry and a company of Shermans... And 4 naval support fires, 39 factors of OBA, and 5 airstrikes and not these wimpy Bf109s or Gloster Gladiators, but the beefy, no neck stevadore-solid Typhoons with some amazing array of things that go boom to kill my cardboard. The Germans had a pet snail named Lazlo. Oh. And some rifles. The German commander had placed minefields along his left frontage at the top of the hill with the town he was defending and a few mines toward the center that would hopefully canalize the British to come within the range of the two hidden anti-tank guns, a 50mm and a 75mm. On the hill I deployed dug in 81mm mortars in the minefields in front of town so they could have a chance in an assault but alas they were destroyed by airpower and well placed artillery. My British opponent came with the main thrust on his right and hit my left like a freight train and decimated my mortars (see above). By turn 5 it was obvious that without even taking one more objective, he was going to exit enough units to make it a victory so I conceded and we will take up action somewhere else. |
||||||||||||||
| 2 Comments |

 LIBE001


