
|
Phoenix: Seven Horrors of War La Campagne de Tunisie #11 |
||
|---|---|---|
| (Defender) Italy | vs |
France
(Attacker)
United States (Attacker) |
| Formations Involved | ||
|---|---|---|
| France |  |
12e Regiment de Chasseurs d'Afrique |
| Italy |  |
131ª Divisone Corazzata "Centauro" |

| Total | |
|---|---|
| Side 1 | 0 |
| Draw | 3 |
| Side 2 | 1 |


| Overall Rating, 4 votes |
|---|
|
3
|
| Scenario Rank: --- of 913 |
| Parent Game | La Campagne de Tunisie |
|---|---|
| Historicity | Historical |
| Date | 1943-03-22 |
| Start Time | 16:30 |
| Turn Count | 12 |
| Visibility | Day |
| Counters | 51 |
| Net Morale | 0 |
| Net Initiative | 3 |
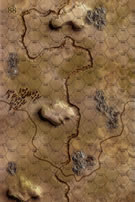
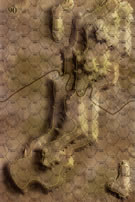
| Maps | 2: 88, 90 |
| Layout Dimensions | 56 x 43 cm 22 x 17 in |
| Play Bounty | 155 |
| AAR Bounty | 165 |
| Total Plays | 4 |
| Total AARs | 2 |
| Battle Types |
|---|
| Inflict Enemy Casualties |
| Conditions |
|---|
| Anti-infantry Wire |
| Entrenchments |
| Hidden Units |
| Minefields |
| Smoke |
| Terrain Mods |
| Scenario Requirements & Playability | |
|---|---|
| An Army at Dawn | Counters |
| Conquest of Ethiopia | Maps |
| La Campagne de Tunisie | Base Game |
| Introduction |
|---|
|
With the coming of spring the Allies were ready to regain the initiative. However, a driving rain confined vehicles to the roads and filled the desert with mud -- one of the seven horrors of war. When the rains finally ceased, the Allies gradually pushed the Axis defenders back in the El Guettar region. There, the German command had built a blocking position manned mainly by the Italian Centauro Division and by several ad hoc units. To support the US attack a Franco-American diversionary force would bypass the Italian defenses from the south, following a wide valley shouldered by high djebel hills on both sides. It just looked like a trap. |
| Conclusion |
|---|
|
The desert track was rather easy to defend since it was dominated on the north by a high djebel line. The Axis troops used the terrain to close down the way to the east and the first French troops were halted by violent artillery fire. When they tried again at 1600, they were stopped by the fortifications between Djebel Bou Jerra and Djebel El-Asker. Despite aggressive action by the Somua tanks covering the US recon units, accurate Italian artillery fire prevented the French from closing the range. No bypass was possible. |
| Additional Notes |
|---|
|
Maps from Africa Orientale Italiana are the same as those from Conquest of Ethiopia, and thus may be used in there place. |

|
|
|---|
| AFV Rules Pertaining to this Scenario's Order of Battle |
|---|
|
| Armée de Terre |
|---|
|


| Regio Esercito |
|---|
|


| Army |
|---|
|


| 1 Errata Item | |
|---|---|

|
In 1940: Fall of France, the units show Direct Fire. All units are Indirect Fire. (rerathbun
on 2015 Jun 06)
|
| Allies Make It Look Easy | ||||||||||||
|---|---|---|---|---|---|---|---|---|---|---|---|---|
La Campaigne de Tunisie Scenario 11: The Seven Horrors of War The Situation: It’s Franco-American armor against Italian guns in this small scenario. No geographic objectives in this one, taking out the other guy’s steps is the only objective. Setup: The Italian force sets up first, with some 75s, a 100mm, some 47mm AT with Bersligieri, a motorcycle platoon and a AB41 backing them up. They also get some entrenchments, mines and wire. Seems formidable! But this is a two board map, so I concentrate them in two groups. The artillery and BERS set up shop on a slope in the upper middle of the map, with the troops entrenched in front of the guns. The 47mm ATs set up in a rocky patch about 8 hexes south, with minefields in front. The MTC and AB41 form a mobile reserve, hidden out of sight behind a hill. The idea is to make the open area in front and between these positions impassible to mechanized forces. Recap: The Allies enter from the west in two groups. The armor, French S35s accompanied by American M3/75s, M3 Scout Cars and some Jeeps with 50 cals head for the artillery while the US Infantry company takes on the 47s. The Italians are badly restricted by the victory conditions, which only involve step losses. Thus they cannot base their defense around a specific objective. That, combined with 16 turns straddling dusk, gives the Allies and their mobility tons of options. In this case the northern force moves around the IT position to the north, with the Jeeps swinging all the way to the rear, the S35s moving up the reverse slope out of sight, and the main US force keeping the BERS occupied while staying out of range of the Italian guns. After sunset they move in, with the Jeeps demoralizing a 75, which is eliminated on a recovery attempt, while the S35s get the drop on the 100mm and knock it out. The last remaining 75 gets off a couple shots at the S35s before being taken out. The Italian force was essentially frozen; if they tried to pack up and move the trucks would get caught in the open and the BERS would lose their trenches. So they stood and fought, but the dice were against them. The battle to the south was less eventful. The GIs battled the mobile reserve and 47s to no effect, with the two sides swapping DMs and disruptions but nothing else. By turn 14 the Allies have taken out 3 steps, enough for the minor win, but the additional 3 required for the major win will not be easy to get. So they fall back and take the minor victory. They also got out without a scratch. Final score 3-0 Allies. Analysis: This was a fun textbook encounter between a mobile attacker vs a defender in a fixed position. Again, I feel the victory conditions make this one very tough for Italy; if the Allies had to take a hill or clear the road it would have been much harder. As it stands it’s pretty easy pickings for the French and Americans, as they have a lot of time and real estate to play with and can set up a coordinated attack. A good solitaire game. |
||||||||||||
| 0 Comments |
| A Quiet Evening in the Valley | ||||||||||||
|---|---|---|---|---|---|---|---|---|---|---|---|---|
On March 22, 1943, a Franco-American diversionary force attempted to bypass units of the Italian Centauro Division south of El Guettar. Bersaglieri from the Centauro Division were dug in west of the central wadi, two 47mm AT groups were entrenched in the southern and south central rocky areas, an AB41 was adjacent to the southwest wadi, and a major bombardment group consisting of two 75mm and a 100mm platoon was entrenched on the northeast 60-meter hill. Units of the 12e Régiment de Chasseurs d’Afrique moved east through the valley where they were slowed by both wire and minefields. An engineer platoon found a clear path east, and the Allied units moved forward in force. As the sun started to fall, the combined effects of fire from both an M3A1 Scout patrol and multiple 75mm French batteries caused the Italian gun crews in the major bombardment group to abandon their weapons. At 1800 hours in the last light of day, an Italian AB41 platoon eliminated an Allied Truck MG, while fire from Somua S35’s destroyed a Bersaglierri infantry group. After that, both sides settled in for the evening with the battle ending in a draw. This short (12 turn) scenario, with victory based totally on step loss, did not start out well for the Franco-American side when one of their infantry crested the southwest 20-meter hill to reconnoiter and was destroyed by the Italian major bombardment group (rolling “snake eyes” on the first roll!). Two steps were lost on the first turn, and since the Italians only needed three for a minor victory, things looked bleak for the Allies. However, they had similar good fortune when they were able to demoralize all three of the artillery units in the major bombardment group through a combo of direct fire from an M3A1 and bombardment from dual 75mm units. The demoralization check for all three units resulted in their flight, and subsequent abandonment. At that point, the Italians only needed one more point to match the Allied total and secure a draw, which they did on the last turn with 2-hex visibility due to the mobility of their armored car and the plethora of one-step Jeep MG and Truck MG units. After that, both sides could gain no further advantage by any increase in step loss since the Victory Conditions read that “Tied victory levels or any other result is a draw”. So, they hunkered down and finished out the foray at ease. The Allies ended the scenario with 3 steps lost, to 5 lost by the Italian forces. The scenario is pretty much an effort to get three steps quickly while keeping your forces from losing three in the process. There are only 4 turns with visibility of 12 hexes, which limits the ability to accrue the steps needed for victory without short-range combat. In the latter situation, the Italian infantry are best placed near the AT units to ensure that the S35’s can't move in and have their way with them. |
||||||||||||
| 0 Comments |