Panzer Grenadier Battles on April 27th:
Arctic Front Deluxe #40 - Children's Crusade Broken Axis #14 - Târgu Frumos: The Second Battle Scenario 3: Sledge Hammer of the Proletariat
Army Group South Ukraine #6 - Consternation Road to Berlin #73 - She-Wolves of the SS
Errors? Omissions? Report them!
Battle of Leuwiliang, The 2nd Day
Lost Battalion #2
(Defender) Australia
(Defender) Britain
(Defender) United States
vs Japan (Attacker)
Formations Involved
Australia 2/2nd Pioneer Battalion
Australia 2/3rd Machine-gun Battalion
Britain 3rd Hussars
Japan 16th Infantry Regiment
Japan 2nd Tank Regiment
United States 131st Field Artillery Regiment
Display
Balance:


Overall balance chart for LBoP002
Total
Side 1 1
Draw 0
Side 2 0
Overall Rating, 2 votes
5
4
3
2
1
4
Scenario Rank: --- of 913
Parent Game Lost Battalion
Historicity Historical
Date 1942-03-03
Start Time 05:45
Turn Count 16
Visibility Day
Counters 95
Net Morale 1
Net Initiative 1
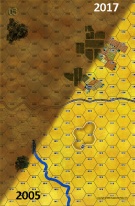
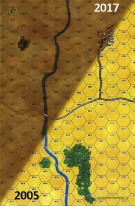
Maps 2: 5, 7
Layout Dimensions 86 x 28 cm
34 x 11 in
Play Bounty 187
AAR Bounty 171
Total Plays 1
Total AARs 1
Battle Types
Delaying Action
Exit the Battle Area
River Crossing
Conditions
Entrenchments
Terrain Mods
Scenario Requirements & Playability
An Army at Dawn Counters
Fire in the Steppe Maps
Kokoda Campaign Counters
Lost Battalion Base Game
Nihon Silk Counters
Road to Dunkirk Counters
Introduction

About 3km north of the bridge to Leuwiliang was another, which had not been destroyed. This fact troubled Brigadier Blackburn. After the failed assault and an abortive night crossing, Japanese headlights were observed moving toward the intact crossing. While Blackforce was feeling better about themselves they knew a hard day was coming.

Conclusion

The Australians were as ready as they could be. They still could not prevent the Japanese from getting across the river, but they kept them contained. Battery D of the 2/131st Field Artillery Regiment was credited with knocking out several tanks. The cooks, drivers and others pressed into front line service also performed well.

On the north coast, Batavia fell to the 2nd Infantry Division. Soon to be pressed on two sides, Blackforce withdrew to Soekaboemi in good order. They had suffered about 100 casualties in two days of fighting.


Display Relevant AFV Rules

AFV Rules Pertaining to this Scenario's Order of Battle
  • Vulnerable to results on the Assault Combat Chart (7.25, 7.63, ACC), and may be attacked by Anti-Tank fire (11.2, DFT). Anti-Tank fire only affects the individual unit fired upon (7.62, 11.0).
  • AFV's are activated by tank leaders (3.2, 3.3, 5.42, 6.8). They may also be activated as part of an initial activating stack, but if activated in this way would need a tank leader in order to carry out combat movement.
  • AFV's do not block Direct Fire (10.1).
  • Full-strength AFV's with "armor efficiency" may make two anti-tank (AT) fire attacks per turn (either in their action segment or during opportunity fire) if they have AT fire values of 0 or more (11.2).
  • Each unit with an AT fire value of 2 or more may fire at targets at a distance of between 100% and 150% of its printed AT range. It does so at half its AT fire value. (11.3)
  • Efficient and non-efficient AFV's may conduct two opportunity fires per turn if using direct fire (7.44, 7.64). Units with both Direct and AT Fire values may use either type of fire in the same turn as their opportunity fire, but not both (7.22, 13.0). Units which can take opportunity fire twice per turn do not have to target the same unit both times (13.0).
  • Demoralized AFV's are not required to flee from units that do not have AT fire values (14.3).
  • Place a Wreck marker when an AFV is eliminated in a bridge or town hex (16.3).
  • AFV's do not benefit from Entrenchments (16.42).
  • AFV's may Dig In (16.2).
  • Closed-top AFV's: Immune to M, M1 and M2 results on Direct and Bombardment Fire Tables. Do not take step losses from Direct or Bombardment Fire. If X or #X result on Fire Table, make M morale check instead (7.25, 7.41, 7.61, BT, DFT).
  • Closed-top AFV's: Provide the +1 modifier on the Assault Table when combined with infantry. (Modifier only applies to Germans in all scenarios; Soviet Guards in scenarios taking place after 1942; Polish, US and Commonwealth in scenarios taking place after 1943.) (ACC)
  • Tank: all are closed-top and provide the +1 Assault bonus, when applicable

Display Order of Battle

Australia Order of Battle
Army
  • Motorized
Britain Order of Battle
Army
  • Mechanized
Japan Order of Battle
Imperial Japanese Army
  • Mechanized
United States Order of Battle
131st Field Artillery Regiment
  • Towed
Army

Display AARs (1)

A Smaller, but Very Intense Battle in Java
Author treadasaurusrex (Australia, Britain, United States)
Method Face to Face
Victor United States, Australia, Britain
Participants Tubac52
Play Date 2024-03-17
Language English
Scenario LBoP002

This was our second 16-turn scenario, designed by our own Peter Lloyd, that Tubac52 and I have tried in a face-to-face encounter. Like the previous one, this engagement lasted 4-sessions. This time I led the Black Force made-up of Americans, Australians and British units. Tubac52 ably led the attacking Japanese elements of the 16th Infantry regiment (2nd Infantry Division). Once again, Map 7 contained the Tjianten River that the Japanese must cross and push back the defenders that are entrenched in 7 strongpoints. This time the scenario did not arbitrarily end before both sides were ready. Both sides drew middling leaders and many were eliminated in this intense fight. We used the consolidation, excess initiative and extended assault optional rules and ignored the FOW. We used the following two house rules: 1) Road Movement for Mechanized & Foot Units All FOOT & MECHANIZED units may move on roads at the rate of 1/2 a Movement Point (MP) per road hex, just like MOTORIZED units, and 2) Standardized Movement for Mechanized Units All mechanized units may move through clear hexes at a movement cost of only 1 movement point (MP) per hex, instead of 1 1/2. Add one to this cost if moving up, across, or down slopes hexes. We think that these house rules added to the fun and improved game play.

This action almost began with the senior Japanese leader getting himself killed in the 3rd game turn. This decapitation, started an avalanche of leader losses with one lost each game turn until the 9th turn. We had never experienced so many consecutive leader losses in PG! Both Japanese tank platoons and British Mk, VIb light tanks were eliminated by armor piercing shots in a nasty tank-on-tank exchange ended by the US artillery. Again, Japanese morale recovery efforts were virtually always successful in this play-through. Four of the 7 Allied strong points were taken in costly close assaults. The other 3 entrenchments did not change hands and the Australian were able to recover one in a spirited counterattack that cost 2 leaders their lives. However, Lady Luck clearly favored the Allies in bombardment, AT and adjacent-hex firefights, especially after game turn 8. The Emperor began seriously running out of units at about game turn 13, although the Allied were also running very short by that point.

At the end, the Japanese were not able to exit 6 units off the east edge of the battle map, and in fact, only 2 of the Emperor's few remaining intact platoons were able to get more than 3 hexes east of the Tjianten (The River of Death in this play through. This result was remarkably close to a draw, but was much bloodier (longer game length) than our previous effort. The final step losses were an amazing 30 for the Japanese attackers and 7 leaders, versus 13 steps and 6 leaders for the Allies.

So, final victory went to the battered Allied side. We give this well-balanced, scenario an enthusiastic rating of 4! We both felt that this one is suitable for both SOLO and SHARED play.

0 Comments
You must be a registered member and logged-in to post a comment.
Errors? Omissions? Report them!
Page generated in 1.131 seconds.