
|
Do or Die South Flank #35 |
||
|---|---|---|
| (Attacker) Germany | vs | Soviet Union (Defender) |
| Formations Involved | ||
|---|---|---|
| Germany |  |
5th SS "Thule" Panzergrenadier Regiment |
| Soviet Union |  |
230th Separate Tank Regiment |
| Soviet Union |  |
301st Antitank Regiment |
| Soviet Union |  |
308th Guards Mortar Regiment |
| Soviet Union |  |
42nd Guards Rifle Division |
| Soviet Union |  |
52nd Guards Rifle Division |
| Soviet Union |  |
95th Guards Rifle Division |

| Total | |
|---|---|
| Side 1 | 0 |
| Draw | 0 |
| Side 2 | 2 |


| Overall Rating, 3 votes |
|---|
|
4.33
|
| Scenario Rank: --- of 913 |
| Parent Game | South Flank |
|---|---|
| Historicity | Historical |
| Date | 1943-07-12 |
| Start Time | 12:30 |
| Turn Count | 22 |
| Visibility | Day |
| Counters | 229 |
| Net Morale | 0 |
| Net Initiative | 2 |
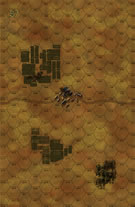
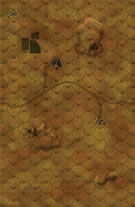
| Maps | 3: 36, 37, 39 |
| Layout Dimensions | 84 x 43 cm 33 x 17 in |
| Play Bounty | 191 |
| AAR Bounty | 171 |
| Total Plays | 2 |
| Total AARs | 1 |
| Battle Types |
|---|
| Hill Control |
| Urban Assault |
| Conditions |
|---|
| Entrenchments |
| Minefields |
| Off-board Artillery |
| Randomly-drawn Aircraft |
| Reinforcements |
| Terrain Mods |
| Scenario Requirements & Playability | |
|---|---|
| South Flank | Base Game |
| Introduction |
|---|
|
Things looked grim for II SS Panzer Corps as its advance south of the Psel River had stopped and been thrown back. That left all German hopes for Operation Citadel resting squarely on Death’s Head Division’s advance north of the river. On the previous day, when the defenders of the two nations’ ideologies had squared off, the Guardsmen had prevailed. The Germans understood there was no tomorrow, and ordered every man and machine available into the fight. |
| Conclusion |
|---|
|
The fury of the German attack drove the Soviets from Hill 226.6 in just an hour, all but destroying the depleted 52nd Guards Rifle Division in the process. Ninety-fifth Guards Rifle Division fared little better but managed to retain their integrity. It appeared to the men at the front that despite the Soviet Union’s best efforts, the blitzkrieg was unstoppable. Meanwhile, Stavka had matured enough to know that today’s breakthrough was not a strategic disaster but only a tactical setback. That evening, forces were already moving forward to counter any threat tomorrow might bring. |

|

|
|---|
| AFV Rules Pertaining to this Scenario's Order of Battle |
|---|
|
| Schutzstaffel |
|---|
|


")
")
")
")
")


| Army (RKKA) |
|---|
|


| Guards |
|---|
|


| 6 Errata Items | |
|---|---|

|
The reduced direct fire value of the SS HMG is 5-5 in Beyond Normandy and Road to Berlin. (plloyd1010
on 2015 Jul 31)
|

|
The Units in Beyond Normandy were misprinted with a movement factor of 5. The movement factor should be 8. (rerathbun
on 2012 Mar 21)
|
|
|
Liberation 1944's counters are mislabeled 'PzIVF2.' The counter's ratings are correct (Armor 5, Move 8, DF 11-6, AT 6-8). (rerathbun
on 2014 Feb 14)
|

|
The movement shown on the counter is zero (0) but is listed as 8 just like the regular SdKfz 250 APCs. (thomaso827
on 2016 Jul 11)
|

|
Should have direct fire value of 10-5 and an anti-tank value of 4-4. Values on the Kursk South Flank counter are for SPW-251/22. (plloyd1010
on 2015 Feb 17)
|

|
Kommissars never get morale or combat modifiers. Ignore misprints. (Shad
on 2010 Dec 15)
|
| Didn't Do & Dead | ||||||||||||||
|---|---|---|---|---|---|---|---|---|---|---|---|---|---|---|
Once again, time was the Soviets' greatest ally. The Germans would win this scenario 90 percent of the time if it were a 30 turn game. But it isn't. Hence the challenge. The Soviet player's set-up aggravated my weaknesses as commander- he seemed to know HOW I would approach the big picture. I keep saying that I need to rethink my "task force" mentality and be a bit more flexible in how I commit my forces to battle, yet I still haven't done that, especially as the Germans. I had too little infantry to take that first hill, too much infantry on the right flank to take that town, and too many SPWs getting shot up in the middle of the board. Once again, I think I was not aggressive enough when I needed to be. This playing of the scenario really underscores the maxim: Know thy enemy. As my opponent kept saying, "I'm not worried about facing the Germans and those Tigers. I'm facing you; and I know how you play." Point taken. |
||||||||||||||
| 0 Comments |