|
Purple Haze South Flank #32 |
||
|---|---|---|
| (Attacker) Germany | vs | Soviet Union (Defender) |
| Formations Involved | ||
|---|---|---|
| Germany |  |
1st SS "Leibstandarte Adolf Hitler" Division |
| Soviet Union |  |
18th Tank Corps |
| Soviet Union |  |
23rd Guards Airborne Rifle Regiment |
| Soviet Union |  |
29th Tank Corps |
| Soviet Union |  |
9th Guards Airborne Division |

| Total | |
|---|---|
| Side 1 | 3 |
| Draw | 0 |
| Side 2 | 1 |
| Overall Rating, 6 votes |
|---|
|
4.5
|
| Scenario Rank: 13 of 913 |
| Parent Game | South Flank |
|---|---|
| Historicity | Historical |
| Date | 1943-07-12 |
| Start Time | 07:30 |
| Turn Count | 20 |
| Visibility | Day |
| Counters | 332 |
| Net Morale | 0 |
| Net Initiative | 1 |
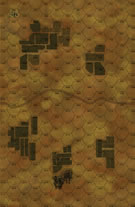
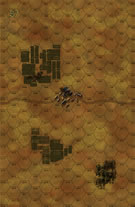
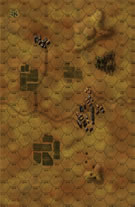
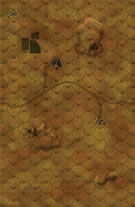
| Maps | 4: 36, 37, 38, 39 |
| Layout Dimensions | 86 x 56 cm 34 x 22 in |
| Play Bounty | 221 |
| AAR Bounty | 159 |
| Total Plays | 4 |
| Total AARs | 3 |
| Battle Types |
|---|
| Hill Control |
| Inflict Enemy Casualties |
| Urban Assault |
| Conditions |
|---|
| Minefields |
| Off-board Artillery |
| Randomly-drawn Aircraft |
| Reinforcements |
| Terrain Mods |
| Scenario Requirements & Playability | |
|---|---|
| South Flank | Base Game |
| Introduction |
|---|
|
Shortly before 0800 hours, 2nd SS Panzergrenadier Regiment advanced north from Oktiabr’skii State Farm under the Luftwaffe’s blanket of protection. Waiting there was a well dug-in elite regiment of enemy paratroopers. When the advance finally resumed, a deep purple haze began filling the air. |
| Conclusion |
|---|
|
The panzer regiment had already started to exploit the grenadiers’ success when the purple smoke appeared. It was the Luftwaffe dropping purple flares to warn of approaching enemy armor. According to Rudolf von Ribbentrop they were “all along the crest ... farther right at the railroad embankment.” It was apparent a major counterattack had commenced. The Zugführer of an armored halftrack gun platoon reported “They were around us, on top of us and between us. We fought man to man ... lobbing magnetic hollow-charge grenades at the enemy tanks, leaping on our Schützenpanzerwagen to take on any enemy vehicle or man we spotted. At 0900 hours the battlefield was once again firmly in our hands ... greatly helped by panzers ... my company alone had destroyed fifteen Soviet tanks.” First SS Lifeguard Division displayed a tactical mastery over their adversaries. The Soviet 170th Tank Brigade lost half its armor as well as its commander during the fighting. For the day, the Lifeguards claimed (and declassified Soviet documents support) 192 enemy tanks destroyed against loses of fewer than 40 tanks. They captured 292 prisoners and admitted to 48 killed, 321 wounded and five missing. |
| AFV Rules Pertaining to this Scenario's Order of Battle |
|---|
|
| 8 Errata Items | |
|---|---|

|
All SS 75mm IG guns are direct fire weapons (black), not indirect (white). (Shad
on 2010 Dec 15)
|

|
The reduced direct fire value of the SS HMG is 5-5 in Beyond Normandy and Road to Berlin. (plloyd1010
on 2015 Jul 31)
|

|
The Units in Beyond Normandy were misprinted with a movement factor of 5. The movement factor should be 8. (rerathbun
on 2012 Mar 21)
|

|
Liberation 1944's counters are mislabeled 'PzIVF2.' The counter's ratings are correct (Armor 5, Move 8, DF 11-6, AT 6-8). (rerathbun
on 2014 Feb 14)
|

|
The movement shown on the counter is zero (0) but is listed as 8 just like the regular SdKfz 250 APCs. (thomaso827
on 2016 Jul 11)
|

|
Should have direct fire value of 10-5 and an anti-tank value of 4-4. Values on the Kursk South Flank counter are for SPW-251/22. (plloyd1010
on 2015 Feb 17)
|

|
The reduced direct fire value in Kursk: Burning Tigers is 4-4. (plloyd1010
on 2015 Jul 31)
|

|
Kommissars never get morale or combat modifiers. Ignore misprints. (Shad
on 2010 Dec 15)
|
| Kursk South Flank, scenario #32: Purple Haze | ||||||||||||
|---|---|---|---|---|---|---|---|---|---|---|---|---|
Posting #1 This is a huge scenario and uses over 330 counters but it’s one of many that I have wanted to play from Kursk South Flank as it has just about everything you want from a scenario about Kursk. The Germans are starting their attack for the day but are preempted by a Soviet attack. Four maps, 20 turns, off-board artillery and air-support for both sides, 4 types of victory objectives for both sides scatter across the maps. Both the Soviets and the Germans have reinforcements that will enter into play. The unit/counter types are too many to mentions, as the Soviets have all types of infantry units including an Engineer Flame counter, the Germans have a boat load of Infantry types including 6 engineer counters, while both sides have all types of heavy weapons including a Soviet 85mm AT Guns and German 88mm AT Guns. Tons of Tanks, AFVs, AC, APC’s with the usual T-34’s in three versions, the German Tiger and a Grille Germans SP unit not to mention Soviet Churchill Tanks to name a few. There are also Rockets counters on both sides, with the Germans having the NW 41s and the Soviets having the BM-13s setting a possible rocket dual. I few mines are also spread out on the map. Like I said everything I ever wanted in a large Kursk scenario. This scenario took me over 1.5 hours to setup. Posting #2 I added the minefields in the rear of the Russian area but I am not sure if they will come into play as I realize most of the victory conditions are on the Germans side of the Battlefield so even though both sides are setup to go on the offensive, most of it will fall on the Soviets to be the aggressor if they want to win this scenario. The Soviet got first air-support this turn which didn’t amount to much, then they pushed their three battle-groups of Infantry forward which got some of them blasted by on and off board artillery and direct-fire. The direct fire did expose some Germans Infantry units to Russian on and off board artillery but for sure the Soviets have received the worst of it so far. But two of the unsupported smaller Germans towns are kind of in trouble but not the larger towns or the hill hexes yet. The main Soviet armor group shot through the middle and lost some armor but not as much as I thought they would but still they are setup to loss more unless they activate first in that area. Also the first group of Soviet reinforcements have arrived which consist mostly of Armor and some SMG Infantry units, which I will attempt to push forward to help the first group of Soviet armor but if the Germans start shooting better with their Armor and the Germans 88mm AT gun only need about on more hex of range, it could be a bad day for the Soviets. If the attack in mass doesn’t work-out for the Soviets, they will only have one more good chance, when the third group of reinforcements arrives and maybe they will have to try a flanking attack. Too much battle left to tell either way. The Germans had most of their armor in the middle but some flanking armor as well on both the eastern and western sectors but they are shifting a few PzVHs to the middle to help stop the mass Soviet armor attack. At the same time, the Soviet are pushing a couple SU-76s forward to support an attack on small German town on map 38 that doesn’t appear to have any AT support, allowing the SU76s to move up unmolested in support of their infantry. Soon I will need to borrow more demoralized and disrupted counters from other games, just because of the size of this battle. There is even a Soviet M3 halftrack in this scenario. Back to the game! Posting #3 Revaluating the situation, I cannot continue to go after so many objectives as the Soviets, so I will pull out all my Soviet Infantry which were attacking the larger held German town which has 7 hexes and is very well defended and shift those units to attacking the smaller German towns and supporting the Soviet Armor in taking the hill hexes if possible. My main Soviet attack will now focus on victory hexes on map 39 with only a minor effort on map 38 to get the small forward town there. My casualty rate is already too high for the Soviets compared to the Germans, so to win this, the Soviet will have to go for a few objectives at a time and not be so spread out. Posting #4 The first group of Soviet Armor to attack the middle is pretty much decimated but still has some units but they have only put a small dent in the line of Germans reinforced Armor in the middle, with the help of a 85mm AT gun that is but the second group of Soviet Armor is closing fast and I am sure the third group is only a few turns away as well. The Germans are way ahead in enemy steps eliminated and hold most of the terrain victory objects as well. The Germans flanks are holding up just fine with the exception of a small town in the East in danger of falling to the Soviet but the Germans are sending a couple of units of StuGIIIG’s to reinforce it. Artillery it starting to take a toll on both sides but unless the Soviet can punch a hole in that German Armor to get some terrain objectives, they will loss by step losses. The next couple of turns could hold the key for the whole scenario, as my offensive planning for the Soviets has not been very well thought out in this scenario so far! Posting #5 The middle of the map is where the major action is or should I say the most important. The second group of Soviet Armor in now engaged with the Germans steel wall center, with Tanks, Infantry, AT-Gun and a bunch of other heavy weapon types defending it. Also the third group of Soviet reinforcements is now on the map and moving down the road on the far western flank, to maybe relief some pressure from the center but this reinforcement group consist of only Churchill Tanks, SMG, small AT-Guns, one 76.2mm Gun unit, Mortars and Prime Movers, so they are more of a distraction. Everything rides on the next two or three turns, as the Soviets have taken too many causalities and worst yet, the German reinforcement could arrive at any time, depending on the die rolls but they are about due. Posting #6 (final) These are not the tough Churchill tanks from 1944 Beyond Normandy but the Weak 1942-43 lead-lease type! The third group of Soviet units didn’t prove to be too much of a problem for the Germans as their reinforcements arrived a couple turns right after and plugged up the Churchill tanks and company, no problem and the second assault wave to Soviet T-34s & T-70s in the center of the map took another beating. The problem with the Soviet RKKA units, is that they do not have armor efficiency and the Germans do, which gives them a two to one shot advantage offsetting the Soviet numbers and they are mostly dug in getting another modifier. The Soviet Infantry was pretty much beaten down by artillery and direct fire on their approached to different terrain objectives. Believe it or not, I pulled the plug on this scenario at least four turns early as the Soviet took a huge beating and had so many eliminated steps, it really didn’t matter how many victory objectives they took at this point, the Germans won a Major Victory with a 168 points verses 33 Soviet points. This is a hard scenario for the Soviets to win but not impossible despite my results. First of all, I spread out my Soviet attack across the map too much and should focused on map 38 which has more victory objectives. Second I should have softened up my targets more with all that on and off board artillery before moving forward but was too concerned about having 20 turns to move such large forces. But still, being the attacker as the Soviets, with so many Germans assets, makes this a challenging scenario. Even though it was a lopsided Germans victory I enjoyed it and had a lot of fun with this scenario and will be interested to see how others do playing it. It really gives you the Kursk battle feel. I recommend it. One more idea on the Purple Haze scenario, if I would have held back my Soviets on map from attacking until their 2nd group of units arrived on the north end of the map on turn one and combined both groups into one huge attacking force, the Soviet would have a better chance in this one. |
||||||||||||
| 0 Comments |
| Finally: Learning How to Win as the Russian | ||||||||||||||
|---|---|---|---|---|---|---|---|---|---|---|---|---|---|---|
During setup, I was cursing my luck at being the Russians for this scenario. Thankfully, my opponent pointed out that the fields on board 36 were to be treated as hills. That changed the entire complexion of my initial set-up. I decided to sacrifice the town, not without a fight, mind you, and to concentrate my forces on the Russian right flank, especially the large hill. I put nine T34 platoons on the largest hill, and a good number of my guards infantry. Artillery was concentrated on board 36 as well, to break up infantry attacks and to clear the closest of the German held hills. I was willing to sacrifice most of board 37; so I concentrated quite a few guns and tanks in the field in the middle of the battlefield on that board. It was a gamble, but it paid off. The Germans advanced most strongly on their right flank, near the Russian held town. Relying on most of their armor strength, the Germans finally began to clear out the town during turns 11-14, but a few tough Russian units just wouldn't become demoralized or suffer step losses during the fight. In the middle of the battlefield, the initial German infantry advance was not stopped, but at least was slowed, by vigorous Russian infantry assaults, which forced the German to commit his HMGs to the center of the board, and to lose quite a few SPWs in the process. The Tigers, having been committed to the center of the board near the Russian held hill in the center, were stripped of their infantry protection by some very lucky artillery fire and infantry attacks from the hill. Although the Tigers should have been a powerful factor in this game, they were relegated to making sure my infantry didn't rush them. On the German left flank, all hell broke loose once the Russians finally got into position on the big hill. A seemingly endless supply of infantry and tanks finally poured off the hill, and a few lucky shots took out a good number of the German defenders opposite them on board 39. Although the scenario was far from over, and the step-loss count was nearly even, the German commander conceded defeat, seeing that the German held hill was doomed, and that little was left to hold his left flank. I finally learned to MASS the Russians as much as possible, but I still need to work on waiting for the right moment to strike. I think I waited a bit too long and could have done more damage earlier. It's a difficult thing to master as the Russians: you take losses, and you lose initiative, but you hide and dig in, and maneuver out of sight until just the right time... |
||||||||||||||
| 0 Comments |
| Never watch sausage being made | ||||||||||||||
|---|---|---|---|---|---|---|---|---|---|---|---|---|---|---|
This is a potentially overwhelming scenario. Both forces need to consider attacking and arranging to defend against the opponent. The Germans start out with the upper hand and need to take advantage of that, taking some territory from the Soviets and then be able to withstand an expected Soviet counterattack. Daniel arranged his forces relatively evenly across the field and I posted heavy forces in the large town and on the large western hill. My goal was to use the force in the west to try to take control of the large hill in the Soviet setup zone while defending against the expected Soviet assault on the towns to the east. To have a mobile defense I put two companies in limiting terrain mounted on SPWs to enable a quick counter should the Soviet attacks stall. Daniel moved his initial armored reinforcements to fight against my western assault but my PzIVH optics must have been recently recalibrated as they absolutely shredded the Soviet T-34s. As it became apparent that I would be able to gain a foothold on the hill, Daniel launched his infantry assault in the east. Unfortunately, he found that my artillery had similarly improved their efficiency. Out of four attacks of company size or larger only one was able to penetrate even the front line and it was thrown back by carefully dug in Panzers. Daniel watched as the score rapidly escalated against him, reaching 80-60 the first possible turn for his final reinforcements. By the time my reinforcements arrived the score was 111-61 and we decided to continue playing only so that Daniel could kill a Tiger step. By the time turn 11 had come and his last throw at the Tigers was dispatched (artillery knocking out the last 85mm AA gun) the score was 132-59 and his turn 5 reinforcements still hadn't arrived. Don't get the wrong idea though. This is a darn good scenario. Daniel's premature assault caused him to fritter away his infantry in a wasteful manner (we always discuss strategy after the fact). We believe that the Soviets should sit and take the German assault thereby avoiding the losses he experienced. I give it a "4". |
||||||||||||||
| 0 Comments |

 KurS031


