Panzer Grenadier Battles on April 27th:
Arctic Front Deluxe #40 - Children's Crusade Broken Axis #14 - Târgu Frumos: The Second Battle Scenario 3: Sledge Hammer of the Proletariat
Army Group South Ukraine #6 - Consternation Road to Berlin #73 - She-Wolves of the SS
Errors? Omissions? Report them!
The Small Engagement
Pusan Perimeter #40
(Attacker) North Korea vs South Korea (Defender)
United States (Defender)
Formations Involved
Display
Balance:


Overall balance chart for KWPP040
Total
Side 1 1
Draw 0
Side 2 3
Overall Rating, 4 votes
5
4
3
2
1
4
Scenario Rank: --- of 913
Parent Game Pusan Perimeter
Historicity Historical
Date 1950-07-28
Start Time 05:30
Turn Count 20
Visibility Day
Counters 76
Net Morale 0
Net Initiative 1
Maps 2: 92, 94
Layout Dimensions 56 x 43 cm
22 x 17 in
Play Bounty 163
AAR Bounty 171
Total Plays 4
Total AARs 1
Battle Types
Exit the Battle Area
Inflict Enemy Casualties
Conditions
Off-board Artillery
Smoke
Scenario Requirements & Playability
Pusan Perimeter Base Game
Introduction

After a couple days of rest, during which it absorbed several thousand untrained replacements, the North Korean 4th Division resumed its advance. The North Koreans drove an American blocking force out of the town of Anui and took over the crossroads there to help keep their advance supplied. With Anui secure, they moved on to tackle a mixed American-South Korean force led jointly by Lt. Col. Wesley C. Wilson and Col. Min Ki Sik. Wilson’s battalion was one of the two green units rushed from Okinawa straight into the front line, but Min had a special reserve on hand.

Conclusion

Things looked pretty dire for the United Nations side, with only very effective American mortar fire doing much to repel the North Korean attackers. But the company of ROK Marines held behind the South Korean main line launched a spirited counter-attack into the North Korean flank, forcing them to withdraw. Prisoners revealed that the Americans had been kicked out of the key crossroads town of Anui the day before, and Wilson and Min agreed they should pull back to avoid


Display Relevant AFV Rules

AFV Rules Pertaining to this Scenario's Order of Battle
  • Vulnerable to results on the Assault Combat Chart (7.25, 7.63, ACC), and may be attacked by Anti-Tank fire (11.2, DFT). Anti-Tank fire only affects the individual unit fired upon (7.62, 11.0).
  • AFV's are activated by tank leaders (3.2, 3.3, 5.42, 6.8). They may also be activated as part of an initial activating stack, but if activated in this way would need a tank leader in order to carry out combat movement.
  • AFV's do not block Direct Fire (10.1).
  • Full-strength AFV's with "armor efficiency" may make two anti-tank (AT) fire attacks per turn (either in their action segment or during opportunity fire) if they have AT fire values of 0 or more (11.2).
  • Each unit with an AT fire value of 2 or more may fire at targets at a distance of between 100% and 150% of its printed AT range. It does so at half its AT fire value. (11.3)
  • Efficient and non-efficient AFV's may conduct two opportunity fires per turn if using direct fire (7.44, 7.64). Units with both Direct and AT Fire values may use either type of fire in the same turn as their opportunity fire, but not both (7.22, 13.0). Units which can take opportunity fire twice per turn do not have to target the same unit both times (13.0).
  • Demoralized AFV's are not required to flee from units that do not have AT fire values (14.3).
  • Place a Wreck marker when an AFV is eliminated in a bridge or town hex (16.3).
  • AFV's do not benefit from Entrenchments (16.42).
  • AFV's may Dig In (16.2).
  • Closed-top AFV's: Immune to M, M1 and M2 results on Direct and Bombardment Fire Tables. Do not take step losses from Direct or Bombardment Fire. If X or #X result on Fire Table, make M morale check instead (7.25, 7.41, 7.61, BT, DFT).
  • Closed-top AFV's: Provide the +1 modifier on the Assault Table when combined with infantry. (Modifier only applies to Germans in all scenarios; Soviet Guards in scenarios taking place after 1942; Polish, US and Commonwealth in scenarios taking place after 1943.) (ACC)
  • Armored Cars: These are Combat Units. They are motorized instead of mechanized. All have their own armored car leaders, who can only activate armored cars (6.85). Do not provide the +1 Assault bonus (ACC).
  • Reconnaissance Vehicle: 8.23 Special Spotting Powers Both foot and vehicle mounted recce units (1.2) possess two special spotting abilities. The first ability is that they can spot enemy in limiting terrain at one hex further than the TEC specifies for other units and leaders. For example, an enemy unit in town can normally be spotted at three hexes or less, but a recce unit can spot them at four hexes.Their second ability is that they can place a Spotted marker on any one enemy unit they can spot per turn, just as if the enemy unit had "blown its cover" by firing. Such Spotted markers are removed as described earlier.

Display Order of Battle

North Korea Order of Battle
Chosŏn inmin'gun
  • Motorized
  • Towed
South Korea Order of Battle
Daehanminguk Haebyeongdae
Daehanminguk Yukgun
United States Order of Battle
Army

Display AARs (1)

Korean War: Pusan Perimeter, scenario #40: The Small Engagement.
Author JayTownsend
Method Solo
Victor North Korea
Play Date 2015-04-18
Language English
Scenario KWPP040

Korean War: Pusan Perimeter, scenario #40: The Small Engagement.

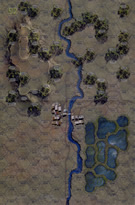
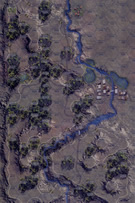
An interesting scenario, with the ROK and ROK Marines defending on map 92 and the Americans defending on map 94 against North Korean units pushing south from the north edges of the maps. Points are awarded for eliminated enemy units and for the NKPA exiting units off the south edges of the maps and the American/ROK forces preventing NKPA steps from exiting.

Map 94 is more rough terrain while map 92 is more open terrain, so after seeing the American and ROK setups I decided to put my main thrust south through map 92 as the North Korean player but enough forces to enter on map 94 to keep the Americans forces from shifting all their units to map 92 to help out the ROKs and to keep them honest. I also decide instead of attacking enemy units as the NKPA player my main strategy would be to get points by exiting units of the south edge of the maps.

The BA-64 armored car unit enters first and with the new 4th addition rules, armored cars can now play a bigger role in battle other than target practice, as they make great reconnaissance units and can spot units in cover, up to four hexes away, reveling those enemy units in limited LOS like towns, placing spotted markers on them. I moved the BA-64 within four hexes of the town hexes on map 92 so the NKPA 76.2mm guns and 81mm mortars could suppress enemy units in the open plains and town hexes there, so the Infantry could find opening in the ROK lines to break through. Being careful with the BA-64 to stay always from assault combat possibilities and the one 2.6 Bazooka team that could take it out. With the 76.2mm guns and 81mm mortars I have no intention of trying to exit those units, as they will only be lost if I do so, but their fire support is very helpful, as the NKPA player has no other heavy support units.

Enough NKPA units keep some the American units on map 94 busy that that can only shift a few units over to help the ROK units on map 92. The NKPA mass enough units adjacent to the ROKs line to fire direct fire and a few assaults only when necessary to punch several holes in the lines to head south. For once the American off-board artillery rolled terrible and through the whole game only managed to eliminate one step and disrupt two other steps the whole scenario with their artillery while the NKPA managed some very nice dice rolls with their artillery.

The North Koreans exited 26 steps and eliminated 2 enemy steps for a total of 28 points.

The South Koreans and Americans manage to keep 12 enemy steps on the maps at the end of play and eliminate 8 enemy steps for a total of 20 points.

The NKPA player won a major victory but having 7 of more points than their opponent.

Very fun scenario to play, and for a change an armored car played a big role in starting off the offense, as there was not much that could harm it if it kept its distance. But setup, and strategies can make this scenario play out differently each time but I think the exit strategy is the best one for the NKPA player to win this one instead of taking on dug-in enemy units and those in towns as well. The American needed to move more forces faster to reinforce the ROK units but the NKPA have the advantage to see where the setup American and ROK forces are before committing to their entry and using the attacking or avoiding method. A very fun scenario to try and figure out as it looks like to could go either way with some good replay value.

0 Comments
You must be a registered member and logged-in to post a comment.
Errors? Omissions? Report them!
Page generated in 0.362 seconds.