Panzer Grenadier Battles on April 27th:
Arctic Front Deluxe #40 - Children's Crusade Broken Axis #14 - Târgu Frumos: The Second Battle Scenario 3: Sledge Hammer of the Proletariat
Army Group South Ukraine #6 - Consternation Road to Berlin #73 - She-Wolves of the SS
Errors? Omissions? Report them!
Rock of Chickamauga
Pusan Perimeter #25
(Attacker) North Korea vs United States (Defender)
Formations Involved
Display
Balance:


Overall balance chart for KWPP025
Total
Side 1 0
Draw 1
Side 2 3
Overall Rating, 5 votes
5
4
3
2
1
4
Scenario Rank: 107 of 913
Parent Game Pusan Perimeter
Historicity Historical
Date 1950-07-16
Start Time 04:00
Turn Count 20
Visibility Day & Night
Counters 84
Net Morale 0
Net Initiative 1
Maps 1: 94
Layout Dimensions 43 x 28 cm
17 x 11 in
Play Bounty 159
AAR Bounty 171
Total Plays 4
Total AARs 1
Battle Types
Exit the Battle Area
Inflict Enemy Casualties
Conditions
Off-board Artillery
Reinforcements
Smoke
Illumination
Scenario Requirements & Playability
Pusan Perimeter Base Game
Introduction

Maj. Gen. Dean hoped for better performance from his third regiment, the 19th Infantry. Known as the “Rock of Chickamauga” for its epic stand during the American Civil War, the 19th Infantry had been stretched thin to cover a very wide stretch of the Kum River line. At many places in their sector, the river could easily be waded by enemy troops. In the wee hours of July 16th, the North Koreans started to do just that.

Conclusion

The North Koreans made repeated attacks across the river, finally making a small breakthrough on their fourth attempt. Hundreds of NKPA troops filtered through this gap to establish blocking positions behind the Americans, and were still there when an American counter-attack push the North Koreans back across the river. The 19th Regiment’s commander reported that his position had been restored and that he could hold his lines; in reality, his regiment was now very vulnerable to envelopment and the North Koreans would soon exploit their advantage.


Display Relevant AFV Rules

AFV Rules Pertaining to this Scenario's Order of Battle
  • Vulnerable to results on the Assault Combat Chart (7.25, 7.63, ACC), and may be attacked by Anti-Tank fire (11.2, DFT). Anti-Tank fire only affects the individual unit fired upon (7.62, 11.0).
  • AFV's are activated by tank leaders (3.2, 3.3, 5.42, 6.8). They may also be activated as part of an initial activating stack, but if activated in this way would need a tank leader in order to carry out combat movement.
  • AFV's do not block Direct Fire (10.1).
  • Full-strength AFV's with "armor efficiency" may make two anti-tank (AT) fire attacks per turn (either in their action segment or during opportunity fire) if they have AT fire values of 0 or more (11.2).
  • Each unit with an AT fire value of 2 or more may fire at targets at a distance of between 100% and 150% of its printed AT range. It does so at half its AT fire value. (11.3)
  • Efficient and non-efficient AFV's may conduct two opportunity fires per turn if using direct fire (7.44, 7.64). Units with both Direct and AT Fire values may use either type of fire in the same turn as their opportunity fire, but not both (7.22, 13.0). Units which can take opportunity fire twice per turn do not have to target the same unit both times (13.0).
  • Demoralized AFV's are not required to flee from units that do not have AT fire values (14.3).
  • Place a Wreck marker when an AFV is eliminated in a bridge or town hex (16.3).
  • AFV's do not benefit from Entrenchments (16.42).
  • AFV's may Dig In (16.2).
  • Open-top AFV's: Immune to M, M1 and M2 results on Direct and Bombardment Fire Tables, but DO take step losses from X and #X results (7.25, 7.41, 7.61, BT, DFT). If a "2X" or "3X" result is rolled, at least one of the step losses must be taken by an open-top AFV if present.
  • Closed-top AFV's: Immune to M, M1 and M2 results on Direct and Bombardment Fire Tables. Do not take step losses from Direct or Bombardment Fire. If X or #X result on Fire Table, make M morale check instead (7.25, 7.41, 7.61, BT, DFT).
  • Closed-top AFV's: Provide the +1 modifier on the Assault Table when combined with infantry. (Modifier only applies to Germans in all scenarios; Soviet Guards in scenarios taking place after 1942; Polish, US and Commonwealth in scenarios taking place after 1943.) (ACC)
  • Tank: all are closed-top and provide the +1 Assault bonus, when applicable
  • Anti-Aircraft Weapon Carrier: apply a -1 modifier to an air attack if within three hexes of the targeted hex (15.14).

Display Order of Battle

North Korea Order of Battle
Chosŏn inmin'gun
United States Order of Battle
Army

Display AARs (1)

Korean War: Pusan Perimeter, scenario #25: Rock of Chickamauga
Author JayTownsend
Method Solo
Victor United States
Play Date 2019-01-20
Language English
Scenario KWPP025

Korean War: Pusan Perimeter, scenario #25: Rock of Chickamauga

I think originally this scenario was called The Big Push, as I go back and look at my notes. This was my first Panzer Grenadier scenario played in 2019, as I have been really busy. When I first set this scenario up, I noticed the American leader setup was a carryover from the previous scenario but since the situation on the Americans side dictates confusion and lack of control, having only five leader counters kind of show this aspect of the scenario off very well and since everyone else has been playing it this way for years I went with it as well. But if you don’t do very well with the Americans on this scenario, you can add 3 more leader counters.

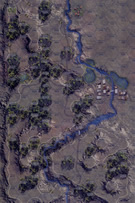
The North Koreans enter mostly from the north edge of the map with a smaller group entering from the west. The American setup anywhere south of the river not dug-in but have time to do so while the NKPA enter the map and it’s still dark the first six turns. The Americans must also setup a small blocking force on the western edge of the map to prevent the small NKPA force that enters from escaping behind their lines and must spread out five leaders wisely as they will get lot of action tonight. Both sides get points for eliminated steps but only the North Koreans get points for exiting steps off the southern edge of the map.

The Americans are spread pretty thin but with a lot of fire power and off-board artillery and have time to dug-in before the NKPA make contact with them. The North Koreans try to enter the map spread out across the northern edge of the map hoping to exploit holes in the U.S. lines which many have been their first mistake and maybe they should have punch through in force in two points. The NKPA smaller western force is stopped by the smaller American blocking force and shot to pieces by the American off-board artillery.

The desperate fighting is going on from east to west in a number of different engagements. This is the prefect one map scenario for this battle and with only 20 turns it plays really fast. The 7 morale for both sides makes recovery more difficult and the NKPA have two KOMs that will be very busy throughout the game.

As the game progresses the American 26th Anti-Aircraft Battalion enter the battle on turn 13 to take care of any remaining, scattered NKPA units that might exit the south edge of the map and change the victory results and a M19, M16 and a reduced M24 have a nice punch, if they don’t enter too late to make a difference.

In my game the Americans eliminated 22 North Korean steps and 3 leaders, while the NKPA only eliminated 2 American steps and exited 8 steps off the southern edge of the map for an American Major Victory winning by 22 to 10 in total points. It really helped that the Americans roll very well with their off board artillery in the beginning of the game and that the NKPA didn’t groups stronger forces together early, to punch a big hole or two through the American lines. I would say having only five American leaders make this scenario more balanced and tense for both side, so I wouldn’t change that. I can also see the replay-ability for this scenario being very high, as there are many variables in setup, entry, defense, attack and luck of the dice to make this one play out differently each time. I really enjoyed playing this scenario again. The perfect size for a quick one map, medium size scenario.

0 Comments
You must be a registered member and logged-in to post a comment.
Errors? Omissions? Report them!
Page generated in 0.251 seconds.