|
Ch'unch'on Day 2 Pusan Perimeter #4 |
||
|---|---|---|
| (Attacker) North Korea | vs | South Korea (Defender) |
| Formations Involved |
|---|

| Total | |
|---|---|
| Side 1 | 1 |
| Draw | 0 |
| Side 2 | 6 |
| Overall Rating, 7 votes |
|---|
|
4.14
|
| Scenario Rank: 63 of 913 |
| Parent Game | Pusan Perimeter |
|---|---|
| Historicity | Historical |
| Date | 1950-06-26 |
| Start Time | 07:00 |
| Turn Count | 24 |
| Visibility | Day |
| Counters | 122 |
| Net Morale | 1 |
| Net Initiative | 0 |
| Maps | 2: 94, 95 |
| Layout Dimensions | 56 x 43 cm 22 x 17 in |
| Play Bounty | 174 |
| AAR Bounty | 159 |
| Total Plays | 7 |
| Total AARs | 3 |
| Battle Types |
|---|
| Inflict Enemy Casualties |
| Urban Assault |
| Conditions |
|---|
| Off-board Artillery |
| Smoke |
| Scenario Requirements & Playability | |
|---|---|
| Pusan Perimeter | Base Game |
| Introduction |
|---|
|
The NKPA 2nd Division could not dislodge the ROK 6th Infantry Division and fell behind the offensive’s carefully-planned timetable. NKPA Headquarters sent the 7th Division to help while the ROK also committed a reserve regiment to the mix. The ROK 6th Division began the war at full strength, unlike other ROK divisions which had granted weekend passes to some of their men, and was ready for battle. |
| Conclusion |
|---|
|
The NKPA earned little more success on the second day of battle for Ch’unch’on than it did on the first day despite adding the resources of another division. The casualties climbed but without result, though no NKPA tanks had entered the battle thus far. But would the ROK Divisions on the flanks of the 6th Division hold too? |
| AFV Rules Pertaining to this Scenario's Order of Battle |
|---|
|
| Love Lies Bleeding In My Hands | ||||||||||||
|---|---|---|---|---|---|---|---|---|---|---|---|---|
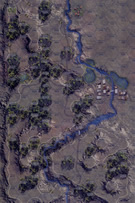
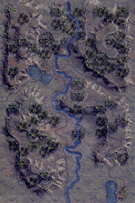
During a long ago field exercise during my own tour to Korea, a captain said over the radio, "I don't want to see anything but dead bodies." That was as we charged a well defended tank trap in open scout jeeps. Yep, would have been our dead bodies when it was over. That was how this game went, but for the other side. That town on the east side of the two boards is covered from the front by river and rice paddies and has lots of open space beyond that that an attacker has to cross, and like the game of the first day, the NKPA just weren't up to the task. In their victory conditions, they must take all town hexes as well as 3 of the 4 casemates by the end of 24 turns. I ran out of time to complete the game, but at the halfway point, the casemates were doing a pretty good job of winning in assaults in two hexes, and the only thing the North could do to the town was dump a constant stream of OBA on it hoping to demoralize a bunch of it in time to assault from the west flank and rear, but while the arty did a little bit of demoralizing, the troops in town quickly regrouped and even ventured out to try to run off a NKPA Lieutenant that was hanging around a little bit too close calling in fire missions, and when he relocated, the ROK stack moved back into cover. I set up 2 forces of NKPA, equal except for attaching all the on board arty to the eastern force, including the heavy mortars and the 45mm AT guns, which were just about useless in this situation and were used to draw fire that could have been used elsewhere. Large stacks of hard core NKPA moved in to assault the outposts in the west, hoping to tie the defenders down or eliminate them to allow more troops to infiltrate and get around the town, but ever time an NKPA stack moved out into an open hex, there was somebody with eyes on them and mortars or OBA to call in. By the time I had to quit the game, the NKPA had lost 30 steps, including the Su-76 that had died early on in a failed assault. Among the first casualties for the NKPA was their LTC, who died with a truckload of infantry when an OBA shot rolled a 12. It was another one of the games where rolls are either 2s and 12s or 7s, with little in between. Both sides had their turns with the 2s and 12s, but the ROKs got a lot more of them than the NKPA did, and as the NKPA initiative was waning, holding on with a 1, the ROKs had yet to lose their 6th step to bring their initiative down. At the end of turn 10, the casualties were NKPA 30, ROK 5, with half of the remaining NKPA force on the table demoralized and half of those in assaults. While the casualty count might go up further, and the ROK initiative might fall a bit, it wasn't in the cards today for the NKPA to take the town by encirclement due to the many ROK outposts that held on long after they should have. Even the ROK morale 7 LTs retained their morale and stayed tough in assault turn after turn. Great game, and I look forward to getting this on the table for face-to-face play with a local PG gamer. |
||||||||||||
| 0 Comments |
| Korean War: Pusan Perimeter, scenario #4: Ch’unch’on Day 2 | ||||||||||||
|---|---|---|---|---|---|---|---|---|---|---|---|---|
Korean War: Pusan Perimeter, scenario #4: Ch’unch’on Day 2 I had my second go at Ch’unch’on. This time both sides have some reduced units from Day 1 but also some replacements/reinforcements, about 50/50. Both sides also get more off-board artillery which favored the NKPA but the ROKs get a better morale which obviously favored them. After playing the first Ch’unch’on scenario I learned some better methods for my attacking approach for the North Koreans but I almost threw in the towel several times but somehow I kept reorganizing and was able to pull out a NKPA victory by the skin of my teeth and the extra off-board artillery but also the great dice rolls the North Koreans had this time around. So my lesson learned, don’t give up. Ok, now I have to play Ch’unch’on Day 3 for the tie-breaker, as it is one/one presently and day three reduces both sides, reduces the NPKA off-board artillery but gives them some more armor but I think I might found a better way to defend as the South Koreans as well. So this looks interesting! |
||||||||||||
| 0 Comments |
| Fell far short |
|---|
|
The RoK forces heavily defended the town, and arrayed a thin screen of infantry and machine guns west of town on the large hill mass that essentially covered the town from that side. The NKPA attacked from the north and west to clear that hill mass first, before planning to storm the town. NKPA morale was the main weakness they faced, with their coherent attack melting into a mass of demoralized troops with a few weak company-scale attacks pushing through to break up the RoK defensive screen. By the end of the battle the NKPA was flaming out in the approaches to the town, while a lively RoK counterattack was disrupting any reinforcements that were attempting to filter forward for the NKPA. A solid victory for the RoK forces. |
| 0 Comments |

 KWPP003


