
|
Ch'unch'on Pusan Perimeter #3 |
||
|---|---|---|
| (Attacker) North Korea | vs | South Korea (Defender) |
| Formations Involved |
|---|

| Total | |
|---|---|
| Side 1 | 2 |
| Draw | 0 |
| Side 2 | 6 |


| Overall Rating, 8 votes |
|---|
|
3.75
|
| Scenario Rank: 234 of 913 |
| Parent Game | Pusan Perimeter |
|---|---|
| Historicity | Historical |
| Date | 1950-06-25 |
| Start Time | 06:00 |
| Turn Count | 24 |
| Visibility | Day |
| Counters | 101 |
| Net Morale | 0 |
| Net Initiative | 0 |
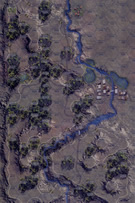
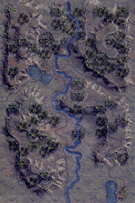
| Maps | 2: 94, 95 |
| Layout Dimensions | 56 x 43 cm 22 x 17 in |
| Play Bounty | 168 |
| AAR Bounty | 159 |
| Total Plays | 8 |
| Total AARs | 3 |
| Battle Types |
|---|
| Inflict Enemy Casualties |
| Urban Assault |
| Conditions |
|---|
| Off-board Artillery |
| Smoke |
| Scenario Requirements & Playability | |
|---|---|
| Pusan Perimeter | Base Game |
| Introduction |
|---|
|
The NKPA 2nd Division replaced a Border Guard unit in the front lines and received orders to capture Ch’unch’on by the afternoon. The ROK 6th “Blue Star” Infantry Division guarded Ch’unch’on, a beautiful town spread out below the Peacock Mountains. From the outset accurate ROK artillery fire rained down on the 2nd Division’s attacking 6th Regiment. |
| Conclusion |
|---|
|
The battle for Ch’unch’on went against the North Koreans. From dug-in positions and pillboxes on the high ridge just north of town the ROK 6th Infantry Division repelled one assault after another. The failure forced the NKPA command to reconsider their plans and send reinforcements to the badly-mauled 2nd Division. |

|
|
|---|
| AFV Rules Pertaining to this Scenario's Order of Battle |
|---|
| Chosŏn inmin'gun |
|---|
|


| Daehanminguk Yukgun |
|---|
|


| Town Defense Waiting for Action | ||||||||||||||
|---|---|---|---|---|---|---|---|---|---|---|---|---|---|---|
Bob and I played our second face-to-face game, choosing the 3rd scenario instead of the 2nd one because of trying to keep the game inside a planned play time. I took the South Koreans and built 3-unit stacks with good leaders in the town, lead by good LTs centered around a good Captain in the central hex so the town could fight as a combined group or stacks fight individually if necessary. At the outskirts of town and south of the edge of town, I placed an extra infantry unit that could move in to replace any losses, and put the Engineer platoon with a 9-0-0 leader in the jeeps so they could run in and support in town assaults as well. I placed the 4 casemates in a line about 6 hexes apart across both boards and slightly north of the northern-most town hex, with good fields of fire and on hills where they could threaten NKPA attackers. The 2 105s were placed on the hill overlooking the town, where they had a great field of fire over the open plain north of the town. The Mortars were set up in adjacent hexes with the Colonel directing the center weapon, a captain on the right and the sergeant on the left, set up in a wood line towards the middle of the board where they could add their massed fire or individual fire to just about any point where the NKPA were expected to try to flank the town. The last two stacks of infantry and HMGs were on the western board and on the hill so they could try to slow down or prevent an end run from that flank. Bob set up 3 large command groups, one on his left facing the town, one in the center that I expected to move south and then turn left to try to take the town from the south and west, and the third just west of the junction of the two boards that I expected would keep my western forces tied down and keep them from assisting the town defenders. As we started play, my off board arty and the 2 105s took accurate fire on the NKPA left stopping the key attack force before most of them were in range to fire. The longer range of the ROK weapons really showed here with the 3-hex fire-group killing or demoralizing just about anything that survived the artillery, until what survivors turned tail. The Kommissar had chosen to accompany the NKPA LTC on that flank, and turned out being one of the few Leader Loss roll casualties of the game. The center faltered early on, and had to work hard to get into a position to fire on the two casemates on the eastern board, but managed to take them both out by turn 10 and started engaging the ROK mortars, killing one platoon and demoralizing the captain. The ROK Colonel pulled the other mortar into his hex along with the demoralized leader from his right, but off board NKPA guns found the range and demoralized the colonel and sergeant while doing little damage to the mortars. At about this point, it seemed Bob's focus was changing, ignoring the prize of the town and just doing as much damage as possible. It wasn't much of a fight, as at the end of 13 turns, the NKPA had taking 19 step losses to only 3 ROK step losses, and with so many reduced units on the table, and with no real attack being directed at the town, we called it a day. Excellent scenario, and we look forward to a return to Ch'unch'on Day 2 for our next game. |
||||||||||||||
| 0 Comments |
| Nailbiter |
|---|
|
This was an exciting battle that came down to the final turn. The North Koreans attacked with one battalion across the hills just northwest of town, and sent a second battalion on a march down the western road to attack from due west across the main plateau. Both forces essentially met on the plateau and attacked the western approaches to the town, with a few companies on the extreme northern and southern flanks clearing out RoK resistance there. The South Koreans defended the western plateau with multiple lines of casemates and HMG/infantry teams. The initial hours seemed to be going their way as their artillery inflicted multiple step losses and morale degradations on the NK troops. But by mid battle the NK forces had firmed up a solid line west of town, and launched their final drive. Infiltration tactics worked repeatedly to unseat RoK defenders who would become isolated if they didn't fall back. In the final hour of battle, as the North entered the town in a series of final bloody assaults, the RoK troops tried local counterattacks that went badly for them, resulting in them losing control of two town hexes and only able to weakly contest the other two. North Korean Victory. |
| 0 Comments |
| Korean War: Pusan Perimeter, scenario #3: Ch’unch’on | ||||||||||||
|---|---|---|---|---|---|---|---|---|---|---|---|---|
Korean War: Pusan Perimeter, scenario #3: Ch’unch’on The Ch’unch’on scenarios gives me three chances to try things out, depending on which side won, with the scenarios: Ch’unch’on, Ch’unch’on Day2 and Ch’unch’on Day 3. With both sides wearing down but also getting reinforcements within those three scenarios. With the first Ch’unch’on scenario I setup the South Koreans in the town hexes on map 94 with rings of defense extending out from there and the overlooking covering hill in the rear to support with 105mm artillery & 81mm mortars. The main fighting is pretty much on map 94 but the North Koreans use both maps to maneuver and try and flank the ROK positions. The main NKPA attack kind of stalled in some rough terrain and the North Koreans paid a heavy price once they pushed out. The highpoint of the NKPA attack was rolling a 2 on the dices with two stacks of NKPA units with a Leader with a combat modifier to get a total of 23 points against single stack of ROK units. Sure the ROKs got a 1 dug-in modifier but the NKPA got a 2 modifier for being adjacent with the end results being a 3x on the direct fire combat table and the ROK leader was lost as well. After that is was a slugfest both ways. The North Koreans lost 15 steps and two leaders while the South Koreans lost 9 steps and one leader but the ROKs won, as they kept possession of all the town hexes and only lost two casemates. Next, on to Ch’unch’on Day2 and see if doubling up on my off-board artillery might help! |
||||||||||||
| 0 Comments |