
|
Mt. Austin X Jungle Fighting #28 |
||
|---|---|---|
| (Defender) Japan | vs | United States (Attacker) |
| Formations Involved | ||
|---|---|---|
| Japan |  |
10th Mountain Gun Battalion |
| Japan |  |
124th Infantry Regiment |
| Japan |  |
228th Infantry Regiment |
| United States |  |
25th "Tropic Lightning" Infantry Division |
| United States |  |
25th Reconnaissance Troop |
| United States |  |
35th Infantry Regiment |

| Total | |
|---|---|
| Side 1 | 2 |
| Draw | 0 |
| Side 2 | 2 |


| Overall Rating, 4 votes |
|---|
|
2.5
|
| Scenario Rank: --- of 913 |
| Parent Game | Jungle Fighting |
|---|---|
| Historicity | Historical |
| Date | 1943-01-22 |
| Start Time | 14:45 |
| Turn Count | 14 |
| Visibility | Day |
| Counters | 45 |
| Net Morale | 0 |
| Net Initiative | 3 |
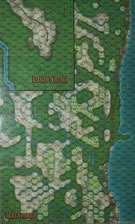
| Maps | 1: Guad-ME |
| Layout Dimensions | 84 x 55 cm 33 x 22 in |
| Play Bounty | 139 |
| AAR Bounty | 159 |
| Total Plays | 4 |
| Total AARs | 3 |
| Battle Types |
|---|
| Inflict Enemy Casualties |
| Rural Assault |
| Conditions |
|---|
| Entrenchments |
| Terrain Mods |
| Scenario Requirements & Playability | |
|---|---|
| Battle of the Bulge | Counters |
| Guadalcanal | Maps + Counters |
| Jungle Fighting | Base Game |
| Introduction |
|---|
|
On the 20th it rained heavily and prevented any offensive action against the GIFU position. Plans were made to resume the offensive on the 22nd. On the night of 20-21 January several Japanese were killed trying to escape from the now surrounded GIFU position, an indicator that the Japanese thought the end was near. To even further strengthen the American forces preparing to attack, three USMC light tanks were loaned to the Army. Manned by members of the 25th Division Reconnaissance Troop, they were to accompany the attacking troops. |
| Conclusion |
|---|
|
The Japanese proved unable to counter the tank and large American gains were made in attacks against the northeastern corner of the position. An attack against the southern portion of the perimeter, this one without tank support, failed. The American battalion commander believed a single hard push would cause the collapse of the last of the Japanese defenders. |
| Additional Notes |
|---|
|
Elsenborn Ridge or Cassino '44 may be used for the U.S. Army units. |

|
|
|---|
| AFV Rules Pertaining to this Scenario's Order of Battle |
|---|
|
| Imperial Japanese Army |
|---|
|


| Army |
|---|
|


| Marine Corps |
|---|
|

| 1 Errata Item | |
|---|---|
| Scen 28 |
Japanese SSR dictate they have to roll to attempt to move but do not mention whether or not a failure to move counts as their activation. As it usually does in the system with this type of special rule, I played it as such. (triangular_cube
on 2023 Feb 18)
|
| Jungle Fighting #28 | ||||||||||||
|---|---|---|---|---|---|---|---|---|---|---|---|---|
This was a more unique situation compared to the rest of the GIFU, although still with the same fundamental casualty problems for the American VCs. The Japanese are entirely surrounded aside from one hex, and the Americans have tanks, which can fire AT at the entrenchments in this module, making them very powerful. The VCs are what is interesting though. The Japanese have to control hexes (or kill Americans). Any hexes, not just the trenches. They can try to break out in theory (as they did historically the night before?), but are basically frozen in place by the SSR movement limitations :(. I was actually disappointed in this fact because keeping the Japanese penned up in the shrinking net actually sounds interesting, but alas its a butchers task of clearing them out. They actually only have morale 8 in this scenario! so its completely doable, but the casualty limits are still unrealistic and create the gamey "can the Japanese roll a 2?" exercise that plagues this module. Aaaanyways. Americans fire at the hopeless Japanese repeatedly as expected and methodically clear out the left and northern trenches. The southeast has the counterattack stack ,anticipaitng the American tanks in the clearing. They roll lucky to move and assault (I guess this is vague as to whether or not they need to but i played they did), and are able to clear out the HMG and M5 in the clear hex. This alone is enough for the win, but the silly part happens after. Americans pummel the hex next turn on the 60 column OBA, and dem all 3.... who flee (without having to roll to move presumably). Americans walk into the trench for the last piece, but... have to chase down those fleeing Japanese that broke out the net demoralized. As soon as they recover morale, they are now controlling hexes again and spread out. Americans with the aid of OBA and leader movement rates DO catch and eliminate them before the end of the scenario for a total board wipe (aside from one Japanese Lt who disappeared into the Jungle). Still too many losses taken though, so they cant win and Japan does. I really dislike the VCs in this module... |
||||||||||||
| 0 Comments |
| The American Steamroller Rolls | ||||||||||||
|---|---|---|---|---|---|---|---|---|---|---|---|---|
The Japanese set up spread out over the four hexes while the Americans surrounded them. Early on the overwhelming American firepower took it's toll and many Japanese units were eliminated. After five turns the US had already gained two of the four Japanese held hexes. Three turns later all Japanese units had been eliminated and the US had a major victory. This one only appears winnable for the Japanese if they concentrate their forces in a few strong hexes and if fog of war can occasionally prevent the American firepower from being used. Would be worth playing again solitaire, but doesn't seem to be a great two player scenario. |
||||||||||||
| 0 Comments |
| Jungle Fighting, scenario #28: Mt. Austin X | ||||||||||||
|---|---|---|---|---|---|---|---|---|---|---|---|---|
Jungle Fighting, scenario #28: Mt. Austin X *I remember reading about the GIFU portion of the Guadalcanal battle a few years ago and thought I must tryout one of the scenarios from Jungle Fighting which include it. I didn’t expect too much from this one, as it’s basically and assault scenarios with four Japanese Entrenchments that must be taken. Actually the Americans only have to take two of the four with out losing more than two steps. Both sides start adjacent to each other in setup, so it’s basically a set piece battle with only how you arrange each stack with which types of units. The Japanese just have hold three out of four entrenchments or eliminate three American steps. *As I stated before, the Japanese have four entrenchments but a very weak force with many of the units already reduced. Not only that, but they will find it very difficult to move a per special scenario rule #2. *The Americans have a very strong force, pretty much 3 to 1, yes some of their units also start reduced but they have so many and a huge Off-Board artillery and one M5 Stuart Tank unit on it’s reduced side. The Starts will be able to get at two of the Japanese Entrenchments from some clear terrain hexes adjacent to them. *Also Jungle Fighting has a Special Rule #3 that gives them a Defense Value of 2 against armor but every hit from a tank eliminates on step of enemy units inside the entrenchment, not the entrenchment it’s self. I really like this rule, or the Tanks would not have been of much use but with this rule, it rocks. *Being such a small battle, it will be a small AAR, but the Americans wear down the Japanese through Artillery, adjacent Infantry in stacks of 3 combat units and one unit of 3 Stuart tanks, slowly but surely wearing the Japanese units down to nothing much and then assaulting. The highlight for the Japanese; was when they rolled high and demoralized pretty much a whole stack on American Infantry, but they were able to pull back and the line was filled with new American units. Don’t attack the Japanese from the open space hexes, unless you are armor. The American won this, taking all four entrenchments. I have never had very much luck taking entrenchment until this battle. *There is not a lot of maneuver in this battle but it a good one to practice your assault & entrenchment skills. Not a bad scenario but one you only play once. |
||||||||||||
| 0 Comments |