
|
North German Plain Iron Curtain #5 |
||
|---|---|---|
| (Attacker) United States | vs | Soviet Union (Attacker) |
| Formations Involved | ||
|---|---|---|
| Soviet Union |  |
18th Mechanized Division |
| United States |  |
2nd "Hell on Wheels" Armored Division |

| Total | |
|---|---|
| Side 1 | 2 |
| Draw | 0 |
| Side 2 | 2 |


| Overall Rating, 4 votes |
|---|
|
4.5
|
| Scenario Rank: --- of 913 |
| Parent Game | Iron Curtain |
|---|---|
| Historicity | Alt-History |
| Date | 1948-06-27 |
| Start Time | 06:00 |
| Turn Count | 24 |
| Visibility | Day |
| Counters | 165 |
| Net Morale | 1 |
| Net Initiative | 1 |
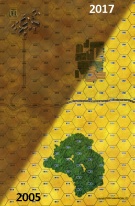
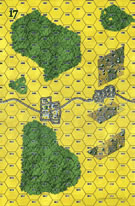
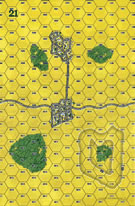
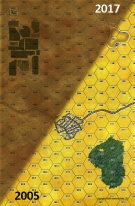
| Maps | 4: 1, 17, 21, 4 |
| Layout Dimensions | 86 x 56 cm 34 x 22 in |
| Play Bounty | 186 |
| AAR Bounty | 159 |
| Total Plays | 4 |
| Total AARs | 3 |
| Battle Types |
|---|
| Inflict Enemy Casualties |
| Meeting Engagement |
| Conditions |
|---|
| Off-board Artillery |
| Scenario Requirements & Playability | |
|---|---|
| Battle of the Bulge | Counters |
| Eastern Front | Maps |
| Iron Curtain | Base Game |
| Road to Berlin | Maps + Counters |
| Introduction |
|---|
|
In later years, the defense of the "North German Plain" would be entrusted to British, Dutch, Belgian and German troops. In the event of war between the United States and the Soviet Union, Red Army planners realized right away that they needed to cut off American troops from the north German ports, especially Bremerhaven. Though there were other big ports available, this one had become the American port of entry and its loss would have crippled American logistics. On the flat farmlands of north Germany, tank would meet tank. |
| Conclusion |
|---|
|
Second Armored Division participated in the parade through Berlin in July 1945, and then remained in Germany for the rest of the year on occupation duties. At year's end the unit shipped back home and was de-activated, returning to the American order of battle in 1951. After 1957 it would return to Fort Hood, ready to reinforce Allied troops in Germany. On the Soviet side, 3rd Red Banner Army probably would have drawn the assignment to attack the North Sea ports - not all Soviet forces in Germany were tank-heavy organizations. |

|
|
|---|
| AFV Rules Pertaining to this Scenario's Order of Battle |
|---|
|
| Army (RKKA) |
|---|
|


| Army |
|---|
|


| 1 Errata Item | |
|---|---|

|
The reduced direct fire value in Kursk: Burning Tigers is 4-4. (plloyd1010
on 2015 Jul 31)
|
| Iron Curtain, scenario #5, North German Plain | ||||||||||||
|---|---|---|---|---|---|---|---|---|---|---|---|---|
I needed a real steel scenario so this one was it for me. The scenario started off with a big rock & roll thunder storm outside so a perfect setting for this battle. With the Soviets I decided on a three prong attack and whichever one had more success, I would shift my focus to. My main goal was to open up a hole, and exit troop out the North end. The leaders have to be stacked just right in this game as neither side has many and losing just one on the Soviet side would really hurt. With the Americans, I just had to get in deep enough to setup a blocking force and use the best terrain to my advantage. Also, rush the Chaffee (M24) tanks forward, in time, even if it meant their sacrifice. I believe they were the biggest factor in the game in fact. After turn one, both sides’ stacks were very vulnerable, and after turn two no shot had been fired yet. After turn three, the Chaffee were doing their job and actually shooting up Soviet armor, slowing them down to allow the Bigger American Armor, M26’s, M45’s, M3/76’s a better chance to get into better positions and the Infantry to dig-in or get into towns or forest. Not to mention getting some good cross-fire bonus points. In the end, the Soviet made several attempts but their casualties were way too high, they lost most of their Leadership on the East side and the low Morale of the Soviet’s side made it very difficult to rally the troops when they became demoralized. The American Artillery really started to breakup the Soviet Infantry and the big Soviet armor, T-44’s, JS2’s, T-34/85’s, M4A2’s & Su-76’s just got ambushed and blasted to hell. So much for the big bad wolf! Incredible Casualties: Americans lose 73 steps. Losses: 70 Armor, 1 Infantry, & 2 APC’s, also one Leader. The Soviets lose 148 steps. Losses: 140 Armor, 8 Infantry, also two Leaders They did exit 8 steps. Total American Points 148, Total Soviet Points 81! Remember tanks steps count double in all the above. The result is a Major American Victory! Final comments: when you play solitaire you always win and lose at the same time. To do it over again, I should of have two Soviet prongs and taken my time a little more. This scenario only played out about half of the turns before the Soviets retreated or waved the white flag. The American did pay a price but much smaller and mostly in armor. I see why the Chaffee tank was the best light tank in WWII. I called this game early. I think I need to try this one again someday. Fun scenario to play, win lose or draw. |
||||||||||||
| 0 Comments |
| Limey can't hack it... | ||||||||||||||
|---|---|---|---|---|---|---|---|---|---|---|---|---|---|---|
BackstoryI sat down to play this great Cold War scenario with my buddy Dave Gill from Liverpool. It'd been ages since we last played together, and my work on PG-HQ had prevented me from playing anything in months. This would also be my first Iron Curtain scenario... Initial DeploymentWe flipped a coin and I ended up with the Soviets. I massed my infantry on the right flank, my weak armor on the left, and my slow heavy-hitters in the center giving them a chance to swing left or right depending on how the battle went. Dave strung his NATO wankers out in a long line across the battlefield. Quick DeathI rushed forwards with my right flank infantry and heavies in the center. My left flank inched ahead in a supporting position. Faced with a relatively equal distribution of strength, Dave sat back and waited. Having crossed half the distance to his defensive lines, I deftly swung my center mass of armor to the right and boldly pushed the infantry on the right flank right into his firing lines. He suddenly realized how badly out-gunned he now was on his left flank and began wheeling his right flank up to meet my armor from the side... However, what he had failed to notice was that on my left flank I had concentrated all my armor with the longest AT fire range... so while he thought he was about to come crashing into my center force's side he instead had rolled right into open ground and in front of the sights of several dozen angry Commies! His right flank force was shot to hell trying to save the center, and my heavies in the middle barreled right through his line - nigh unstoppable with shells bouncing off their incredible armor. The battle was decisively won for the Soviets. |
||||||||||||||
| 0 Comments |
| The Soviet Masses Attack! | ||||||||||||
|---|---|---|---|---|---|---|---|---|---|---|---|---|
Setup: The Americans split their force into four equal parts, assigning each to defend the limiting terrain on Boards 1 and 4. They hold back the Pershings to defend against any armored breakthroughs on the part of the Soviets. The Soviets follow the Americans lead and split themselves into four forces. The infantry attack with the JS-2's and T-44's on Board 1, while the rest of the force ties up the Americans elsewhere on the map. Play: The Soviets swing all of their infantry south with JS-2's, while the twelve T-44's hang back so that they can make a charge if things go badly. The Soviet SMG's and HMG's charge in the north with the Soviet M4's and after passing through relatively unscathed from American AT fire from the M4/76's, the T-34/85's begin to duel with the American tanks. The duel last several tuns, and eventually the fight in the north becomes an infantry battle. The Americans and Soviets suffer almost equal armored losses, with the advantage to the Americans. Meanwhile, in the south, the Soviet's first wave of infantry reach the town, but the Americans' OF cuts them down. Even the JS-2's succumb to American AT fire from M4/76's. The Soviets exchange fire with the Americans in the north, while the second wave of infantry replace their fallen comrades, and survive the American OF. The JS-2's and M4/76's begin a two turn duel, with the skilled Americans taking out several platoons of JS-2's. The Soviets begin their main attack across the entire line, assaulting every available American position, making some gains in step losses early in the attack. However, the next turn, the Americans take a toll on the Soviet attack, and their morale begins to fail them, thus the Soviet attack losses steam. The first wave begins to recover and prepares to aid in the attack. Americans in the north have all but obliterated the Soviet forces, but decline to follow the demoralized units out of their own dug-in positions. The Soviet attack in the town begins to peter out, and the Soviet commanders bring up the T-44's in the rear to attempt a charge past the Americans' line and off the board edge. The Soviet then completely breaks in the south, and the Soviets move their remaining JS-2's and the T-44's out into the open, charging northward. The Pershings begin to fire, taking out dozens of Soviet tanks, but eleven steps make it through the armored defense, all others demoralized and fleeing. Result: Major American Victory. The Soviets managed to pass twenty-two steps off the north edge of the map. The Step Count stands at 65-105, with the Americans having a 40 step lead. |
||||||||||||
| 0 Comments |