
|
Red Parachutes: Bukrin Bridgehead Heroes of the Soviet Union #18 |
||
|---|---|---|
| (Attacker) Germany | vs | Soviet Union (Defender) |
| Formations Involved | ||
|---|---|---|
| Germany |  |
10th Motorized Division |
| Soviet Union |  |
23rd Guards Brigade |

| Total | |
|---|---|
| Side 1 | 1 |
| Draw | 2 |
| Side 2 | 0 |


| Overall Rating, 3 votes |
|---|
|
3.33
|
| Scenario Rank: --- of 913 |
| Parent Game | Heroes of the Soviet Union |
|---|---|
| Historicity | Historical |
| Date | 1943-09-28 |
| Start Time | 08:45 |
| Turn Count | 24 |
| Visibility | Day |
| Counters | 117 |
| Net Morale | 0 |
| Net Initiative | 2 |
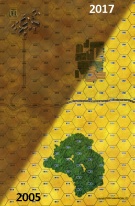
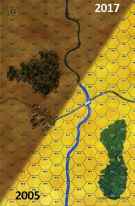
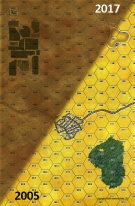
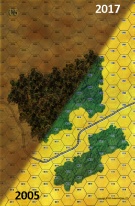
| Maps | 5: 1, 3, 4, 6, 8 |
| Layout Dimensions | 86 x 84 cm 34 x 33 in |
| Play Bounty | 185 |
| AAR Bounty | 171 |
| Total Plays | 3 |
| Total AARs | 1 |
| Battle Types |
|---|
| Delaying Action |
| Inflict Enemy Casualties |
| Urban Assault |
| Conditions |
|---|
| Off-board Artillery |
| Scenario Requirements & Playability | |
|---|---|
| Eastern Front | Maps + Counters |
| Heroes of the Soviet Union | Base Game |
| Introduction |
|---|
|
24TH PANZER CORPS: Soviet operations across the Dnepr north of Kanev had established a secure bridgehead in the wide bend of the rivet The Germans managed to halt Soviet expansion of the bridgehead and now prepared to eliminate it. On the western flank of the line the 10th Panzer Grenadier Division opened the attack in the early morning hours of 28 September. |
| Conclusion |
|---|
|
The German attack drove the Soviets back from between 2 kilometers along the river and 5 kilometers inland, but failed to eliminate the bridgehead. The Germans would hold portions of the Dnepr line into 1944, but ultimately could not halt the Soviets on the river. |
| Additional Notes |
|---|
|
Red Warriors counters may be substituted for those of Heroes of the Soviet Union. The German StuG IIIg originally had an AT value of 5-8 in the game system, later the AT value was changed to 6-8. The 5-8 AT value would better describe the StuG IIIf, a vehicle which never officially entered the PG universe. By the time of this scenario, the StuG IIIf had been out of production for quite some time and field units had been updated to the Stug IIIg standard. From a historical perspective, players should use the 6-8 AT values. |

|
|
|---|
| AFV Rules Pertaining to this Scenario's Order of Battle |
|---|
|
| Heer |
|---|
|


| Army (RKKA) |
|---|
|


| Guards |
|---|
|


| 5 Errata Items | |
|---|---|
| Scen 18 |
Scenario calls for German Self Propelled 75mm units. Whether they mean 75mm ig or 150mm sp, or something else entirely is left to our guesses. I used the ig as it is far more common. (triangular_cube
on 2017 Dec 02)
|

|
The reduced direct fire value of the Heer HMG became 5-5 starting with Fall of France. (plloyd1010
on 2015 Jul 31)
|

|
The StuG IIb appearing in the original Panzer Grenadier game had an Anti tank value of 4-7. As of Eastern Front Deluxe (2005), continuing onward through the 3rd and 4th edition games, the anti-tank value has been 4-4. (plloyd1010
on 2022 Jul 21)
|

|
The reduced direct fire value in Kursk: Burning Tigers is 4-4. (plloyd1010
on 2015 Jul 31)
|

|
These units should have a Direct Fire rating of 2-3, just like the RKKA and NKVD counterparts. (danradz
on 2011 May 04)
|
| T34's to the rescue | ||||||||||||
|---|---|---|---|---|---|---|---|---|---|---|---|---|
This scenario has a major German force trying to push their way through Soviet defenses. The interesting points are the German PZIV and Stug's matched against the Soviet T34's. Soviet and German infantry will slog it out while the AFV's control the battle. The Germans have a slight advantage with OBA, but the Soviets can counter it with dug in troops. Morale is nearly even. One point I don't like about some of the HotSU and Tank Battle scenarios is that the boards have odd layouts. This can leave some units stuck out on the edge and this scenario has this. In our fight, the Germans advance from the south and is immediately hit by Soviet fire, but the Soviet player has kept his T34s back from the front line. The Germans are forced to deploy early to attack the advanced units. One German reinforced company moves to cutoff and take the town on boards 3, while a second reinforced company moves to take the town on board 1. A reverse of a company strength is positioned to reinforce either attack and the German tanks are positioned to cover the right side and provide a breakthrough force. The Soviets have about company strength units in both towns but they also have a company in the woods on board 6 as well as the T34's just to the north on board 4. Both German attacks get close before Soviet OP fire and OBA start to disrupt and demoralize the Germans. German OBA is on target and disrupt the defender in the town on board 1. Soon, assaults start to happen and the Soviets start to lose troops. The Germans have some disruptions/demoralizations but good German leadership gets them back into good order quickly. Soviet leaders struggle to keep the troops in the town. Calls go out for support. On board 3 the attack on the town is a bit tougher for the Germans. Two step losses have kept the German attack from assaulting the town. But German OBA switches from board 1 to board 3 and this starts to make a difference. Soviet OBA also has some effect on the Germans, but eventually get INF and HMG in position to assault the town. The Soviet defense starts to run from the town. The Soviets still keep the T34's at bay as the Germans need to push onto board 4 to capture the towns. In the east the Soviets on board 6 start to move west to threaten the German right flank. Reserve INF and HMG move to count this but are hit by accurate Soviet OBA and lose a step. At this point they dig in and wait for more of the Soviets to move out from the woods. The German tanks move up to the newly captured town on board 1. The reinforce company and the tanks start to move forward after several more INF's from the reserve are commit to the board 4 assault. Infantry lead the advance to flush out the units in the field on board 4. As they approach they are hit by mortars but the shells fall wide and the German troops get into the fields. Several infantry units and RKKA T34's try to fight it out by eventually retreat back to the town on board 4. The German AFV's move up to the field to get ready for the assault on the town. The Soviets have fortified the town with AT guns and the T34's, but he begins to move the T34s out toward the east on board 8. The German PZIV's move to position themselves on the junction of the boards 4,8,1 and 6 to try to control the T34 movement. At that point the Soviets in the woods on board 6 advance on the German blocking troops and overrun their positions after Soviet OBA softened them up. The German reserve is setup to block the Soviet breakthrough, but this keeps reinforcements from helping with the attack on board 4. This also allows the T34s to move south and get around the Germans tanks and position themselves with the Soviet force. Meantime the Germans start the assault on the town on board 4. The Stugs move to support the attack after German OBA neutralizes the Soviet AT guns. The Soviets get some luck recoveries and still have a solid defense force. The Germans assault but get locked in assaults for the balance of the scenario. For the final Soviet push the T34s engage the PZIV and the T34's get the better of the PZIVs with 2 steps lost for the German tanks to one for the Soviets. The Soviet infantry moves up to counterattack the town on board 1. German reserves and recovering units put up a defense but the Soviets are able to capture one of the town hexes. The PzIV move back to help with the town but the T34's take another step before they can setup in a new position. In the end the Germans don't capture all the town and the Soviets did not keep the Germans off board 4 or 8, so the scenario winds up in a draw. In general this is a interesting scenario with the tank battles, but the map setup and victory conditions need a little work to make this a little more interesting. |
||||||||||||
| 0 Comments |