
|
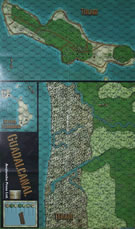
'We aren't going to let those people lay up there all day.' Guadalcanal #10 |
||
|---|---|---|
| (Defender) Japan | vs | United States (Attacker) |
| Formations Involved | ||
|---|---|---|
| Japan |  |
Ichiki Detachment |
| United States |  |
1st Marine Regiment |

| Total | |
|---|---|
| Side 1 | 1 |
| Draw | 4 |
| Side 2 | 6 |


| Overall Rating, 10 votes |
|---|
|
3.6
|
| Scenario Rank: 331 of 913 |
| Parent Game | Guadalcanal |
|---|---|
| Historicity | Historical |
| Date | 1942-08-21 |
| Start Time | 00:00 |
| Turn Count | 22 |
| Visibility | Day |
| Counters | 68 |
| Net Morale | 0 |
| Net Initiative | 1 |
| Maps | 1: Guad-TTGT |
| Layout Dimensions | 84 x 55 cm 33 x 22 in |
| Play Bounty | 124 |
| AAR Bounty | 147 |
| Total Plays | 11 |
| Total AARs | 5 |
| Battle Types |
|---|
| Rural Assault |
| Conditions |
|---|
| Hidden Units |
| Off-board Artillery |
| Scenario Requirements & Playability | |
|---|---|
| Guadalcanal | Base Game |
| Introduction |
|---|
|
The successful repulse of the first serious Japanese attack left the 1st Marine Division staff with the question of what to do next. Clearly the initiative had passed to them and there appeared to be a second Japanese force ready to attack the perimeter to the west. A plan was developed to encircle the Japanese from the inland using the 1st Battalion, 1st Marine Regiment and a platoon of light tanks. After the jungle terrain proved too much for the light tanks to navigate, the 1st Battalion advanced north without them. Under orders to retain a position near the airfield, the Japanese refused to retreat. |
| Conclusion |
|---|
|
The Marines were surprised by the Japanese unwillingness to surrender, but drove the remnants of the Ichicki Detachment against the beach and killed them almost to a man. One Japanese soldier surrendered and twelve wounded were captured. The Marines counted 777 dead Japanese and lost 44 dead and 71 wounded of their own. Japanese leadership did not learn of the fate of Colonel Ichicki's force for a few days, but when they did many began to question the effectiveness of the traditional Japanese night close assault against a heavily-armed and resolute foe. |

|
|
|---|
| AFV Rules Pertaining to this Scenario's Order of Battle |
|---|
|
| Imperial Japanese Army |
|---|
|


| Marine Corps |
|---|
|


| A virtual adrenaline rush | ||||||||||||
|---|---|---|---|---|---|---|---|---|---|---|---|---|
This scenario turned out to be quite a nail-biter with the passing of each turn. The American objective is quite to the point: annihilate every Japanese unit on the map and suffer no more than 4 step losses; the Japanese, well, they have to do their best to keep either 3 units alive on the map OR eliminate 5 or more American steps. The Americans have formidable amount of OBA alotted to them with 2x18 and 2x10 increments available and a whole battalion of marines along with a platoon of M-5 tanks to kick some imperial ass with. Actually, there are two battalions of marines available if the Japanese are foolish enough to charge the American line west of the river but those units cannot move unless assaulted. Perhaps in a rare case the Japanese could be driven west into DF firing range of them but likely those units will just ramain static and colorfully blend in with the tropical surroundings on the map. The American advance with the 1st Battalion moves northeast to engage the enemy who are hurriedly digging-in within the palm groves by the beach as that is all they are allowed to do the first four turns unless the marines get within DF range. Three reduced Japanese INF units are hidden but they are found out right before the conclusion of turn 4. Before the Americans can get to pound that triple stack of upstarts with OBA the fog of war intervenes but they are spotted before they can slip away into the jungle. At 10:45/turn 5 all of the attacking marine units are organized and situated within the palm groves with a small detachment paired with the M-5s to flank the eastern area. Then one fine blast of OBA reduces the sole Japanese HMG unit on the southern perimeter and shaking up the rest of the units in that stack. Meanwhile the once-hidden units attempt to split up and scatter. They will never make it to the jungle in time so they flee east to try to get out of range. Soon another heavy blast of OBA stops them and their leader from getting much further from failed morale checks. Everything starts falling into place for the American attack as each turn passes and the advance is virtually unhindered. The Japanese know they are going to die but do what they can to prolong the inevitable. In desperation a small diversionary suicide charge is made with a reduced INF led by a (9-1-0) Lieutenant and it actually succeeds in eliminating both a step of marines along with a Captain but return fire also manages to wipe that reduced INF step out. The shaken Japanese Lieutenant escapes capture, recovers and then coerces another reduced INF to also assault a few turns later and even yet another Marine platoon takes a step loss. This is fast becoming a very deadly game but the American OBA and combined DF is even deadlier as the Japanese losses continue to pile up. Eventually, the once hidden units get chased down and rounded up on the eastern flank while the remnants of the main Japanese detachmant are methodically pushed back to the coast. Then a thunderstorm comes into play at 12:00/turn 10 but this time it favors the attackers for a change as 99% of the American forces are in good order while the opposite holds true for the beleagured Japanese in sorry states of morale. So the +1 to recovery rolls is to the American advantage at this point while the +1 to movement also benefits them as they are in close proximity and will only affect Japanese units and leaders trying to quickly move out of harm's way. The visibilty of two hexes is also of no consequence for the five turns that the thunderstorm lasts. The Japanese need to make and win more assaults but they can't get it together as both their leaders and units are almost all disrupted or demoralized. It looks like this is going to be over very quickly but then another random event occurs at 13:30/turn 16 resulting in an American ammunition shortage and there is no longer OBA at their disposal for the remainder of the battle. Soon the Japanese have some opportunities to inflict more American step losses with adjacent small arms fire but their aim is not very good, even on the 16 column of the DF table after many chances allowed. And soon there are just only 3 Japanese units consisting of 5 steps left bottled up by the beach; the Americans have just 3 turns left to eliminate all of them to win. And then, like clockwork, American assaults are made on the last two Japanese positions after excessive bursts of HMG and they are all wiped out by 14:30/turn 21. The marines lose another Captain in the process but no further step losses. At 14:45/turn 22 there is just a disrupted Japanese Lieutenant and the good ordered Major left. The Major vainly makes a break for it and is quickly mowed down in a hail of bullets while the Lieutenant is surrounded on all sides facing the sea and is easily captured. This one gets an unshakeable "5" rating from me. It was a great solo play and though the Americans have strength in numbers and firepower I don't really find it unbalanced. It's really hard to use hidden units solo 100% effectively and I didn't do the best job hiding those units from myself; I knew all along that they were in either one of two places. If the three hidden units can be moved without detection after turn 4 then they have a chance to spoil the American victory conditions. Also in many cases the Japanese will have plenty of opportunities to eliminate the required Amercian steps for the alternative victory conditions. Whatever the case this one was a blast to play and for a while was sure it would end in a draw; that the Japanese would at least be able to keep one unit alive; whether full or reduced; good order, disrupted or demoralized by the conclusion of 22 turns. One sure way to find out is to revisit this one in the future. I still have 14 scenarios left of 'Guadalcanal' left to go but very glad I found a "5" already and not even halfway through it. |
||||||||||||
| 0 Comments |
| Marine Sweep |
|---|
|
On the surface, this looks like a pretty easy one for the Marines. They have a strong fore along the river, and another battalion to sweep the under stength company of Japanese. The Japanese set up along the edge of the grove to slow down the Marines, and keep a small force of three reduced units back and hidden to meet the alternative victory condition. The Marines advance the 1st battalion to close with and destroy the Japanese blocking force. Then they will continue on and sweep for any survivors. The plan starts well fro the Marines as they take no damage in closing near the Japanese, and set up their firebase. The Marines begin to fire on the Japanese base, and start a flanking force to circle them. The Japanese continue to fire back and set up an assault force to engage any isolated Marine force or the tank. Marien fire eventually starts to take a toll, but the Japanese also inflict some casualties in an assault they have made in the jungle. The Marines finally eliminate most of the blocking force except for three platoons engaged in assualt with a Marine company. The remainder of the Marines set up a sweeping force to beign to find the three remaining Japanese platoons. The Marines take their time sweeping through the cocunut grove, while the assult hex continues to whittle both sides down. Eventually, the sweeping force finds and eliminates the three reduced Japanese platoons, but not before five Marine steps have been lost between all the assaults. So, this results in a draw. |
| 0 Comments |
| To the Beach! | ||||||||||||
|---|---|---|---|---|---|---|---|---|---|---|---|---|
Battle Report: Following the nighttime attack by the Colonel Ichicki’s troops on 21 August 1942, Americans from the 1st Marine Division struck back in mid-morning. Units from the 1st Marine Battalion moved north on the east side of the river, while the 2nd Battalion held the west bank of the Ilu from the jungle to the coast. They were supported by units from the 1st Tank Battalion, but the armor was unable to advance through the swampy ground. The remnants of the Ichicki Detachment were dug in just south of the coast and about 1 Km from the east bank of the river with their line of sight blocked in all directions by the palm groves. The Marines took fire at 1115 hours as they advanced north, but by noon they had turned the Japanese left flank for enfilade while pinning the front line. Shortly thereafter, US artillery took out a Japanese 70mm gun emplacement, and by 1300 hours, the Japanese front line about ¾ Km south of the beach broke down. The Marines poured though and headed toward the Japanese right flank that extended to the coast. By 1445 hours, the surviving Japanese troops were pushed to the coast covered by the remnant of an HMG platoon. At 1500, only two Japanese units remained and both were severely compromised, but holding out nonetheless. Analysis: This scenario is fought over the same ground as that of Scenario #8 and uses a victory condition of either Japanese troop survival or elimination. It was played using 4th edition rules. At the halfway point in the scenario, the US had only eliminated a single step (the 70mm Japanese gun platoon), so they needed to pick up the pace. Up to that point, there had been limited success in softening up the Japanese front line. The next five turns all ended with fog-of-war, which hurt the opportunity for the US to advance and saved a couple of Japanese retreats from assault that would have otherwise been forced with concurrent free shots. At game end, the Americans had lost 3 steps to 18 for the Japanese; neither side had met the requirements for victory. The scenario had great balance and took the battle right down to the wire. At first, it appeared as though the Americans wouldn't have a chance of eliminating enough Japanese units, but in the end, the Japanese were fortunate to survive a number of assaults against the odds. |
||||||||||||
| 0 Comments |
| To the last man... | ||||||||||||||
|---|---|---|---|---|---|---|---|---|---|---|---|---|---|---|
Another round of Guadalcanal where a cross river flanking maneuver by the Marines caught a Japanese battalion between blazing guns and the beach. In the real battle the Japanese were killed almost to a man (one plus 12 wounded captured, all the rest killed) with relatively light American casualties, and the Japanese command started to realize their tactics may not be the best. In our game the Japanese and about half the Marines set up on opposite sides of the river out of range. These Americans could not move unless assaulted by the Japanese (yeah, right), and the Japanese could not move for the first hour. The remainder of the Americans set up south of the Japanese positions, and were effectively the hammer. The Marines moved north against the Japanese positions, spreading out to wrap around the Japanese flanks. While the American tanks could not navigate the jungle and remained out of the action, the Marine infantry carried a large number of machine guns, slowing down the main advance. Quicker and lighter forces moved further east to head off any Japanese retreats. The Japanese stayed in their defensive positions waiting to strike. Finally, an overanxious Japanese soldier broke cover and charged the Marine attackers. The trap now ruined, the hidden Japanese opened fire at the head of the Marine line. Poor fire discipline and an early trigger of the trap meant nearly no impact to the Marine advance. Lt Col Jones paused only long enough to call a rain of fire down on the Japanese position from the regimental artillery positions. The Japanese faltered, and the Marine line moved to envelop the Japanese flank. Combat was constant for the next few hours as Marine artillery would break the Japanese in their positions, then infantry would assault. Two Japanese platoons broke and ran, but the rest continued to fire ineffectively as the Marine net closed. As the entire Japanese left flank collapsed, Lt Col Jones redirected fire into the Japanese center. The assault was slow, but the Japanese were falling at a steady rate, a rate much higher than the Marines. Noticing a commanding figure in the center, Lt Col Jones called the strength of Marine artillery directly down on Maj Ichiki's position. The effect was devastating. All three units with Maj Ichiki disintegrated. The attack could not have been more effective if the Americans had had maps of the Japanese defensive positions. By the time the shelling stopped, not a Japanese soldier was left standing except Maj Ichiki. Three Marine platoons charged the broken center, now defended by the lone Major. Showing outstanding bravery (to the point of foolhardiness), the Major stood with pistol in one hand and saber in the other. Meeting the charge of 150 Marines, the Major died instantly as gunfire poured into a body held aloft only by the force of rounds slamming into him. Both shocked by the death of their commander, and awed by his bravery, the Japanese right, or the survivors as they were known at that point, poured effective fire into the Marine line. Capt Sakura, now in command, deftly directed the fire of the remaining troops into the Marine line. The Marines faltered. While casualties were minimal, the ferocity of the fire prevented the Marines from closing. In addition, the two platoons who had broken and ran now also turned to hold their positions along the beach. Those who fled east faced a small Marine force, and a gun battle raged for some 45 minutes until they were silenced. Those who had run west unfortunately ran into range of the Marines holding the river line. Their fate was much quicker. Eventually the Marines recovered from Capt Sakura's expertly directed fire. The advance continued. Soon all the Japanese who were formerly known as the right flank fell to Marine gunfire and assault with the exception of Capt Sakura. Known as one of the bravest men in the Japanese army, the Marines found him alone on the beach, the shock of the loss of all his troops so heavy on him he could not even commit his final act in support of the Emperor. The only man of the entire battalion to be captured whole. Observations: The Marines won this one handily, again. No Japanese survived (except the Capt we declared to surrender), and the Marines lost no steps. The hidden rules were of minimal value as all three were stacked together, so once one was found there was no chance Marines were going to wander into the hex unready. Japanese players did not assault, again. They loved their foxholes. The Japanese player kept them in position through the entire game, never leaving to assault adjacent Marines. I still stand by my opinion that if the Japanese do not assault they will lose. Even if they could not easily inflict step losses (and make the Marine job of eliminating them easier), just the threat would have slowed down the Marine advance. Instead the Marines fired to disrupt, then walked up and assaulted. Even if the Japanese were not disrupted, the Marines went ahead with powerful assaults because there seemed to be little threat. If the Japanese had assaulted once or twice and caused some casualties, the Marines would have had to spend more time at range to ensure the Japanese troops were disrupted before approaching. Arty was once again telling. Marine artillery caused significant disruption to Japanese troops. The fact that the Japanese failed to slow the Marine advance meant that the Marines could drop artillery and then stroll up and assault. The Marines wisely never dropped artillery when adjacent. The Japanese should have also broken cover with a couple units to disperse. Marine C2 kept the entire mobile force close enough to activate the entire force with one activation until a company had to break away to chase down one Japanese platoon that had broken and ran, then recovered. Meant Fog of War rules were a joke, since the Marines only needed two activations per turn, the first for arty and the second to activate their entire force. The key for the Japanese is to delay the Marines. Engage and assault with some units, then run the rest to the far edge of the map and dig in. The Marines are too powerful to face head to head. Force them to split up or engage the groups separately. This scenario requires the Japanese player to be a master at delay tactics, ‘cause your troops are going to die. The only other choice is assault with everything and hope to cause 5 Marine step losses. |
||||||||||||||
| 0 Comments |
| "Sir, now they're laying up there permanently" | ||||||||||||
|---|---|---|---|---|---|---|---|---|---|---|---|---|
This was a surprisingly quick battle, with a seemingly odd scenario design and victory conditions. Basically, a weak battalion of Japanese army troops are dug in in a palm grove north of a 2-battalion-strong line of Marines with a platoon of Stuarts supporting them. The Marines are tasked with attacking the Japanese, and the VC requires them to leave none on the map. The quirky thing about this scenario is that one of the battalions of Marines is only allowed to move if they are assaulted by the Japanese. The Japanese have no incentive to do so, so half of the American forces in play never actually move or fire (too many palm grove hexes between them and the Japanese). If the Japanese had chosen to set up closer to the Marines they could have been fired on, but they wisely didn't, so the task of clearing them out fell entirely on the second battalion, positioned on the right of the Marine line. They quickly moved out, executing a nice left wheel of their line to face the Japanese. Using artillery smoke and covering fire from part of the line, the Marines and tanks came directly to grips with the Japanese, many of whose platoons were under strength. The assaults proceeded briskly, with heavy Japanese casualties and no losses for the Marines. In two hours the battle was effectively over, mopping up would be complete in less than an additional hour. Total US victory. |
||||||||||||
| 0 Comments |