
|
Kursk - South Flank Scenario 5: Manhandled Variant Panthers #1 |
||
|---|---|---|
| (Attacker) Germany | vs | Soviet Union (Defender) |
| Formations Involved | ||
|---|---|---|
| Germany |  |
3rd SS "Death's Head" Division |
| Soviet Union |  |
16th Guards Mortar Regiment |
| Soviet Union |  |
263rd Mortar Regiment |
| Soviet Union |  |
694th Antitank Regiment |
| Soviet Union |  |
79th Guards Mortar Regiment |

| Total | |
|---|---|
| Side 1 | 0 |
| Draw | 0 |
| Side 2 | 1 |


| Overall Rating, 1 vote |
|---|
|
3
|
| Scenario Rank: --- of 913 |
| Parent Game | Variant Panthers |
|---|---|
| Historicity | Alt-History |
| Date | 1943-07-06 |
| Start Time | 05:30 |
| Turn Count | 22 |
| Visibility | Day |
| Counters | 242 |
| Net Morale | 1 |
| Net Initiative | 1 |
| Maps | 3: 36, 38, 39 |
| Layout Dimensions | 84 x 43 cm 33 x 17 in |
| Play Bounty | 229 |
| AAR Bounty | 171 |
| Total Plays | 1 |
| Total AARs | 1 |
| Battle Types |
|---|
| Delaying Action |
| Exit the Battle Area |
| Inflict Enemy Casualties |
| Road Control |
| Urban Assault |
| Conditions |
|---|
| Entrenchments |
| Minefields |
| Off-board Artillery |
| Randomly-drawn Aircraft |
| Reinforcements |
| Scenario Requirements & Playability | |
|---|---|
| Variant Panthers | Base Game |
| South Flank | Maps + Counters |
| Introduction |
|---|
|
The second day of Operation Citadel found Death’s Head Division attacking eastwards towards the Lipouyi Donets River while Army Detachment Kempf was advancing northward to meet them. It was imperative that the two formations link up so that their armor could be free to spearhead the advance, rather than being stuck protecting the two formations’ own flanks. Located between the Germans and their objectives was Colonel P.D. Govorunenko and his 375th Rifle Division. |
| Conclusion |
|---|
|
Colonel Govorunenko and his men clung tenaciously to every meter of ground and refused to yield an inch. Even though Army Detachment Kempf managed to advance all the way to Iastrebovo, the hoped-for linkup was not accomplished. That forced II SS Panzer Corps to detach almost one third of its total strength to secure its flank, thus weakening the spearhead. |
| Additional Notes |
|---|
|
The Skoda Panther counters replace the PzIIIj or PzIVe and PzIVf2 tanks in this scenario. |

|

|
|---|
| AFV Rules Pertaining to this Scenario's Order of Battle |
|---|
|
| Schutzstaffel |
|---|
|


")
")
")
")
")
")


| Army (RKKA) |
|---|
|


")


| Guards |
|---|
|

| 7 Errata Items | |
|---|---|

|
All SS 105mm guns should have white, indirect fire values. (Shad
on 2010 Dec 15)
|

|
All SS 75mm IG guns are direct fire weapons (black), not indirect (white). (Shad
on 2010 Dec 15)
|

|
The reduced direct fire value of the SS HMG is 5-5 in Beyond Normandy and Road to Berlin. (plloyd1010
on 2015 Jul 31)
|

|
The Units in Beyond Normandy were misprinted with a movement factor of 5. The movement factor should be 8. (rerathbun
on 2012 Mar 21)
|
|
|
Liberation 1944's counters are mislabeled 'PzIVF2.' The counter's ratings are correct (Armor 5, Move 8, DF 11-6, AT 6-8). (rerathbun
on 2014 Feb 14)
|

|
The reduced direct fire value in Kursk: Burning Tigers is 4-4. (plloyd1010
on 2015 Jul 31)
|

|
Kommissars never get morale or combat modifiers. Ignore misprints. (Shad
on 2010 Dec 15)
|
| SS "Panthers" with very little Growl | ||||||||||||
|---|---|---|---|---|---|---|---|---|---|---|---|---|
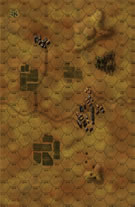
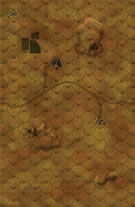
This scenario is actually Scenario #5 from Kursk: South Flank (“Manhandled”) but Pz42t’s were used in place of the PzIIIJ’s and VK-3002’s in place of the PzIVE’s & PZIVF2’s per the defined ratio in the Gold Club Journal notes. The Soviets set up their entrenchments about midway across Map 36 and a second tier to the east to protect the tank lanes to the town. This would hopefully allow some crossfire as the tanks approached the town, which is the key objective. Minefields were placed in the north to channel German traffic to the center and south; however, German engineers were able to cover two of the minefields that were only “1”’s and another was a decoy. The Germans have four objectives, but two of them involve the town since they are required to clear both the town and road of undemoralized Soviet units. If the Soviets only hold the road through the town, they will have a Minor Victory, so this is the critical spot on the map. The other two objectives involve German unit exit and limited loss of German steps. Since tank steps are double, with the Tiger triple, placing Soviet AT units to maximize hits is critical as well. Once they fire in spotting range of the Germans they can be in trouble as the Germans have better OBA and an advantage in aircraft draw. In this playthrough, the Germans were lined up north to south across the map with mortar and howitzer units behind the line. The necessity for German victory to have a clear road essentially means that they can’t leave any Soviet “stragglers” who might slip down and take a road hex late in the game, i.e. the Germans need to keep pushing the Soviets back east until they can be either eliminated or a very small patch of road can be properly cleared. The Germans took some early hits from Soviet OBA, mortar groups and aircraft that slowed their advance and cost them steps. However, by the tenth turn, the Germans had advanced and neutralized better than half of the Soviet AT firepower. On that turn, the Soviet reinforcements arrived bringing some much-needed AT support from 6 T-34’s. These latter units moved quickly to reinforce the town, which was now within German striking distance. By the halfway point in the game, the Germans had lost 28 steps to 18 for the Soviets, which shows the difficulty of advancing into a strong Soviet defensive placement. The German OBA, which maxed at the 42-column once per turn simply wasn’t that effective against AT guns in entrenched positions, and the aircraft draws were fairly even (6-5 German advantage) with Soviet aircraft being much more damaging to German units advancing across open ground. So the German objective of losing no more than 30 steps was in jeopardy early, which limited them to a Minor Victory. As the game moved ahead, the Tiger unit was finally able to move forward with flanking infantry to prevent any Soviet assaults, and 8 of the 11 Soviet AT units had been eliminated, which limited any crossfire on it. It is a devastating weapon but must have protection as noted. On Turn 19, the infantry had been stripped from the Tiger and it was assaulted, which resulted in a step loss even though it destroyed the entire Soviet assault group in the process. Soviet Lend-Lease Blenheim’s also caused quite a bit of damage during the Axis advance, but the Germans drove forward. However at 1030 (the penultimate turn), the Tiger was destroyed, which severely compromised any hope that the Germans had of taking the town and the road through it. At game end, the Germans had not achieved any of their objectives as two road hexes (going through the town) were still held by Soviet units, only two German steps had exited, and the Germans had lost 59 steps to 63 lost by the Soviets. This led to a Soviet Major Victory. Several factors led to the victory including the success of Soviet pickets, disruption of German foot units by both Soviet OBA and air support, and the eventual need for the Germans to advance armor that could not be adequately supported by ground troops. |
||||||||||||
| 0 Comments |