
|
Arno River Crossing Go for Broke #15 |
||
|---|---|---|
| (Defender) Germany | vs | United States (Attacker) |
| Formations Involved | ||
|---|---|---|
| Germany |  |
4th Fallschirmjäger Division |
| United States |  |
442nd "Nisei" Infantry Regiment |
| United States |  |
Army |

| Total | |
|---|---|
| Side 1 | 1 |
| Draw | 0 |
| Side 2 | 0 |


| Overall Rating, 1 vote |
|---|
|
4
|
| Scenario Rank: --- of 913 |
| Parent Game | Go for Broke |
|---|---|
| Historicity | Historical |
| Date | 1944-09-01 |
| Start Time | 08:00 |
| Turn Count | 18 |
| Visibility | Day |
| Counters | 75 |
| Net Morale | 0 |
| Net Initiative | 1 |
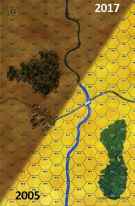
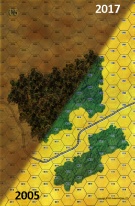
| Maps | 2: 3, 6 |
| Layout Dimensions | 56 x 43 cm 22 x 17 in |
| Play Bounty | 163 |
| AAR Bounty | 171 |
| Total Plays | 1 |
| Total AARs | 1 |
| Battle Types |
|---|
| Inflict Enemy Casualties |
| Road Control |
| Urban Assault |
| Conditions |
|---|
| Hidden Units |
| Minefields |
| Off-board Artillery |
| Randomly-drawn Aircraft |
| Reinforcements |
| Terrain Mods |
| Scenario Requirements & Playability | |
|---|---|
| Battle of the Bulge | Counters |
| Eastern Front | Maps |
| Elsenborn Ridge | Counters |
| Go for Broke | Base Game |
| Introduction |
|---|
|
During August both sides had toned down their operations, recovering from fatigue, bringing replacements, gathering supplies, and preparing for another round. Although the front line had remained relatively stagnant, the Nisei had kept busy patrolling to gain prisoners to interrogate. Finally, the anticipated jump off orders came down - all three battalions were ordered to establish bridgeheads over the Arno River, two along Highway 66 and one 20 miles west near Pisa. The ante had been upped by the Germans. Gone were the Luftwaffe infantry, replaced by the tough-as-nails 4th Parachute Division containing a large number of die-hard former Italian paratroopers fighting on their home turf. |
| Conclusion |
|---|
|
The Second and Third Nisei battalions forced their crossing just west of Florence, encountering significant minefields and other obstacles. Once their small bridgehead was consolidated, they pushed their perimeter up Highway 66. Miles to the west the 100th Battalion simply crossed the Arno River and dug in. Shortly afterwords the regiment would be pulled out of the line and transferred north to France and the bitter fighting in the Vosges Mountains. |

|
|
|---|
| AFV Rules Pertaining to this Scenario's Order of Battle |
|---|
|
| Heer |
|---|
|


| Luftwaffe |
|---|
|


| Army |
|---|
|


| 4 Errata Items | |
|---|---|
| Scen 15 |
This scenario may require a German PzIVe as a variable reinforcement. Use a counter from Eastern Front. (GeneSteeler
on 2012 Apr 16)
|

|
The Pz IVe appearing in the original Panzer Grenadier game had an Anti tank value of 4-7. As of Afrika Korps (2002), continuing onward through the 3rd and 4th edition games, the anti tank value has been 4-4. (plloyd1010
on 2016 Jul 25)
|

|
One Wespe (ID# 1201) should have an armor value of 1 on the front and back of the counter. (Shad
on 2010 Dec 15)
|

|
Reduce strength direct fire value be came 5-5 in Army at Dawn. (plloyd1010
on 2015 Jul 31)
|
| The Wall |
|---|
|
This is the last of the 15 scenarios for the Nisei in Italy in 1944. They have been in almost constant combat and motion since they started. Suddenly they hit the end of their rope. It seems funny that even the dice can seem exhausted at times. In this one the Nisei have to force a river crossing against a German paratrooper detachment, heavily supported by armor and artillery. I was excited as I was able to get two crossing points working well to the west of the town but then I ran into the paratroopers. Seems they didn't want to move. 3 1/2 hours later I finally had cleared the woods of the three platoons of defenders. Meanwhile my third crossing point remained uneffective as the engineers had become demoralized and fled. So fully 1/3 of my force was reduced to direct fire attacks on the town which had little effect. The troops that had cleared the woods gathered for an attack on the town but were savaged by opportunity fire and artillery as they approached the town. With only an hour remaining in the scenario and no coherent force available to assault the town the Americans conceded having already lost 11 steps to 6 German. A key to this result was the high quality of the German leaders (most of whom had morale modifiers) and the poor draw for the Americans (most of whom did not have morale modifiers), combined with the abysmal rolling for recovery from the Nisei. A very enjoyable ride but one that clearly does not have to end this way. I give it a "4". |
| 0 Comments |