
|
Counter-Stroke at Radekhiv Fire in the Steppe #11 |
||
|---|---|---|
| (Defender) Germany | vs | Soviet Union (Attacker) |
| Formations Involved | ||
|---|---|---|
| Germany |  |
11th Panzer Division |
| Soviet Union |  |
10th Tank Division |

| Total | |
|---|---|
| Side 1 | 1 |
| Draw | 0 |
| Side 2 | 0 |


| Overall Rating, 1 vote |
|---|
|
4
|
| Scenario Rank: --- of 913 |
| Parent Game | Fire in the Steppe |
|---|---|
| Historicity | Historical |
| Date | 1941-06-23 |
| Start Time | 15:00 |
| Turn Count | 24 |
| Visibility | Day |
| Counters | 151 |
| Net Morale | 0 |
| Net Initiative | 1 |
| Maps | 4: 1, 4, 6, 8 |
| Layout Dimensions | 86 x 56 cm 34 x 22 in |
| Play Bounty | 191 |
| AAR Bounty | 171 |
| Total Plays | 1 |
| Total AARs | 1 |
| Battle Types |
|---|
| Inflict Enemy Casualties |
| Road Control |
| Urban Assault |
| Conditions |
|---|
| Off-board Artillery |
| Randomly-drawn Aircraft |
| Reinforcements |
| Smoke |
| Terrain Mods |
| Scenario Requirements & Playability | |
|---|---|
| Fire in the Steppe | Base Game |
| Introduction |
|---|
|
Armed with Lysenko's report of German tanks just outside Radekhiv, Maj. Gen. Sergei Y. Ogurtsov of 10th Tank Division hoped to fling his entire formation at them in a mass attack. One of his two tank regiments did not reach its assembly area on time, held up by German air attacks, and Ogurtsov decided not to wait for it and expose the rest of his division to the same treatment. Tenth Tank Division had undergone extensive large-unit training for just such an opportunity, but their commander eschewed maneuver and flung them into a brutal frontal assault. |
| Conclusion |
|---|
|
The Soviets had numbers on their side and a marked superiority in armor quality. But they attacked in waves, aiming their tanks directly into the teeth of German defenses including 88mm anti-aircraft guns deployed in a ground role. The attack broke up and the Soviets left dozens of destroyed tanks behind. Exact losses are hard to determine, as it's unclear if Lysenko's task force from 32nd Tank Division was also present and the Germans may have included tanks destroyed in the morning battle in their claims. Whatever the exact result, 10th Tank Division had suffered a serious setback, made worse over the next few days as higher commands sent contradictory orders causing the division to wander aimlessly across the battlefield constantly losing tanks to mechanical breakdowns and air attacks. |

|
|
|---|
| AFV Rules Pertaining to this Scenario's Order of Battle |
|---|
|
| Heer |
|---|
|


| Luftwaffe |
|---|
|

| Army (RKKA) |
|---|
|


| 6 Errata Items | |
|---|---|
| Scen 11 |
The scenario calls for 5 T-28 units for the Soviets. There are only 4 in the counter mix. (J6A
on 2019 Apr 12)
|

|
The reduced direct fire value of the Heer HMG became 5-5 starting with Fall of France. (plloyd1010
on 2015 Jul 31)
|

|
The Pz IVe appearing in the original Panzer Grenadier game had an Anti tank value of 4-7. As of Afrika Korps (2002), continuing onward through the 3rd and 4th edition games, the anti tank value has been 4-4. (plloyd1010
on 2016 Jul 25)
|

|
The morale and combat modifiers of German Sergeant #1614 should be "0", not "8". (Shad
on 2010 Dec 15)
|

|
The reduced direct fire value in Kursk: Burning Tigers is 4-4. (plloyd1010
on 2015 Jul 31)
|

|
Kommissars never get morale or combat modifiers. Ignore misprints. (Shad
on 2010 Dec 15)
|
| #11 - Counter-Stroke at Radekhiv |
|---|
|
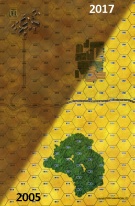
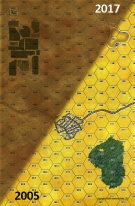
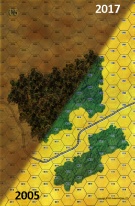
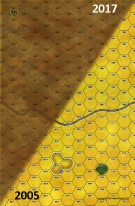
On paper this is a four map scenario but in reality you fight on only two maps, 1-4, the other two I removed as they were not needed (6-8). Set up for the defenders, the Germans, is in and around the town on map 4, depending on who you are playing against, yourself or a partner, determines when the Soviet player finds out his objective for the scenario on turn 8 or 6 respectfully. Regardless which VC is drawn the town is the center of the action. As expected, the German Flak 88s were the key to the German win even though they were hot, then cold, then hot again throughout the battle (dice rolls). The Soviets tried in vain to KO the two 88 batteries but were only able to suppress one of them for a short time. In the end the Soviets were not able to gain control of or contest more town hexes than the Germans. |
| 0 Comments |