
|
Retreat from Turiec First Axis #27 |
||
|---|---|---|
|
(Defender)
Slovak Republic
(Defender) Soviet Union |
vs | Germany (Attacker) |
| Formations Involved | ||
|---|---|---|
| Germany |  |
178th "Tatra" Panzer Division |
| Slovak Republic |  |
5th Tatical Group |
| Soviet Union |  |
1st Czech Partisan Brigade |

| Total | |
|---|---|
| Side 1 | 0 |
| Draw | 0 |
| Side 2 | 1 |


| Overall Rating, 1 vote |
|---|
|
5
|
| Scenario Rank: --- of 913 |
| Parent Game | First Axis |
|---|---|
| Historicity | Historical |
| Date | 1944-09-21 |
| Start Time | 10:00 |
| Turn Count | 36 |
| Visibility | Day |
| Counters | 143 |
| Net Morale | 1 |
| Net Initiative | 1 |
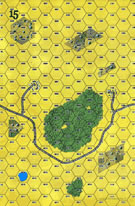
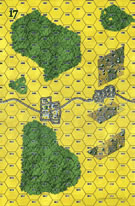
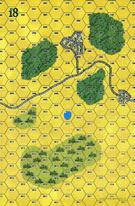
| Maps | 5: 15, 17, 18, 6, 9 |
| Layout Dimensions | 140 x 43 cm 55 x 17 in |
| Play Bounty | 188 |
| AAR Bounty | 171 |
| Total Plays | 1 |
| Total AARs | 1 |
| Battle Types |
|---|
| Rear Guard |
| Rural Assault |
| Conditions |
|---|
| Hidden Units |
| Randomly-drawn Aircraft |
| Terrain Mods |
| Scenario Requirements & Playability | |
|---|---|
| Battle of the Bulge | Maps |
| Eastern Front | Counters |
| First Axis | Base Game |
| Road to Berlin | Maps + Counters |
| Sinister Forces | Counters |
| Introduction |
|---|
|
German attacks slowed as they gathered more force and repressed partisan activity in their rear areas, but the Slovaks took little advantage of the reprieve. The Tatra Division absorbed several new battalions and then pushed forward against the unprepared Slovaks around Sucany. Thought the Slovaks fought hard, their position crumbled and a disorganized retreat began. Only the tough partisans of the communist 1st Czech Brigade kept their heads. |
| Conclusion |
|---|
|
Only the intervention of the partisans - who included Red Army cadres - save the Slovaks from annihilation. Slowed by ambushes, the Germans methodically reduced the guerrillas and inflicted heavy casualties on them, but the Slovaks had the chance to rally and set up a new defense line. The 5th Tactical Group was soon disbanded, its men and weapons assigned to other units. |

|
|
|---|
| AFV Rules Pertaining to this Scenario's Order of Battle |
|---|
|
| Heer |
|---|
|


| Slovenská Armáda |
|---|
|


| Army (RKKA) |
|---|
|

| NKVD |
|---|
|


| 5 Errata Items | |
|---|---|

|
Two 105mms (ID#s 1204, 1205) have "16-31" fire values in black (direct fire), when they should be in white (indirect fire). (Shad
on 2010 Dec 15)
|

|
The reduced direct fire value of the Heer HMG became 5-5 starting with Fall of France. (plloyd1010
on 2015 Jul 31)
|

|
All SS PzIVH tanks should have a movement of 8. (Shad
on 2010 Dec 15)
|

|
The morale and combat modifiers of German Sergeant #1614 should be "0", not "8". (Shad
on 2010 Dec 15)
|

|
Liberation 1944's Tiger movement and armor ratings are backwards. They should be Armor 7 and Movement 5. (petermc
on 2014 Feb 14)
|
| Two for the Price of One |
|---|
|
This is really two different battles. In one, a terrible morale (6/4) Slovak force is attempting to exit the 5 lengthwise boards while being attacked by the Luftwaffe and slowly increasing ground forces. In the second, a high morale partisan ground stiffened by Omsbon and NKVD HMGs attempts to block a strong German force from breaking through to pursue said lowly Slovaks. This is also a long scenario (36 turns) which gives the Slovaks plenty of time to try to hide from the Luftwaffe but they are constantly concerned with their partisan friends who are being ground into dust back at the entry zone for the Germans. There is a lot going on in this one and both players have to bounce back and forth between the running Slovaks and the fight against the partisans. In my play of this one the Slovaks running got a great start as the Luftwaffe missed its first several shots but eventually they started getting hit and disrupted/demoralized. The retreat began to look like the retreat out of Kuwait with red and black covered Slovak units scattered along the road. Still a large force was able to exit onto the final board and prepare to exit. Suddenly, however, a single armored car was able to get onto the final board and subject the retreating Slovaks to Op Fire which delayed their retreat. After two turns they were joined by 10 PZ IVs which pretty much shut the retreat off. At the point that the armored cars arrived there were 8 steps of Slovaks in the area and 13 had exited. To get a 15 point bonus the Germans had to keep the number of Slovaks retreating to 14 or less. The poor morale of the Slovaks ensured that they were unable to pass through the armored car screen. Back on the entry board the partisans were trying to kill enough Germans to counterbalance the dying Slovaks but were unable to as they continued to get slammed by the German artillery and they were basically reduced to scraps by the seventh hour of fighting and the ability to continuing causing losses was basically done. The Germans made some early mistakes as they ran their armored cars into some partisans who gleefully used can openers on the terrified occupants thus reducing the German chances of stopping the fleeing Slovaks but also had monster dice with their artillery so I guess it evens out. There is so much going on in so many different locations on the board that it is impossible to produce a coherent AAR. This is one you just have to experience. It was a ton of fun. I give it a "5". |
| 0 Comments |