
|
Slovak Revival First Axis #25 |
||
|---|---|---|
| (Defender) Slovak Republic | vs | Germany (Attacker) |
| Formations Involved | ||
|---|---|---|
| Germany |  |
Kampfgruppe von Ohlen |
| Slovak Republic |  |
Dubrovodsky Combat Group |

| Total | |
|---|---|
| Side 1 | 0 |
| Draw | 0 |
| Side 2 | 1 |


| Overall Rating, 1 vote |
|---|
|
2
|
| Scenario Rank: --- of 913 |
| Parent Game | First Axis |
|---|---|
| Historicity | Historical |
| Date | 1944-09-05 |
| Start Time | 08:00 |
| Turn Count | 36 |
| Visibility | Day |
| Counters | 92 |
| Net Morale | 0 |
| Net Initiative | 0 |
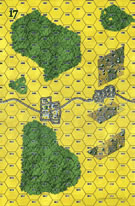
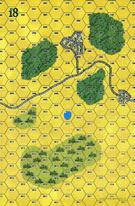
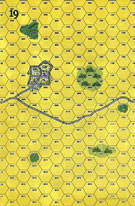
| Maps | 4: 17, 18, 19, 5 |
| Layout Dimensions | 86 x 56 cm 34 x 22 in |
| Play Bounty | 169 |
| AAR Bounty | 171 |
| Total Plays | 1 |
| Total AARs | 1 |
| Battle Types |
|---|
| Exit the Battle Area |
| Conditions |
|---|
| Off-board Artillery |
| Randomly-drawn Aircraft |
| Scenario Requirements & Playability | |
|---|---|
| Eastern Front | Maps |
| First Axis | Base Game |
| Road to Berlin | Maps + Counters |
| Introduction |
|---|
|
Realizing that this fight might continue for some time, the Germans gathered their mixed bag of small units into the new 178th "Tatra" Panzer Grenadier Division and renewed their attack. The Slovaks continued to gain reinforcements, and every day a few more tanks previously notes as "irreparable" on reports made to central headquarters or the German liaison staff rolled out of the arsenal in Martin. |
| Conclusion |
|---|
|
This time the Slovaks fought with much more determination, and when it became obvious that the German attack had faltered their tanks launched a counterattack of their own. The tanks met with disaster, moving forward without artillery preparation or infantry support, and German anti-tank guns soon dispatched the Slovak Panzer III's while the Slovak light tanks somehow escaped a gunnery duel with the German Panzer IV's. |

|

|
|---|
| AFV Rules Pertaining to this Scenario's Order of Battle |
|---|
|
| Heer |
|---|
|


| Slovenská Armáda |
|---|
|


| 3 Errata Items | |
|---|---|

|
The reduced direct fire value of the Heer HMG became 5-5 starting with Fall of France. (plloyd1010
on 2015 Jul 31)
|

|
All SS PzIVH tanks should have a movement of 8. (Shad
on 2010 Dec 15)
|

|
The morale and combat modifiers of German Sergeant #1614 should be "0", not "8". (Shad
on 2010 Dec 15)
|
| And Then There Were None |
|---|
|
This scenario is quite simiilar to the previous one where a reasonably sized German force has to enter a four board area, clear the entry area of Slovak troops and then march a portion off the opposite edge. The Slovaks, without foreknowledge of the entry spot for the Germans need to cover the entire board to try to stop this and, in so doing, leave themselves open to being defeated in detail. The Slovaks again drew leaders without, by and large, any modifiers. While the German leaders were not conspicuously better they did have some morale modifiers and were able to concentrate them with their offensive units. The Slovaks concentrated a large force in the swamps in order to avoid detection as long as possible. Unfortunately the spread nature of the Slovak deployment permitted the Germans to concentrate against individual pockets of Slovaks and destroy them in detail. Unlike the previous scenario, however, the Slovaks were able to cause several losses to the Germans but not enough to change the final results. By 1/3 of the way through the scenario the Slovaks had caused 9 German step losses but were down to 7 steps of infantry. The Germans did expose their armor to shots from the Marder and the 75s of the Slovaks but only took one step loss from that fire and were able to destroy all of the antitank capability of the defenders by the 10th turn. From what I can see the Slovaks have little chance in this one if they try to fight. Perhaps a deeper deployment with widely spread units with the capability to move back onto the entry areas would make the scenario last longer and entice the Germans to move into a "contain" mode but if the Germans look to eliminate the Slovaks there seems to be little that the Slovaks can do to stop it. A shorter scenario would give the Slovaks at least a chance at avoiding the destruction. I give this one a "2". |
| 0 Comments |