
|
Fighting French First Axis #21 |
||
|---|---|---|
| (Defender) Slovak Republic | vs | Germany (Defender) |
| Formations Involved | ||
|---|---|---|
| Germany |  |
178th "Tatra" Panzer Division |
| Germany |  |
Kampfgruppe von Ohlen |
| Slovak Republic |  |
Dubrovodsky Combat Group |
| Slovak Republic |  |
Marechal Foch Paritsan Battalion |

| Total | |
|---|---|
| Side 1 | 0 |
| Draw | 0 |
| Side 2 | 3 |


| Overall Rating, 3 votes |
|---|
|
2.67
|
| Scenario Rank: --- of 913 |
| Parent Game | First Axis |
|---|---|
| Historicity | Historical |
| Date | 1944-08-31 |
| Start Time | 09:00 |
| Turn Count | 16 |
| Visibility | Day |
| Counters | 63 |
| Net Morale | 0 |
| Net Initiative | 0 |
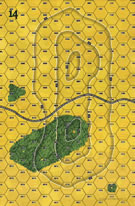
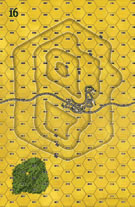
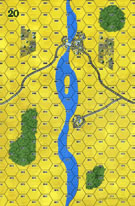
| Maps | 3: 14, 16, 20 |
| Layout Dimensions | 84 x 43 cm 33 x 17 in |
| Play Bounty | 149 |
| AAR Bounty | 165 |
| Total Plays | 3 |
| Total AARs | 2 |
| Battle Types |
|---|
| Exit the Battle Area |
| Conditions |
|---|
| Off-board Artillery |
| Randomly-drawn Aircraft |
| Scenario Requirements & Playability | |
|---|---|
| First Axis | Base Game |
| Road to Berlin | Maps + Counters |
| Sinister Forces | Counters |
| Introduction |
|---|
|
The first open fighting between German and Slovak troops took place near Zilna, a garrison town in northwest Slovakia. The local commander gathered about 1,000 man and some tanks, and a group of French partisans (escapees from German labor camps) and a Slovak partisan group joined him as well. Ordered to block the Vah River valley, they soon came under attack from Battle Group Von Ohlen of the 82nd Reserve Panzer Grenadier Regiment. |
| Conclusion |
|---|
|
The Slovaks initially did well, holding back the Germans and damaging or destroying four of their tanks. But the Slovak partisans detailed to hold the hilltop on the right flank melted away without offering any resistance, and the Germans exploited this gap. Outflanked, the Slovaks pulled back and called in more regular reinforcements to hold a new line. |
| Additional Notes |
|---|
|
Slovaks use 6x Partisans (Soviet) |

|
|
|---|
| AFV Rules Pertaining to this Scenario's Order of Battle |
|---|
|
| Heer |
|---|
|


| Slovenská Armáda |
|---|
|


| 3 Errata Items | |
|---|---|

|
The reduced direct fire value of the Heer HMG became 5-5 starting with Fall of France. (plloyd1010
on 2015 Jul 31)
|

|
All SS PzIVH tanks should have a movement of 8. (Shad
on 2010 Dec 15)
|

|
The morale and combat modifiers of German Sergeant #1614 should be "0", not "8". (Shad
on 2010 Dec 15)
|
| Hit and Run |
|---|
|
This is one of the more baffling terrain setups I have run into. The German force is moving through a river valley and the Slovaks are charged with the responsibility to keep the Germans from advancing for four hours. The Slovaks have the benefit of two companies of partisans of uneven quality (morale 8/5 and some odd restrictions on their activation capability) which can clog up the river valley and force the Germans to delay. The only thing that forces the Slovaks to fight early on though is that the river runs directly through the map and can be crossed only at the bridge which is only two hexes away from the Germans entry point. So, rather than setting up a defense in depth the Slovaks are forced to set up in a "V" with the apex of the V at the entry point of the German force. Helping the Slovaks immensely is that the bridge is in a town and the Slovaks pulled their 1-10-2 Porocik who will command in the town. The Germans are not forced to commit to both sides of the river, as the Slovaks must, without knowledge of the Germans deployment. They choose the east side of the river as the terrain is a little more open once the town is bypassed. They invest the town and use their armor as a direct fire support force and keep the pressure on the Slovaks by continuing to eliminate steps. The Slovaks, however, are elated as their control of the town and the resistance of their troops further south is holding up the Germans. The losses however cause the partisans to become undependable, failing initiative time after time and leaving holes for the Germans to infiltrate and leave the board. At the end of the 16 turn scenario the Germans had managed to exist six infantry platoons and one armor platoon and managed to garner 46 VPs to the Slovak 18, a major victory for the Germans. The play, however, was a good deal closer than the final score. The failure of the partisan troops to move when necessary was the real killer. A very interesting terrain situation and the variety of troops on the Slovak side gives the strong impression of an improvised defense. I sure didn't think it would rank highly but in the end I give it a four for the novelty and the "feel" of the frantic situation of the Slovaks. |
| 0 Comments |
| After being a POW, there is not much fight. | ||||||||||||
|---|---|---|---|---|---|---|---|---|---|---|---|---|
In seeing this popup on the scenario of the day, I look and saw that it looked interesting. This has a German reserve division overrunning Slovak units with some freed French POW's during the Slovak uprising. The Slovaks are on the defense and have some heavy weapons but they must cover three boards with the units. The Germans must drive across the board from north to south. They have a balance force or infantry, HMG, ENG, as well as PzVIh's and OBA. The setup had the Slovaks covering the main advance points the town over straddling the river on board 20, the hills on board 16 and 14. The French POWs dugin at key points on the roads and the hills with the Slovak infantry on the hill elevations and woods, and being ready to move to reinforce the German entry point. The Slovaks defense cannot stop a focused force, but will try to reinforce with mobile units and their tanks. The Germans mass there forces to cross board 14 and exit units. Turns 1 and 2 have the Germans entering the board and moving to engage the Slovaks on the hill. The other Slovak units move from 20 and 16 to try to reinforce. By turn 3 the Germans engage the the Slovaks and French POW's. The POWs demoralize quickly while the Slovaks try to hold but are overrun in an assault. Several German platoons race past the Slovak units to try to get off the board. By turn 5 the Slovak tanks look to support the Slovak infantry, but the German PzVIh knock out the Slovak Marder and L34. At this point, turn 7 the Germans have run past the Slovaks and the other defenders are running to try to catch them. And the game is called. This scenario is unbalanced toward the Germans, given they have the mobility and a well balanced force. The Slovaks have a large front to cover cannot with their forces. It might be more balanced if the Germans did not have trucks and it slowed them down. |
||||||||||||
| 0 Comments |