
|
Collective Farm First Axis #13 |
||
|---|---|---|
| (Attacker) Slovak Republic | vs | Soviet Union (Defender) |
| Formations Involved | ||
|---|---|---|
| Slovak Republic |  |
1st "Janošík" Infantry Division |
| Soviet Union |  |
55th Guards Rifle Division |

| Total | |
|---|---|
| Side 1 | 0 |
| Draw | 1 |
| Side 2 | 0 |


| Overall Rating, 1 vote |
|---|
|
4
|
| Scenario Rank: --- of 913 |
| Parent Game | First Axis |
|---|---|
| Historicity | Historical |
| Date | 1942-07-25 |
| Start Time | 06:30 |
| Turn Count | 32 |
| Visibility | Day |
| Counters | 123 |
| Net Morale | 1 |
| Net Initiative | 1 |
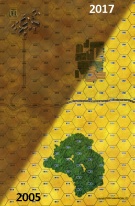
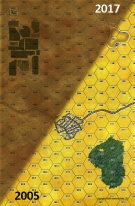
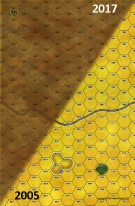
| Maps | 4: 1, 4, 5, 8 |
| Layout Dimensions | 86 x 56 cm 34 x 22 in |
| Play Bounty | 177 |
| AAR Bounty | 171 |
| Total Plays | 1 |
| Total AARs | 1 |
| Battle Types |
|---|
| Hill Control |
| Rural Assault |
| Urban Assault |
| Conditions |
|---|
| Off-board Artillery |
| Randomly-drawn Aircraft |
| Scenario Requirements & Playability | |
|---|---|
| Eastern Front | Maps |
| First Axis | Base Game |
| Road to Berlin | Counters |
| Introduction |
|---|
|
After refitting with replacement personnel and trucks, the Slovak Mobile Division set out in the second echelon of the German advance into the Caucasus. When fierce fighting broke out in and around the city of Rostov, the German corps command committed its shaky allies to capture a key collective farm northeast of the city. |
| Conclusion |
|---|
|
The Slovaks faced some of their fiercest fighting of the entire war, but slowly managed to force the Soviets back and capture the collective farm. In a marked difference from the unit's first year of war, the division not only fought a successful action but was fit for action again afterwards. The re-joined the German second echelon and drove on into the Caucasus. |

|

|
|---|
| AFV Rules Pertaining to this Scenario's Order of Battle |
|---|
|
| Slovenská Armáda |
|---|
|


| Army (RKKA) |
|---|
|

| Guards |
|---|
|


| 2 Errata Items | |
|---|---|

|
These units should have a Direct Fire rating of 2-3, just like the RKKA and NKVD counterparts. (danradz
on 2011 May 04)
|

|
Kommissars never get morale or combat modifiers. Ignore misprints. (Shad
on 2010 Dec 15)
|
| Hit 'em where they ain't |
|---|
|
In this scenario a regiment of Slovaks needs to take several hills and towns away from two Guards battalions. Given the higher value of the towns the Soviets set up in the front town and leave the hills more lightly guarded. The Slovaks run and take both of the smaller hills and insert themselves clearly between two larger Soviet forces. A Soviet counterattack nearly succeeds in retaking one of the hills but in a situation where the Slovaks were threatened with the loss of the hill they called down artillery on their own location and destroyed the attacking Soviet force, killing the Colonel. The Soviet forces were too strong to be able to take any of the remaining town hexes but too weak to attempt an assault on the hills. The Slovaks did not have the strength (or the morale) to be successful in an assault on a town and were comfortable letting a draw go into the books. I felt more than a little pleased at being able to take a relatively weak force at a morale disadvantage against the Guards and being able to capture some territory. I've learned quite a bit about operating the Slovaks at this point. A key is to force the opponent into attacking you. Until you can do that the Slovaks are simply not strong enough by themselves to win. Therefore hitting the opponent where they are weak is essential and finding the choke points in the terrain which force counterattacks is critical. A large scenario on a large board gives both sides lots of options. I give it a 4 for the flexibility provided to each side. |
| 0 Comments |